Only if you have installed iWorks application package on iPad, it will let you to view and edit Microsoft Office files, even to transfer Microsoft Office files from and to Mac or PCs. But you have to purchase each of the applications individually: the Pages app is for Microsoft word; the Numbers app is needed for Microsoft Excel, and the Keynote is for Microsoft PowerPoint. When you have installed all these applications, you can (take Mac as an example):
- Part 1: Transfer Microsoft Office Files from your Mac to iPad
- Part 2: Transfer Microsoft Office Files from iPad to Mac
- Part 3: Transfer Music/Videos/Photos between iPad/Mac/iTunes/Other Phones
Part 1: Transfer Microsoft Office Files from your Mac to iPad
- Connect iPad with your Mac and launch iTunes;
- In iTunes interface, go to the Devices tab and click iPad;
- Select Apps tab and find File Sharing;
- Choose the app which you use to open your Microsoft Office file on new iPad (For example, if you want to view or edit Microsoft Word, select “Pages”). And then click the "Add" button;
- Select the file you would like to import in the dialogue box, and then click Choose. Now you will find the file in the "Documents" box;
- Unplug your new iPad and then you can use the Microsoft Office files via iWorks by selecting My Document/Spreadsheets/Presentations ->the folder -> choose the file just imported.

Part 2: Transfer Microsoft Office Files from iPad to Mac
- Tap on the iWork application and select "My Documents/Spreadsheets/Presentations".
- Find the target Microsoft Office file and choose Share.
- Choose Export and set the corresponding Microsoft Office format to export the file.
- Connect iPad with your Mac and launch iTunes, click iPad in the Devices tab, and then select Apps tab.
- Find File Sharing and select the iWord application then choose the target files. Next, click Save To and set the destination for output files and then click Choose.

Part 3: Transfer Music/Videos/Photos between iPad/Mac/iTunes/Other Phones
iPad is not only a device for people to do work, but also a great player to enjoy movies, videos, music and even view photos. However, you can't transfer videos, music, playlists and photos freely because Apple doesn't allow you to. And you're limited to using only one computer to do the transfer thing via iTunes. Otherwise, all files on your iPad will be erased. If you're facing the problem as well, I recommend you try dr.fone
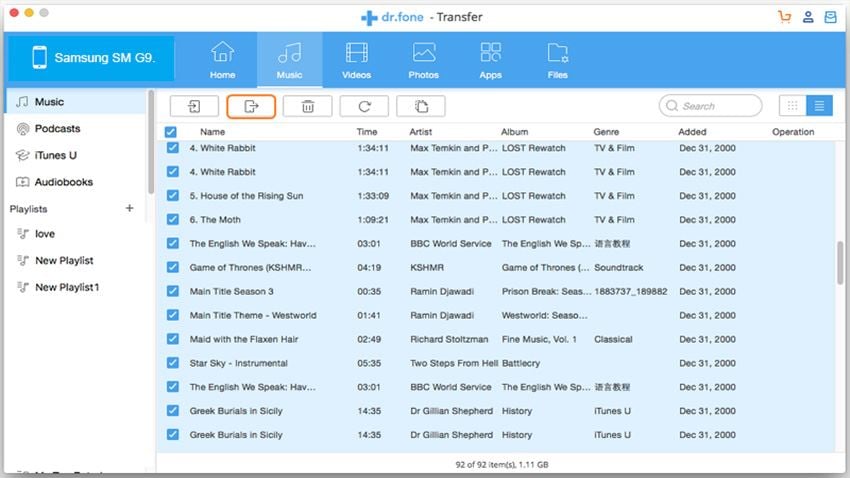
dr.fone is an all-in-one file manager tool for iPad, iPhone, iPod and Android phone users. It allows users to transfer files between iOS, Android devices, Mac, Windows PC and iTunes Library, supported files including music, playlists, videos, Podcasts, audiobooks, and photos.
- Transfer videos, photos, music and playlists between 2 devices, supporting both Android and iOS devices.
- 1 Click to backup photos from iPhone, iPad and Android devices to Mac and PC.
- 1 Click to rebuild iTunes library with media files on iPhone, iPad, and Android devices.
- Transfer media files from iTunes Library to Android phones without a hitch.
- Manage photos on iPhone, iPad and Android device: creat, edit, rename and delete photo albums.

Guides to transfer music/video/photos from Mac to iPad (Click here to see more guides about iSkysoft dr.fone)
Step 1: Download and run iSkysoft dr.fone on your Mac. From the main window, click the "Music" tab. (If you are going to transfer videos, photos or other, simply click the corresponding tab)
Step 2: Now click the "Add" to browse the music on your Mac. Choose the music you want to transfer to your iPad and click on the "Open" button. That's it! You will find the chosen music on your iPad!


