In case you have been living under a rock then you might not know that Apple has recently launched the public beta version of their brand new operating system which has been named after their trademark California theme – macOS Sierra (Sierra refers to a mountain range in central and eastern California).
This new operating system is capable of a hundred things that make it way more exciting than any of the previous versions. An interesting thing to note here would be that apple has dropped the "OS X" and it will now just be called as macOS Sierra. Fun fact, this is not a new thing for Apple as up till the year 2001 (before the release of version 10) it was called macOS only. MacOS Sierra will be the Version 10.12 of Apple’s Mac operating system and it is a major update to the current version. The major features of this update to the existing operating system include Siri's debut on the Mac, a universal clipboard that runs across all applications and optimized storage with iCloud Drive. Another interesting feature is that you can auto unlock the Mac with your Apple Watch or by using Apple Pay on the web. You will also find that freeing space on the Mac is now easier and even the iTunes application is better than before.
Part 1: Official macOS Sierra Minimum System Requirements and Supported Mac Model
Though a bit disappointing for several Apple Mac users but the new operating system will only support certain devices and will not be able to run on the rest. The following is a list of computers that have the minimum system requirements to run on the macOS Sierra and are listed as supported Mac models:
- MacBook (Late 2009 and later)
- MacBook Air (2010 and later)
- MacBook Pro (2010 and later)
- Mac mini (2010 and later)
- iMac (Late 2009 and later)
- Mac Pro (2010 and later)
All the versions of the Mac operating systems have always been free and macOS Sierra is no different. There will be additional costs to upgrade to this new version, however, before you upgrade make sure that you have no such applications that you require and won’t be able to run on macOS Sierra. Also, even if you have decided to upgrade to macOS Sierra, it is recommended to backup all your important data so that if you encounter any sort of problem then you can easily fall back on the backup without any hassle. This will ensure that you have two options to choose from.
Part 2: How to Check Your Mac for MacOS Sierra Compatibility
Even though a list has been shared by Apple regarding the devices of Mac that will be compatible with this version of the operating system, however, there is a simple way to check whether or not your device is compatible with macOS Sierra or not; just follow the steps given below:
Step 1. Open the Apple menu in the upper left corner. Choose the "About this Mac" option.
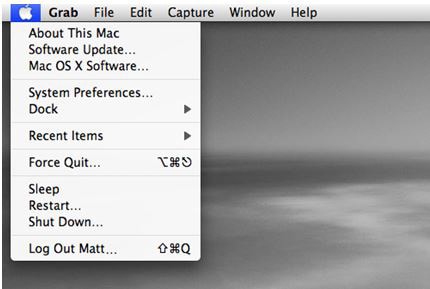
Step 2. Under the "Overview" tab you will find details like the current system software version and also the model and the year of the computer/device.
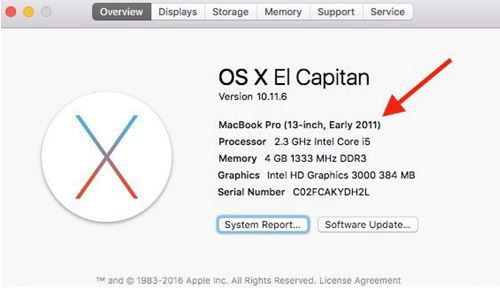
Check the list of macOS compatible devices given above and if the year is same or later than what is shown in the list then your device is compatible with macOS Sierra and you can upgrade easily.
Part 3: How to Run macOS Sierra Unofficially
If you have a Mac that is not compatible with the macOS Sierra, however, you want to upgrade to it then don’t fret as there is a way around it to run the macOS Sierra unofficially on the Mac devices and computers that are not compatible with the particular operating system. You would need to use the macOS Post Install application to choose the optimal patches for your particular Mac model. When the application finishes patching your computer then you should be able to boot into a brand new fully working copy of the macOS Sierra. This, however, comes with its own sets of drawbacks as well because in some cases some devices (unsupported by the macOS Sierra) might not be able to run Wi-Fi or some other features of OS. This would certainly create problems for the user.
Also, before you move ahead it is recommended that you back up all your data. Anyways, to run macOS Sierra on an unsupported device follow the following steps; however, before that you need a copy of the macOS Sierra, a Pen Drive with at least 8 GB and macOS Post Install.
Step 1. Insert your USB key and open disk utility and clear it with format of Mac OS Extended. Now, open the macOS Sierra Patcher and select previously downloaded system on your Mac. Then follow the instructions and it will automatically select your USB Drive and then click on "Start Operation" in the dialog box. Once the process completes your USB Drive will now convert into a boot drive for your computer and you can use it to install macOS Sierra.
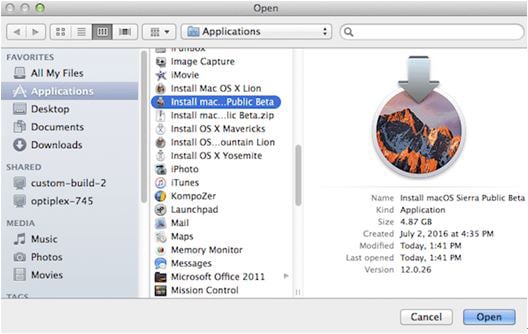
Step 2. Restart your Mac while you press down on the "ALT" key and then select the startup volume on your USB Drive. Again go and open the disk utility and select the disk on which you want to install the macOS Sierra. Click clear by choosing the format called "Extended OS X". It will automatically install it. Restart while holding "ALT" key.
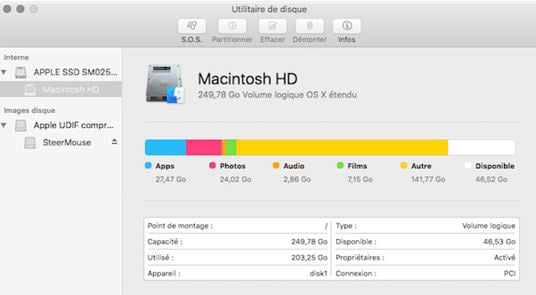
Step 3. Go to utilities section and select macOS Post Install and selection the application in your model of Mac. Select your USB key and click on "Patch" and then click on "Reboot" and wait.
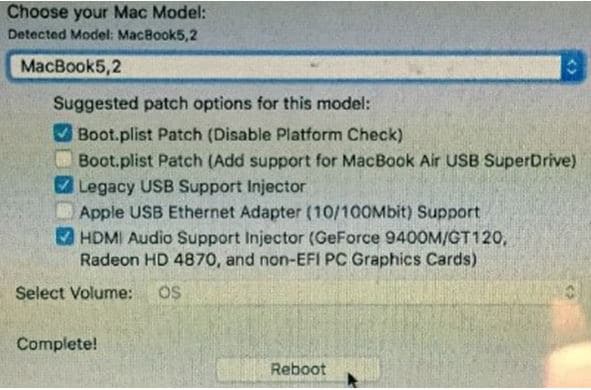
You now have the new operating system – macOS Sierra and you can run it on your Mac. Please note that before you move ahead with any step do not forget to check whether you have enough space or not to install and run the new update to the operating system. Also make sure you backup the data beforehand so that in case you want to revert back to the previous version then you can do so.


