By now you already know that the new macOS Sierra is set to be released in a few days. We can readily bet that you already know the new features macOS Sierra will come with. For instance, there is a new Auto Unlock feature, a new continuity feature, Siri on Mac and even the ability to copy date between devices among very many other features. But as it the case with any upgrade, there are some users who have experienced problems when upgrading to macOS Sierra. Those who have already upgraded the beta version have reported a slew of problems, some of which we are going to provide the troubleshooting of upgrading to macOS Sierra in this article. If you are yet to upgrade and are waiting for the public release, the following list of potential problems you might encounter should help you should you encounter any one of these problems.
1 iTunes Not Responding
Some users have experienced this problem immediately after upgrading to the new macOS Sierra. If iTunes suddenly stops responding, try the following fixes.
- Reboot the Mac
- If that doesn’t work, try starting iTunes in safe mode
- Check to see it you have the latest version of iTunes. If not, download the latest version.
- Turn off Wi-Fi, sign out of iTunes. Turn On Wi-Fi and then sign in to iTunes again.
- If none of these works, try re-installing iTunes again.

2 Data Loss
One of the most dreaded and yet very common consequences of any major upgrade is data loss. Unfortunately, unless you had a backup of all the data on your Mac, it may be impossible to get your data back. Fortunately for you, we have solution that can recover data loss under any circumstance, even after a major upgrade. That solution is iSkysoft Data Recovery for Mac (or iSkysoft Data Recovery for Windows). The program's features make it the ideal solution for you for the following reasons.
Key Features of Recoverit (IS):
- The program’s features are highly specialized and all of them work together to help you recover all of your deleted data in the shortest time possible and in the original condition.
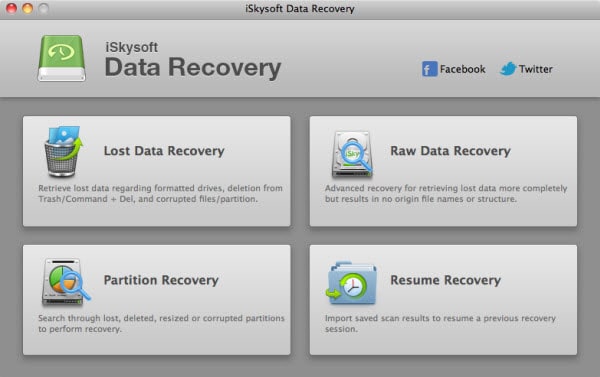
- You will not be spending too much time trying to figure out which button to click.
- You can use Recoverit (IS) for Mac to recovery any other type of data including photos, videos and emails among many others. All of the data is recovered intact and in the original condition.
- It is also useful when recovering data that has been lost due to accidental deletion, virus infection, unexpected power outages, software crashes and even improper operations.
Step-by-Step Guide to Recover Data from Mac
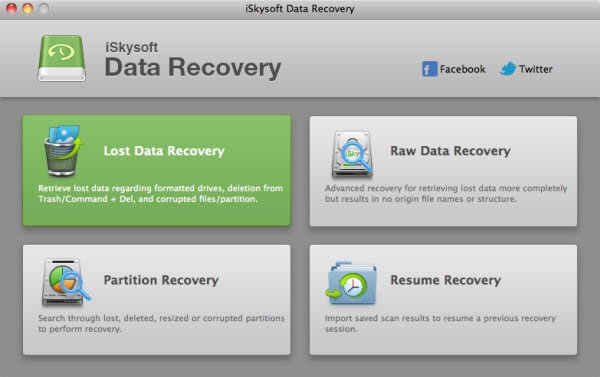
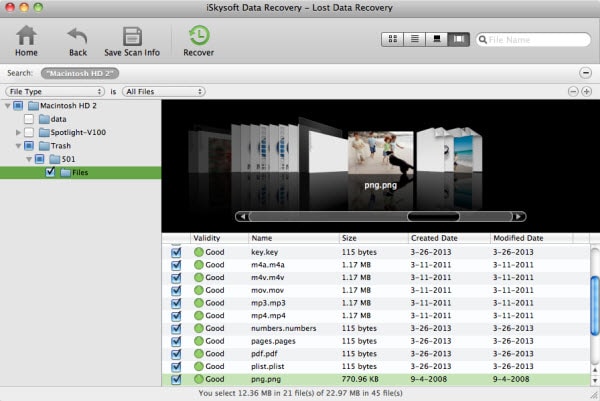
Step 1. Launch the program and from the options in the main window, select "Lost Data Recovery".
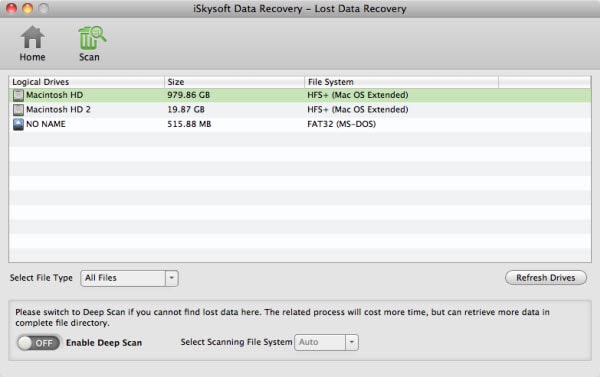
Step 2. In the Lost Data Recovery Window, select the drive with the missing data and then click "Scan" to allow the program to begin scanning the drive. If you don't see the drive, click on "Refresh Drives" and it will appear on the list. If you know the type of data you have lost, click on the drop down menu next to "Select File Type" to choose the type of data you want the program to scan for.
Step 3. Once the scan is complete, all of the data on the selected drive will be displayed in the next window. All you have to do is select the missing files and click on "Recover".
Save the data on a different drive, preferably an external drive to avoid future problems.
3 The macOS Sierra Installing Freezes or is Stuck
Sometimes the macOS Sierra install freezes while installing. If this happens, try one of the following to troubleshoot the problem.
- Turn off the anti-virus on your computer until the OS is installed
- Try updating the software in Safe Mode
- Switch from wireless connection to hardwired connection

4 macOS Sierra Won't Start-up After Update
The update installs just as it should only to fail to start afterwards. If you see a white screen after the upgrade or if the macOS Sierra simply won't start, try one of the following.
- Restart the Mac and on your keyboard, hold down Command + P and R to reset the NVRAM
- Reset the System Management Controller. You can do this by shutting down the Mac, unplugging all the cables from the Mac and then plugging them in and restarting the Mac after a few minutes.
- Try booting the Mac in safe mode
- Try removing all third-party extensions

5 Mac Apps Are Damaged or Can't be Opened
After a macOS Sierra update, many users have reported the "damaged and can't be opened" error when they try to use an app. It mostly happens with the photo app although it may occur on just about any Mac app. If you are experiencing this problem, here are a few fixes.
- Empty app cache
- Reset PRAM at Startup
- Remove plugins associated with the app
- Hold down "Option + Command" when launching the app
6 You Mac Runs Slower After an Update
Have you noticed that your Mac has significantly slowed down after the update? Or did you notice that some apps took considerably longer than normal to open after the update? The following are just some of the things you can try to fix the problem.
- Try restarting the Mac to see if that helps
- You can also reduce the RAM usage or upgrade RAM to make the computer run faster
- You can also try to delete log files manually. Hold don Command + Shift + G to open the folder
- Repair permissions with Disk utility
- Run SMC and PRAM resets on Mac
7 Slow WI-FI After Upgrade
There are some users who have experienced slow Wi-Fi immediately after upgrading to macOS Sierra. If your Wi-Fi is poor and you are certain that the upgrade is to blame. You can try one of the following fixes.
- Try deleting the current Wi-Fi preferences. You can do that by doing the following. Create a folder, turn off Wi-Fi and then hit Command + shift + G to go to folder command where you should choose the following path: * com.apple.airport.preferences.plist, com.apple.network.identification.plist, com.apple.wifi.message-tracer.plist, NetworkInterfaces.plist , preferences.plist and then Move them to the new-created folder and reboot Mac
- Check to see if Wi-Fi Router needs any firmware updates
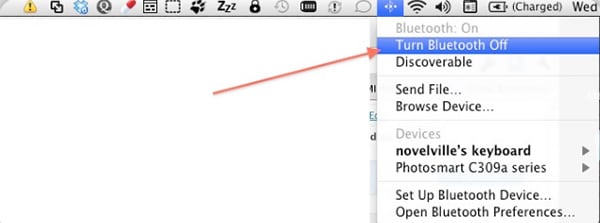
- Turn off Bluetooth
- Reboot the Mac in safe mode and reboot it again
8 Bluetooth is Unavailable
This is a problem that can also occur after the upgrade. You try to use Bluetooth only to get a message that "Bluetooth not available". The following are some of the things you can do to fix this problem.
- Delete Bluetooth Preferences: In OS X Finder, press Command+Shift+G > find type /Library/Preferences/ > find com.apple.Bluetooth.plist > delete the file and shut down Mac
- Reset the SMC and Power Functions
- Power off the system, disconnect all the peripherals and then power on after a few minutes
9 Low Battery Life
Are you experiencing a low battery life after the update? The following are just some of the things you can do to preserve power.
- Turn off spotlight indexing
- Adjust energy saver settings
- Disable Bluetooth
- Reduce the screen brightness
- Reset the system management controller
10 Problems with Mail
After the upgrade some people have experienced problems with mail. Some of these problems include mail failing to open, mail cannot verify account name and password and some can’t even send or receive mail. If you encounter these problems, here are a few things you should do. Delete the email account in preferences and create a new account
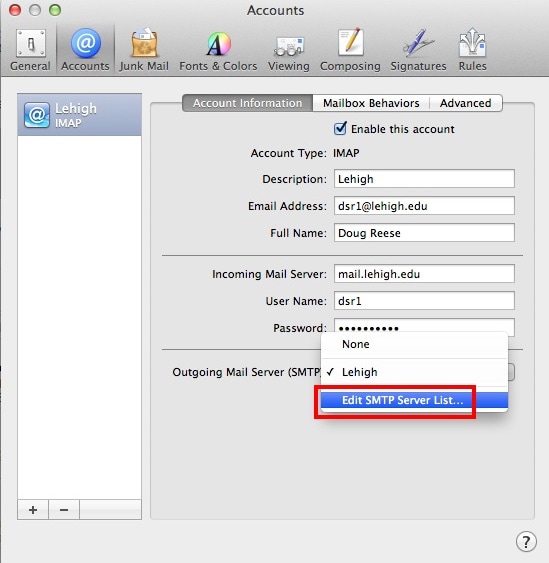
If that doesn't work, go to Preferences and select Accounts > Account Information> Find SMTP Server and then select the "Edit STMP Server List" option and click on "Reset All Setting in this list".
11 External Hard Drive is not Visible
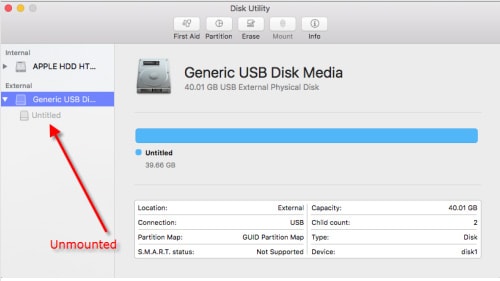
It is also a possibility that the external storage devices may fail to how up after an update. If you are having any kind of issue related to your external drive, try one of the following.
- Restart the Mac (unplug or remove the external storage device before restarting)
- Try mounting the drive in OS X finder.
- Try resetting the SMC and the PRAM on your Mac
12 Safari Crashing or Freezing
It is one of the most common problems after the update. The following is what you can try to do to remedy the situation.
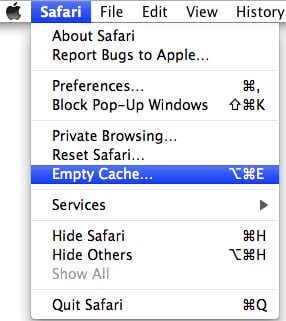
- Clear Safari history and cache
- You can also use third party browsers such as Chrome and Firefox in the meantime.
