Some HDTV sets are produced with a built-in internet connection. Some may use an Ethernet prot, some use wi-fi connectivity and some may use both. And here, you will learn how to do the internet connection with your HDTV.
Part 1. How to Connect HDTV to the Internet via Wired Connection
Now set up your HDTV set on the home network. Turn on your HDTV set, go to “Setup App” (This setting might has be changed if you can’t do so. In this case, go to “Network Menu” or the setting like this on your HDTV.) Here you can get the Ethernet function to access to the Internet. If you want a wired connection, check your wired connection and make sure it has been set to “Connected”. Tick “Manual Setup” to view or manually change the network settings. To make sure the wired Ethernet connection is working, you can click on “Test Connection”.
Part 2. How to Connect HDTV to the Internet via Wireless Connection
To connect your HDTV to the Internet, make sure the Wi-Fi connection is good if you prefer to connect your HDTV to the internet via Wi-Fi. That’s to say, your router works, and the Wi-Fi signal is strong. You can test this with your iPhone, Mac or other Wi-Fi-enabled devices. And of course, you can also use an Ethernet cord to do the HDTV to Internet connection. No wired connection? Try wireless connection if it’s possible. You will see the wireless menu displayed with a list of available wireless network. Choose your wireless network by pressing the down arrow, and then click "OK". If your network isn’t in the list, you can choose “More Access Points” to find it, just like what you used to do on your iPhone or other Wi-Fi enabled devices. If you are required a password, enter it. To enter your secure access code, you can select “Show Keyboard” to get an on-screen keyboard to input your password. After that, click on “Connect”.
Part 3. Recommend Best Tool to Help Play any Video on HDTV on Mac OS X 10.6 or Later

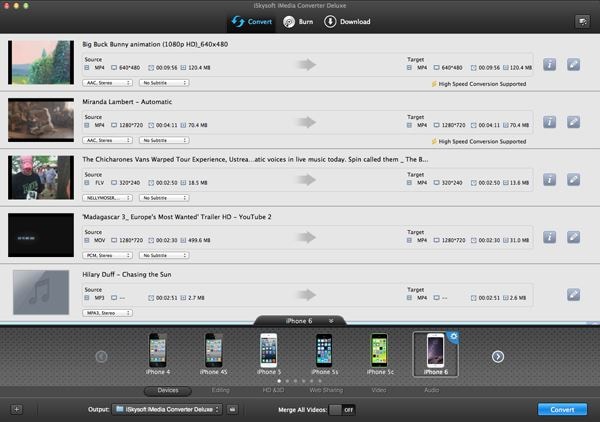
If you want to play your videos on HDTV but fail because they are not supported by HDTV, will you give it up? Actually, you don't have to. You can always seek help from the iSkysoft iMedia Converter Deluxe for Mac (Including El Capitan). This program helps to convert video or audio files to HDTV supported formats on Mac OS X. It can not only help you convert your video files without difficulty, but also edit your videos before conversion. You are allowed to rotate, merge or crop your files. You can also benefit from the batch conversion to save time.
people have downloaded it
Simple Steps to Convert Files to HDTV Compatible Formats with iSkysoft
Step 1. Load Files
Run iMedia Converter, and directly drag and drop your video files to the video converter. Or go to "File", and select "Load Media Files" to do import files.
Step 2. Select Output Format
You need to choose the proper output format now. Click the format icon in the primary window and then you will see various formats that are supported. Choose the ones that can be played on HDTV. For example, you can choose "AVI" as the output format for your videos.
Step 3. Start Conversion
After you've decided on the suitable output format, click "Convert" to let the iMedia Converter finish its job. The converter also works on MacBook, MacBook Pro, MacBook Air, iMac.
Tips about Widgets
Widgets are good to directly link to Internet content. You can set up your HDTV widgets for Netflix, Amazon Prime Instant Video or others. To delete your widget, highlight the widget in question, click the “Yellow” bar button and choose “Red”. After that, click “Red” again. Once you turned on your HDTV the second time, a firmware update will be automatically downloaded. Firmware is the software runs the internet app and other features on the HDTV.


