Many Mountain Lion users may have found that when they click "Share to iDVD" in iMovie. Nothing happen. Why? That's because iDVD doesn't come with new Mac computers any more since Mac OS X 10.8 (Mountain Lion). I know it's strange. The principle is that if you don't have iDVD for Mountain Lion, you should not put that item in the menu, right? But that's Apple. You have to find other solutions to put video to a DVD disc, or choose other way to save movies, such as uploading to YouTube and saving to a USB stick. From Apple's point of view, DVD is becoming less and less popular than downloading from iCloud, YouTube, Facebook, etc. This article will share two ways to put your movies to DVD:
Part 1: Download iDVD for Mountain Lion Alternative: DVD Creator for Mac
iSkysoft DVD Creator for Mac is an ideal alternative to iDVD for Mountain Lion. It includes most features of iDVD, in addition to its unique benefits like broad format support, instantly slideshow making, diverse output formats, etc. This is the easiest way to burn a DVD disc from iMovie videos, iPhoto pictures and your favorite music.
It's very easy to use DVD Creator for Mac to make DVD home movies. Take iMovie for example. When you've finished your movie, go to Share > iDVD (or File > Export depending on iMovie's version) to export your movie to MOV or MP4 format, and then follow 3 steps to burn a DVD disc. If you are using Lion, see iDVD for Lion.
Why Choose iDVD for Mountain Lion Alternative
Burn Various Formats

It can burn MP4, MOV, WMV, MKV, M4V, AVI, VOB, 3GP, FLV, and more to DVD easily and quickly.
Burn Web Videos

Burn videos or movies from YouTube, Facebook, Google, Dailymotion, and other video sites to DVD.
Personalize Your DVD

You can get many free DVD menu templates to fit your theme. Also customize your videos in video editor.
Create Photo Slideshow

Just drag and drop photos to make photo slideshow with your favorite background music.
Steps to Burn DVD with iDVD for Mountain Lion
Step 1
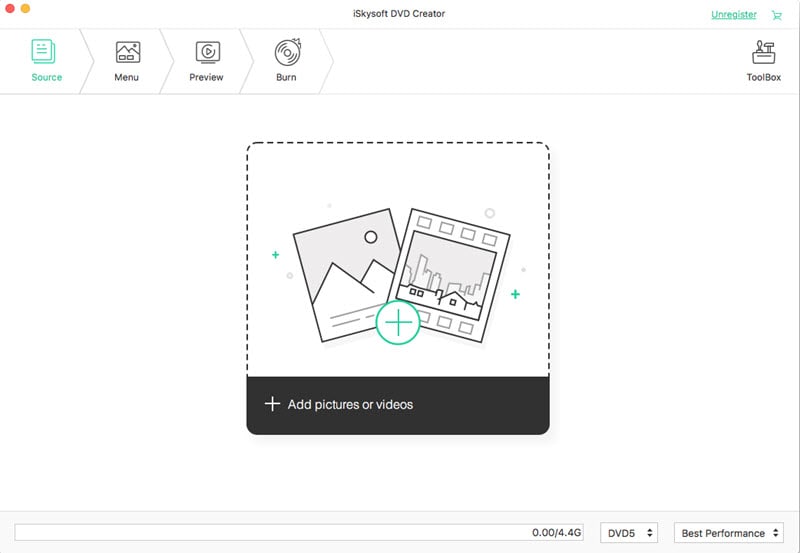
Import videos or photos to this iDVD alternative for Mountain Lion. When you have installed the program on your Mac, launch the program and click Create a New Project to open the DVD burning window. Now you can directly drag and drop the videos or photos to the window. And the files will be imported to the program. Alternatively, you can click the + icon on the top right corner of the window and select your desired files to import them to the program.
Step 2
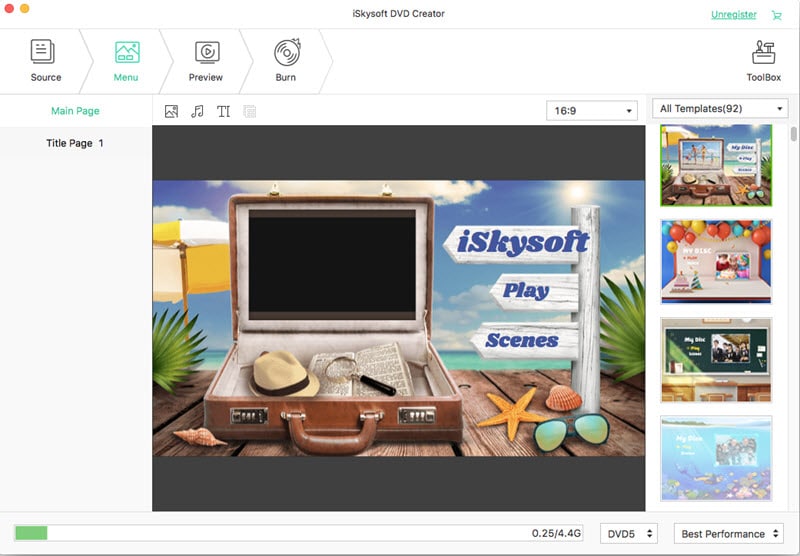
Create a DVD menu. This program provides you with many beautiful DVD menu templates. You can click the Menu button to show the menu list. And then double click any one to apply it to your video. After that, you can click the triangle arrow at the bottom right corner of the program main interface to preview your video.
Step 3
Burn DVD with iDVD for Mountain Lion. When everything is ready, click the big green Burn button and you will get a pop-up window with output parameters options. Insert a DVD dis to your Mac if you haven’t done this before. Now check DVD Disc as output and click Save to start burning DVD. Done!
Part 2: Download and Install iDVD for Mountain Lion (Mac OS X 10.8)
There's no free version of iDVD for download online and Apple stopped to sell it anywhere. You can only get it from iLife'11 box, if you have it or if not buy from somewhere other than Apple, such as Amazon or MegaMacs. Also tell Apple what you think.
When you download iDVD to Mountain Lion, you should know about these before installation. All messages were collected from Apple's Support Community posted by users like you.
OK, so far so good. Here is the tips. Once you've installed iDVD from the iLife 11 disc you can update it to the latest (and last) version with the updaters from here (Apple - Support - Downloads) .
Done. Now you can either run iDVD on Mountain Lion via some tricks or get easy iDVD alternative for Mountain Lion to burn DVDs. Have fun.
Part 3: Troubleshooting on Using iDVD on Mountain Lion
Problem 1: 'Authorisation Licence' had expired on 25 March this year (2012).
Solution: Set your Mac's clock to sometime before early March 2012, and install again. When complete, reset the time.
Problem 2: Can't open iPhoto.
Solution: iPhoto will be re-installed and there seems to be no way to change it. When you open iPhoto after installing and it will not open, just go to the App Store and reinstall iPhoto to solve the problem.


