An iPhone restore is one of the easiest ways to fix almost of the issues you may face with your device. But a lot of people fear that a restore can cause data loss. This is a valid fear as it has happened before. But when done right a restore is a great way to refresh your device and get it in god working order again. In this article we are going to be looking at 3 ways on clean restore iPhone safely, without losing any data.
Part 1. Clean Restore iPhone without Losing Any Data
To ensure that you don’t lose any of your data, it is important to begin with backing up your device to iTunes.
Here’s how to do it.
Step 1. Connect the iPhone to your computer using USB cables and then launch iTunes. It is also very important that you ensure iCloud is turned off. You can’t backup to iTunes if iCloud is enabled.
Step 2. Inside iTunes right click on your device under devices and then choose backup.
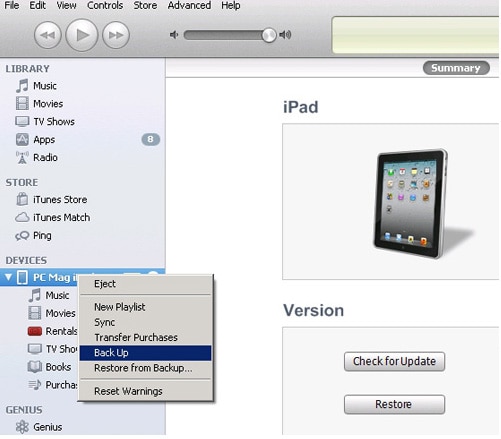
Step 3. Now that we have a backup of all the data on your device, you can go ahead and erase all the content and settings on the device. This action will delete all of the data from your device including calendar, photos, music and even contacts.
To do this, go to Settings > General > Reset > Erase All Content and Settings.
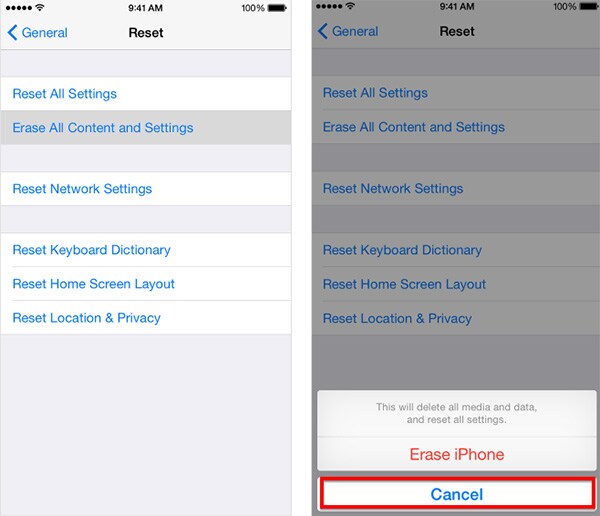
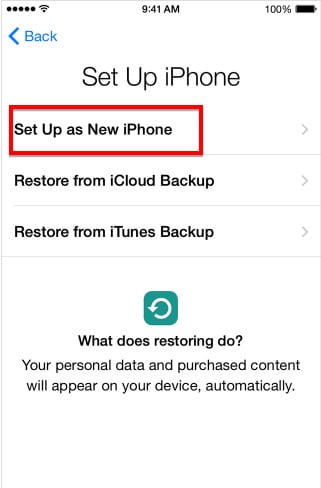
Step 4. The next step is now to set up the device as a new device. Once all the content has been erased, you should see the following screen.

Step 5. Follow the instructions on the setup assistant. Choose "Set up as a New Device" when prompted and then tap "Next" to continue.
Step 6. Enter your Apple ID to sign in. You can skip this if the original issue was an iCloud issue.
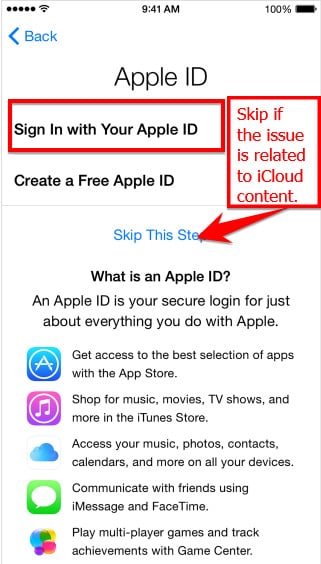
You may be requires to enter your visual voicemail password if your iPhone supports Visual Voicemail.
The final step is to now restore the device from the backup we created in iTunes. To do this follow these very simple steps.
Step 1. Open iTunes on your Mac or PC and then connect the iPhone using USB cables.
Step 2. Select the iPhone when it appears and then select Restore Backup in iTunes.
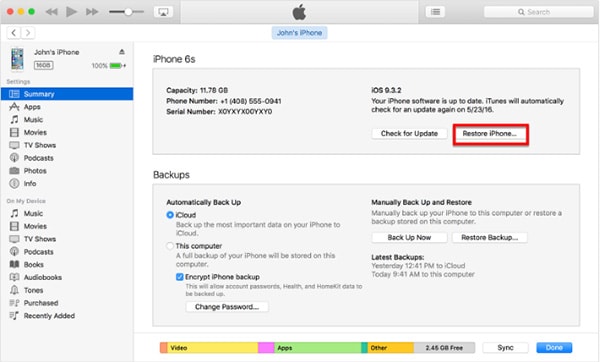
Step 3. Choose the latest backup and then click restore. You may be required to enter your password if the backup was encrypted.
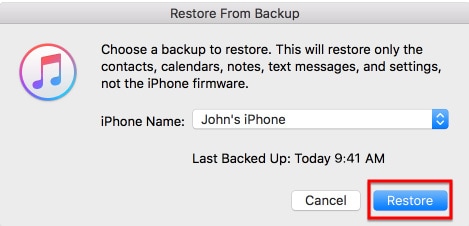
Keep the device connected through the process. Although this process is a little bit involving, it ensures that you safely restore your device without losing any of your data.
Part 2. The Best Tool to Clean Your iPhone
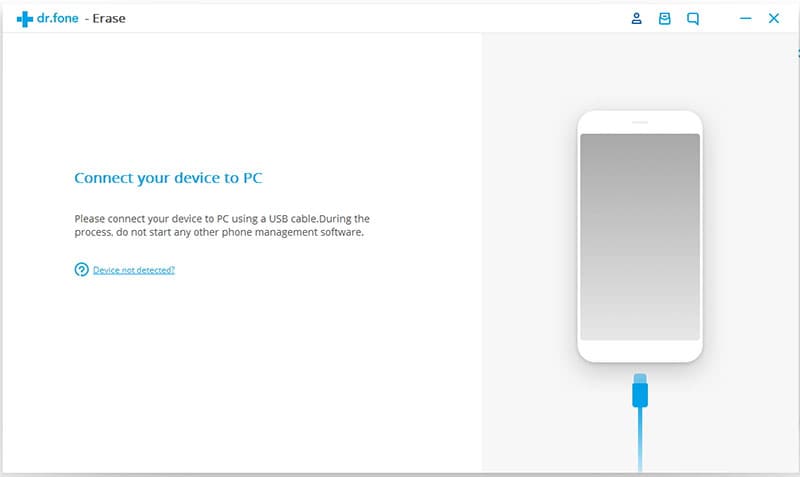
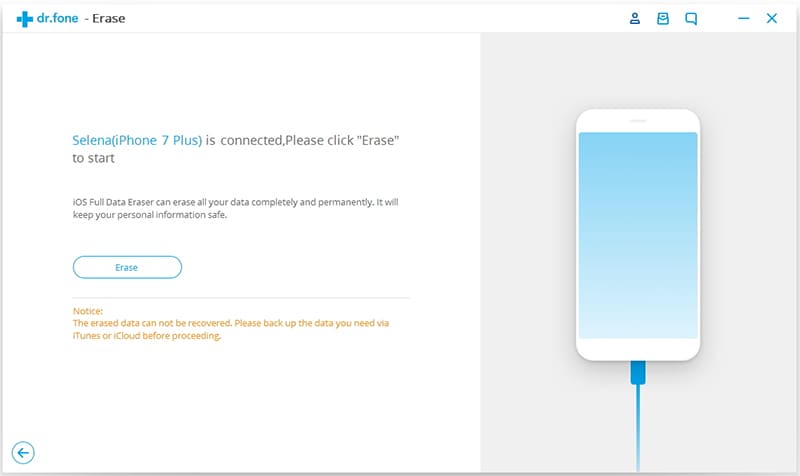
If you need an easier and better way to clean your iPhone and improve its performance, look no further than dr.fone (Mac) - Data Eraser (IS) (or dr.fone - Data Eraser (IS)). This program is designed to help you completely erase your device.
Key Features of dr.fone - Data Eraser (IS):
- It can be used to secure private data including browsing history, banking information, login information and other sensitive data.
- It is very useful in freeing up space and hence enhancing your iPhone’s performance.
- Can be used to permanently erase the files on your device and ensure that the deleted files are non-recoverable.
- It is very easy to use and works across all devices.
Step-by-Step Guide to Clean iPhone
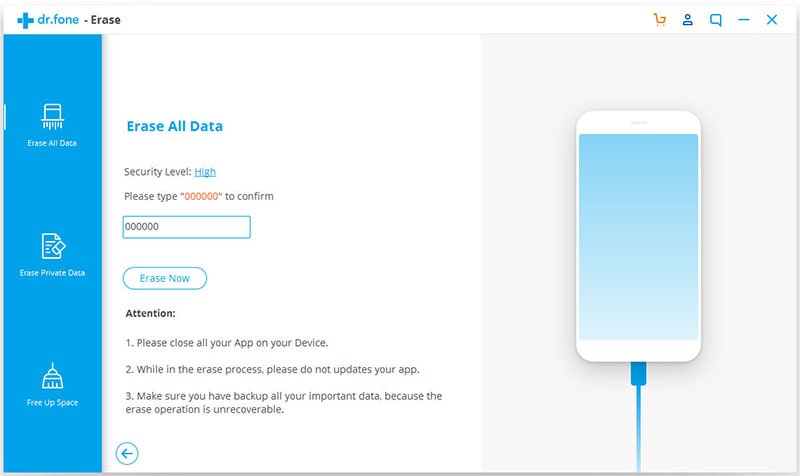
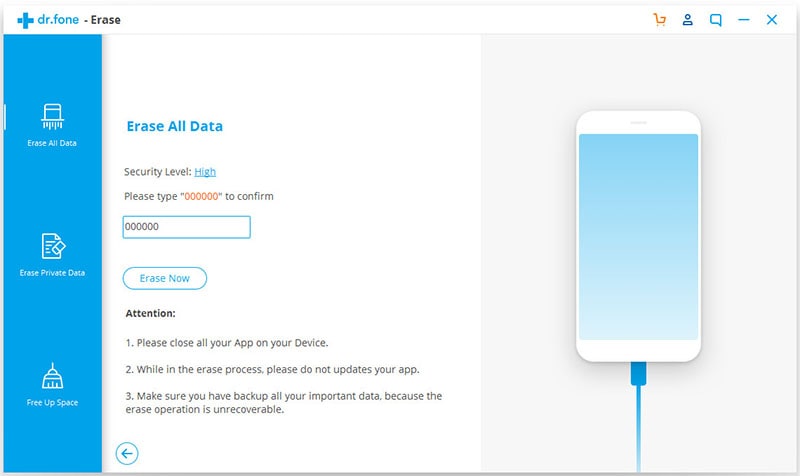
Step 4. Because we want to erase all the files on the device simply click "Erase Now". A popup window will appear requesting you to confirm the action. Type "Delete" and then click "Erase Now".
A confirmation dialogue box will appear confirming that you have deleted all the data on the device. You can now go ahead and setup the device and the restore the iPhone.
Part 3. The Best Tool to Restore iPhone
There is an equally easy way to restore your iPhone. This is MobileTrans for Mac (or MobileTrans for Windows), an excellent tool to transfer data between devices, backup and restore your device.
Key Features of iSkysoft Phone Transfer:
- This program can be used to transfer data between devices. It can transfer all data including contacts. Apps, call log, messages and many others.
- Data transfer is safe. You don’t risk damage to your data and it is not altered in any way.
- It also provides an easy way to backup all the data on your device to the Mac and easily access the backup when you want to restore.
- The program allows users to select the type of data they would like to restore from the backup file. This is unlike a traditional iTunes backup that will not allow you to view the data in the backup file.

Step-by-Step Guide to Restore iPhone
Step 1. Begin by installing the program. You should see the following window.

Step 2. Next click on "Restore from Backup". Here you can choose a number of options- from phone transfer backup file, from Blackberry backup file, from One Drive backup file, from iCloud backup file, or from iTunes backup file. For demonstration purposes, let’s choose "from iTunes backup file" to show how to restore iTunes backup to your iPhone.
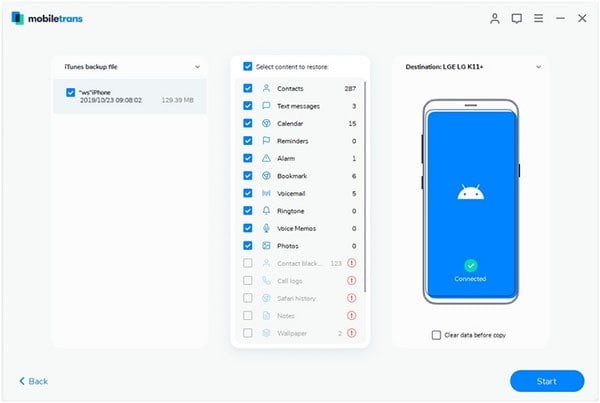
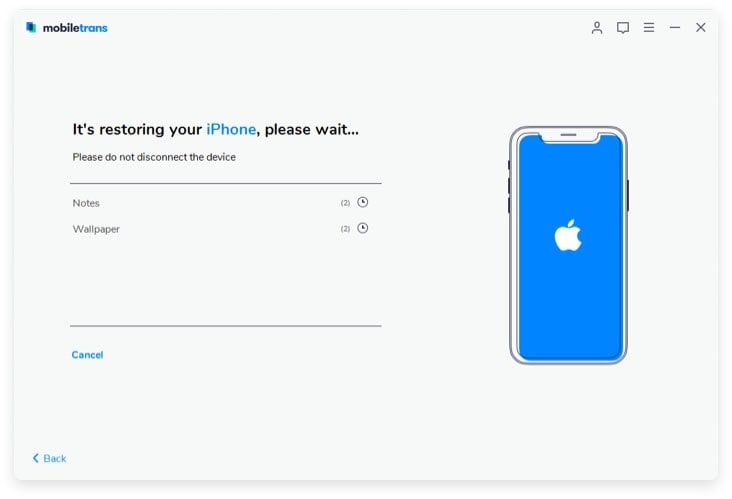
Step 3. In the next window, you should see your iTunes backup files. Choose one and then choose the types of files you would like to transfer click on "Start Copy" to begin transferring the backup data.
