We all tidy our closets, clean the shelves, and prepare our house for the spring. Why not sit back, take a break and begin cleaning our Android phone? It is a productive step, which ensures the longevity of the device, and prevents it from slowing down. Data erasing is an important activity for your phone. You are not only protecting the data from falling into the wrong hands, but also safeguarding the performance of the device. Even when you encounter such this situation that Samsung officially recall the Galaxy Note7, so you should exchange it to another model to ensure the safety. Although you delete content by "erasing" it from the device, the data remains on the system in the form of metadata, which usually takes up space in the invincible mode. Therefore, here we will be looking at how to clean Andriod phone to erase all contents from the phone securely.
Part 1. The Best Way to Clean Android Phone
A better way to tidy the phone and erase data permanently is by using dr.fone - Data Eraser (IS). The world's first data eraser for Android phone securely deletes all the content or those files that you would like to erase permanently. In addition to the general cleaning, the program removes log information, cache data, browsing history, videos, music files, and those files that are unrecoverable. You can sell or exchange your Android phone without worrying about exposing all your personal data. The dr.fone - Data Eraser (IS) ensures that it deletes all the content from your Android (including Samsung Galaxy Note7) phone securely.
Key Features of dr.fone - Data Eraser (IS):
- If you are storing details about account information, banking passwords, and other confidential data, then dr.fone - Data Eraser (IS) ensures that it erases every file on the device to keep your personal information secure.
- It gives you the chance to erase junk files from your iPhone in a single click. Cleaning junk is necessary to speed up the functionality of the system. You can additionally compress files to save space using the data eraser without losing the device's quality.
- Factory reset assures you that it will erase data. However, in the real world, it does not! You can easily recover with the help of data recovery tools. dr.fone - Data Eraser (IS) deletes everything from your device permanently. Yes, you heard it right, the program removes everything, and your phone becomes a fresh piece, which is similar to a new phone that is just out of the packing box.
- dr.fone - Data Eraser (IS) supports all the smartphones and tablets running on Android 2.1 to the latest Marshmallow platform.
Step-By-Step Guide to Clean Andriod Phone
dr.fone - Data Eraser (IS) has the ability to wipe the entire content stored on an Android phone or tablet. The amazing characteristic is its ability to perform the action without rooting the device or restoring it to the factory setting.
Step 1 Install and Launch the Program
Visit the official website of iSkysoft to download the trial version. Install the program by following the onscreen instructions. Double click the icon from the desktop to launch the software. Before connecting your Android device to the computer, enable the USB Debugging mode from the settings. The program will identify the phone and displays the information on the main screen.
Step 2 Clean Android Phone
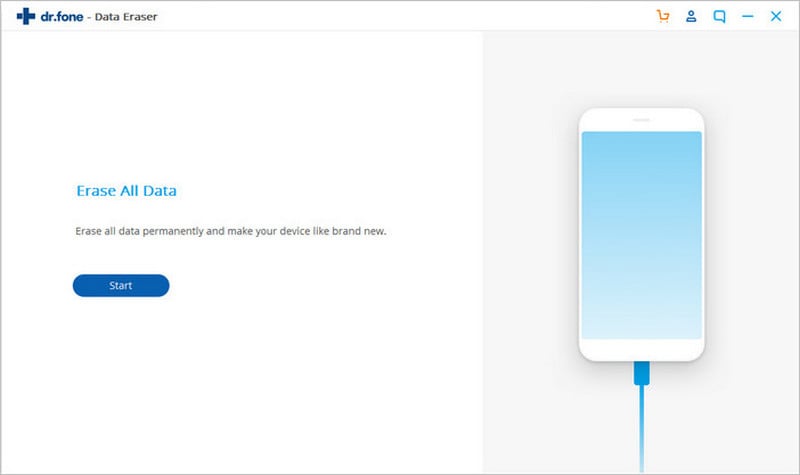
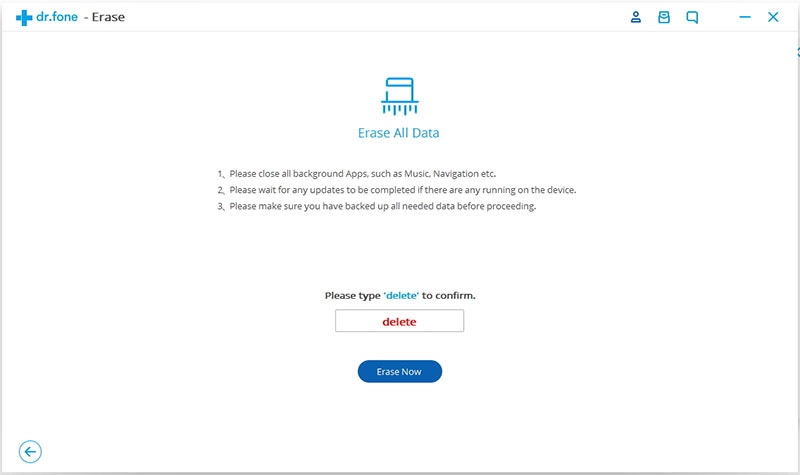
Press the "Erase All Data" button from the main screen. In the next screen, type "delete" in the box, and click "Erase Now" button at the bottom right. The process will begin deleting all the content from the device. After completion of the process, tap "Erase All Content" or "Factory Data Reset" to delete system settings on your Android phone.
The time taken to complete process depends on the size of the data. The program is capable of wiping all the apps, pictures, videos, music, folders, and additional files stored in your gadget.
Part 2. 5 Other Ways to Clean Andorid Phone
Clear App Cache
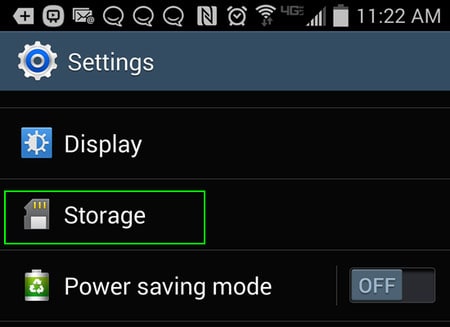
1. Under the "Settings" tab, head to storage menu.
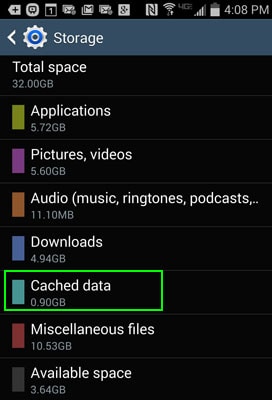
2. Choose "Cached data". Tap "OK" to begin cleaning the app cache.
Disable the Bloatware
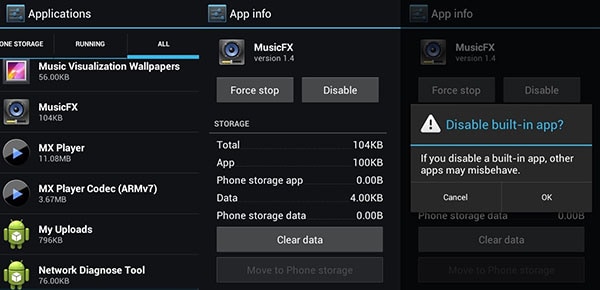
1. You cannot delete pre-loaded apps from the provider, but you can disable them to prevent them from running in the background. Go to "Settings", choose "Applications" and then tap "Application Manager".
2. Move to "All" tab to see the list of apps present on your device. Choose the app that you want to kill.
3. Select "Disable" or "Uninstall". Press the disable key if an app prompts "disable" button. Tap "OK".
Increase the Memory Limit of Chrome
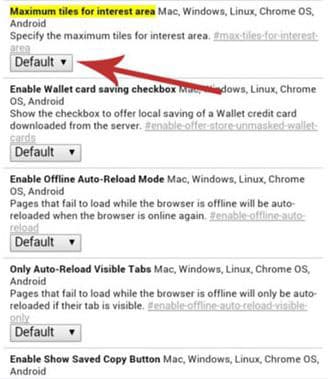
1. You can increase the memory limit of the Chrome to achieve smoother performances. Head to Google Chrome and navigate to Chrome://flags and move down the page until you come across "Maximum tiles for interest area" option.
2. Press the "Default" menu to choose the limit. By default, it is 128. You can select 512 for smoother performance. Click "Relaunch Now".
Disable Animations
Each time you move from an app to the home screen, you will notice transitions effects. Although they are effective, they do take time in redrawing onto the screen. Disable them to have a smoother and faster experience.
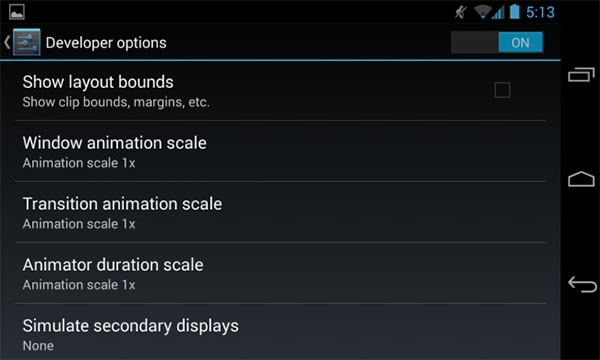
1. From the "Settings" tab, choose "About Phone". Click the "Build Number" for seven times. You will observe a note stating that you are now in the "Developer Mode".
2. Go to the "Settings" in the developer options. It will appear only when the phone is in developer mode. Choose "Window animation scale". Choose "Window animation scale".
3. From the options, turn off the animations. Select "Animation duration" and "Transition animation scale" and turn them off.
Disable Lock Screen Animations
Lock screen animations are quite fascinating and cute. In fact, it leaves a lasting impression each time you operate your device. However, over a period, you do not wish to wait till the animation completes. You can disable the lock screen animations for instant access to your phone.
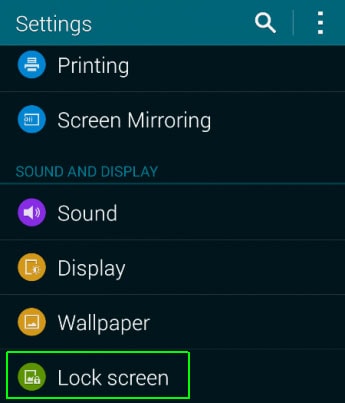
1. In the "Settings" menu, select "Lock screen".
2. Choose "Unlock effect". Tap "None".
