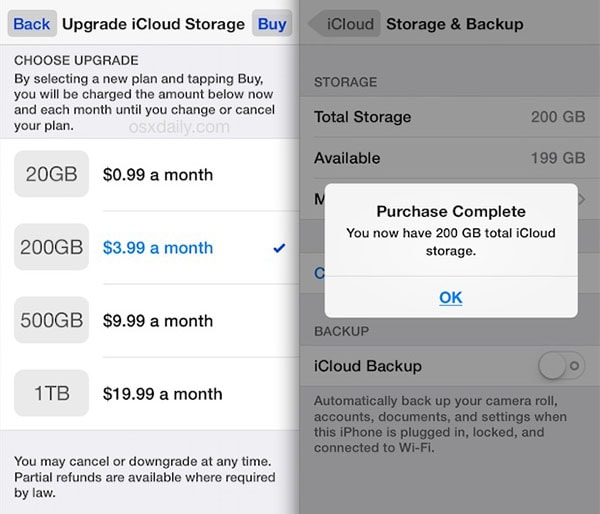
Gone are the days when we used to store our precious moments and information on hard disks and memory cards. Nowadays, thanks to technology, new storage plans such as cloud storage have taken the technological world by storm. Different operating systems usually come with different storage plans. For Apple, we have the iCloud option that usually gives you a total of 5GB worth of data storage for free the moment you purchase a phone from them.
Just like any other storage option, the iCloud option usually runs out of space depending on what you have been storing online. The good thing about Apple and iCloud, in general, is the fact that you can upgrade your storage space to suit the one that perfectly works for you. In this article, we are going to take a step by step look on how we can purchase iCloud storage capacity in a matter of minutes.
How to Purchase iCloud Storage
Tips: Please note that settings may differ depending on the iOS version you are using.
Step-By-Step Guide to Purchase iCloud Storage
Step 1. Whether you are using iOS version 9 or 8 choose the Apple menu by pressing the "Home" button. This action will initiate a new window or screen. Depending on the version you are using, select either "System Preferences" or the "Settings" option. Once you have selected and opened the "Setting" interface, select the "iCloud" option. It’s from this point that you’ll be in a position to purchase a new storage space and plan for your phone.
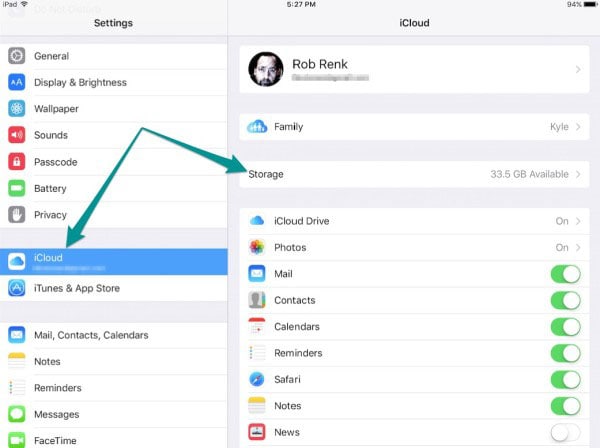
Step 2. Once the "iCloud" option opens, click on the "Manage" option located at the lower-right side of your phone. Tips: Depending on which version of iOS you are using, this option may vary. In some versions, the "Manage" option is located on the lower-right hand side while in others; you can find the option under the “Storage and Backup” option. Make sure that you perfectly understand your phone’s version before proceeding.
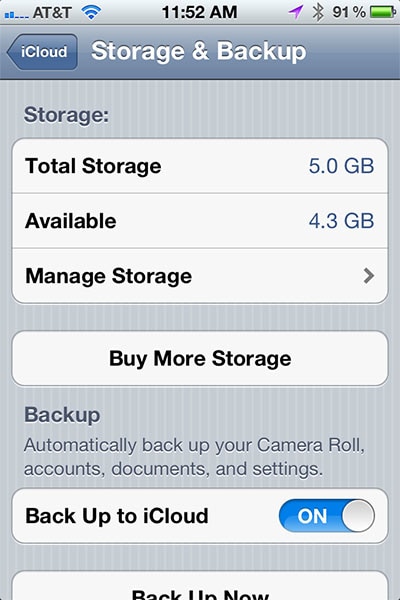
Step 3. Once you have clicked and opened the "Manage" option, a new interface with the "Storage Plan" option will open up. Click on the "Change Storage Plan" option.
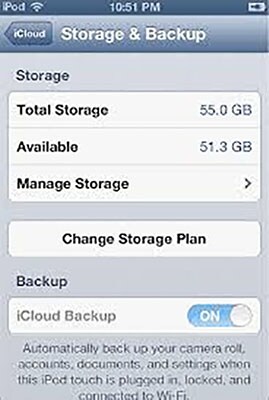
Step 4. The moment you select the "Change Storage Plan" option; a new interface asking you to choose the "upgrade" or "downgrade" option will open up. Click on the "Upgrade Option" to change your storage plan. Once you have your selected plan, press "Next" or "Purchase" depending on the iOS version of your phone. For you to purchase more storage for your phone, you need to have your Apple ID and Password. The moment you select the "Upgrade" option, you’ll be prompted to enter you Apple login details. Enter your details and click the "Manage" or "Buy" option.
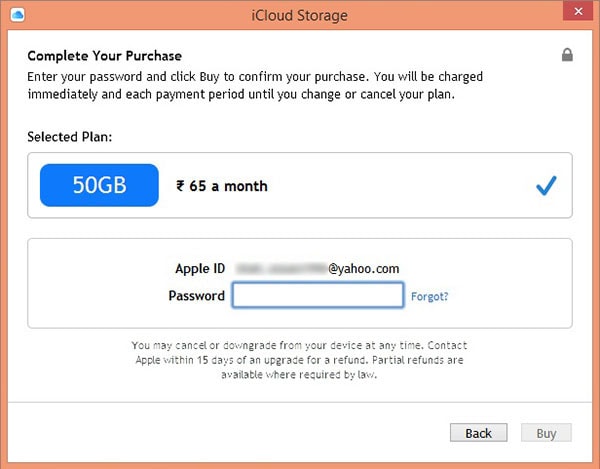
Step 5. Under the "Manage" option tab, you will have different plans to choose from. Choose the storage plan that best suits your preferences. This of course will depend on the amount of information you want to store in your iCloud. Different storage plans come with different prices. Choose the one that suits you.
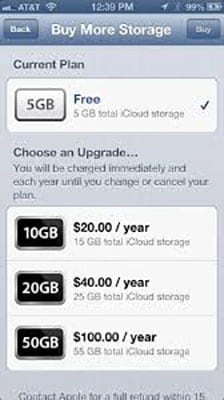
Step 6. Once you have selected the storage plan that best suits you, click on the "OK" option. And just like that; you have yourself a new storage plan to use as you please.
