Advanced Disk Recovery is a leading recovery utility for your devices. The software assists you in scanning for lost files from your computer and helps with the recovery. However, the barrier it possesses would prevent it from penetrating completely into a Mac and retrieve the stolen/lost content with ease. In the current article, we will look at the best alternative to Advanced Disk Recovery Mac.
Part 1. The Best Advanced Disk Recovery Mac Alternative Software
The recommended alternative software to recover data from your Mac is iSkysoft Data Recovery for Mac (also it has the Windows version iSkysoft Data Recovery for Windows). The software leads the race due to the options it provides and the ease of handling. The promising element is the algorithm and the layout of the structure. Combined, these two critical features ensure that they dwell deep into the layers of the hard disk, irrespective of the reasons that affected the performance of the inadequate.
Software tangle, power interruptions, and a virus attack are the common causes of loss of data. Physical damage is another critical factor that entirely disturbs the structure of the disk and requires professional assistance from a recovery lab. Recoverit (IS) for Mac ensures that you get the maximum files out from the corrupted or damaged drive. Consider it as a single solution for all your recovery requirements.
Why Choose This Advanced Disk Recovery Mac Alternative Software:

- Innovative methods for quick analysis and recovery.
- Supports Mac 10.5 and above (including macOS Sierra)
- Functions on NTFS, exFAT, FAT16, FAT32, HFS+, and HFSX file systems
- Save scanning information, search files according to the file type and name
Step-by-Step Guide to Use Advanced Disk Recovery Mac Alternative Software
Step 1 Download Advanced Disk Recovery Mac Alternative
Recoverit (IS) for Mac is available at the original site. Download it, and complete the installation by dropping the executable file to the Applications folder. Start the software by pressing the icon of the program appearing in the same folder. The product window appears on the screen that will show you the 6 file type options. To recover data from Mac, move ahead to the next step by selecting your desired file types and clicking on the "Next" button.

Step 2 Scan the Hard Drive
The recovery mode assists in retrieving data lost due to the corruption of the drive. Choosing the option will head you to the next screen where you will see the partitions of the Mac hard drive with their size and file system. Pick the volume that you think contains the lost data. Scan the drive using the "Start" button.

Step 3 Recover Lost Photos from Mac
The time taken by the software to complete the action is dependent on the total size. Wait for the scan to complete, as Recoverit (IS) for Mac will list the results according to the file format. Pick up a file to see its content in the preview screen. The option is helpful, as you do not have any idea about the content present within a file. With the help of the preview screen, select the archives/records that you wish to retrieve from the partition. Recover the records by using the "Recover" button. The program will prompt for a saving destination. Plug an external mass storage drive and navigate to the same. Wait for the program to complete the action before you browse the files.

Note:
- Deep scan technology will assist in the retrieval of additional files. Use it if you sense there are more files available on the selected partition.
- Take a note of the validity attribute displayed by the system while selecting the files. It will help in speeding the recovery process.
- Save the scanning details if it difficult for you to continue with the recovery process in a single setup.
- Use the file selection option to look for a particular file format and speed up the scan process.
Part 2. How Does Advanced Disk Recovery Software Work
Step-by-Step Guide to Recover Lost Photos Using Advanced Disk Recovery
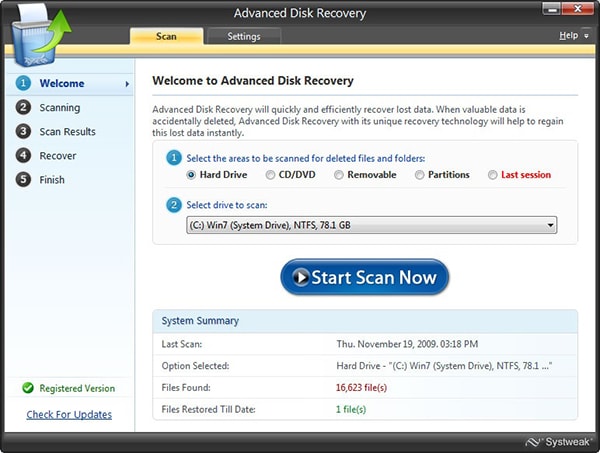
Step 1. Download the software for your Mac. Install the application by dragging the executable file to the Applications folder. Start the software by clicking the icon on the same folder. The program will open its primary window showing the details of the system. It is the welcome screen containing different options offered by the program.

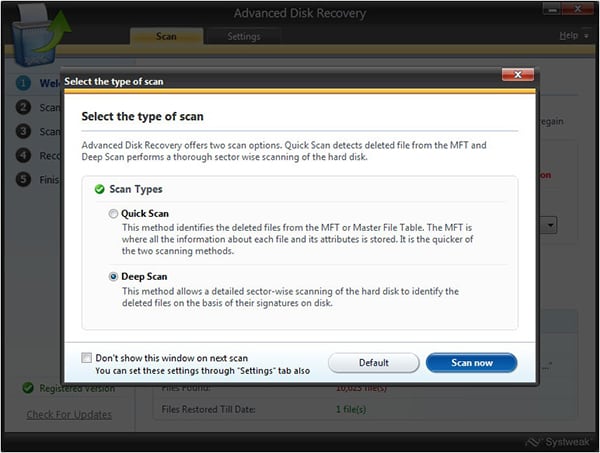
Step 2. You can select the area that you wish to scan. You also have the provision to start a scan from the last session. In the next step, you have to choose the partition that contains the lost data. Under the settings tab, you can select the type of the scan that you wish to opt for the current session. You can make a choice between quick scan or the deep scan. Both offer different scanning technologies and results. Therefore, choose the preferred one according to your need.

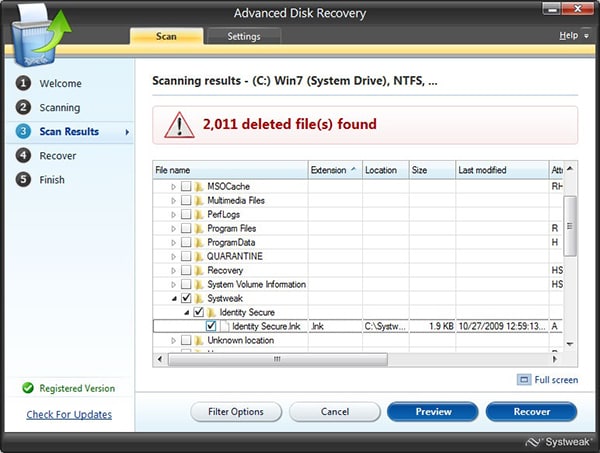
Step 3. The program will begin scanning for the selected partition. It will display the estimated time to complete the process. It varies from one to another because of the size of the volume and the content present within the drive. During the scan process, it will further display the total number of files deleted. It is preferable to leave the system idle during the process.

After completion, it will display the results arranged in an order according to the file type. Choose a file, click the preview button to see the content, and then proceed with the recovery using the Recover button. An advantage of deep scan process is that it will show you the folders and sub-folders.
Part 3. Troubleshooting on Using Advanced Disk Recovery to Recover Photos
Part 4. Comparison of Recoverit (IS) and Advanced Disk Recovery
|
Software |
Operation System |
One-click Operation |
Save Scan Results |
Search File Types |
Preview Ability |
Recover Individual Files |
|---|---|---|---|---|---|---|
|
Recoverit (IS) for Mac |
Mac and Windows | Yes | Yes | Yes | Yes | Yes |
|
Advanced Disk Recovery |
Windows Only | No | No | No | Yes | Yes |


