AppleXsoft File Recovery is an advanced data recovery utility tool for Mac that is capable of recovering data from deleted, lost, corrupted, formatted partitions and crashed hard drives from any Mac system. The software is also capable of recovering deleted or formatted content from USB flash drives, compact flash drives, memory cards, CD, DVD, and smartphones.
Part 1: The Best AppleXsoft File Recovery for Mac Alternative Software
One of the best file recovery alternative software for Mac is iSkysoft Data Recovery for Mac (or iSkysoft Data Recovery for Windows). The software application excels in recovering data from corrupted hard disk, deleted partition, and unrecognizable sectors within a hard drive. An unusual component of the program is its inability to retrieve data using four innovative modes, which propels the capacity of the algorithm to scan a drive for lost files.
Key Features of Recoverit (IS):
- Flexible recovery settings
- One-click start and pause of scan
- Saving scan results
- Distinguishing between a valid and invalid file
- Assigning validity attributes to data - good and bad

Step-by-Step Guide to Recover Lost Files
Step 1 Download and Launch the Program
Download Recoverit (IS) from the official website. Users can install the program by double clicking the icon after the drag the executive will file to the "Applications" folder in Mac. One can launch the program after completing the installation procedure. From the primary window of the program, users have to select one or more file types and click "Next" button.

Step 2 Scan the Selected Disk
In the next screen, the program will display the partitions of the hard drive of the Mac. Users have to choose a particular partition of your hard disk, which they intend to scan and recover deleted files. If you do not gain access to the partitions on the hard disk, press the "Refresh" icon and then re-select the partition that you wish to scan. Click "Start" to begin scanning the selected partition for the lost data.

Step 3 Start to Recover Lost File
After it completes the process, it will open a new window along with the recoverable content. In the same screen, it is also possible to see the preview of the files before recovery. Additionally, the program also provides file validity attributes such as good or bad to the recoverable content. The process makes it easy for a user to choose only the files that have good validity, which makes it easy for the program to recover the content and store it on an external drive. One can begin marking the files they wish to retrieve and then press the "Recover" button at the top.

Note:
- Deep scan retrieves additional files. After the default quick scanning, if you sense there is still plenty of data that is recoverable, you can enable the deep scan technology and re-scan the hard drive.
- Saving the search and scanning parameters will be helpful for you to utilize the same in the future.
- The preview functionality helps you can looking at the content of the data that you wish to retrieve. It will not only preserve time but also help you choose only the necessary files rather than recovering the entire content.
Part 2: How Does AppleXsoft File Recovery Work
AppleXsoft File Recovery for Mac is capable of recovering all file types, including RAW data, making it easy for any user to retrieve a plethora of content. The best part of the system is its ability to scan a device irrespective of the reason behind the failure of its functionality. It even supports both hardware and software RAID recovery.
Step-by-Step Guide to Recover Lost Files Using AppleXsoft File Recovery
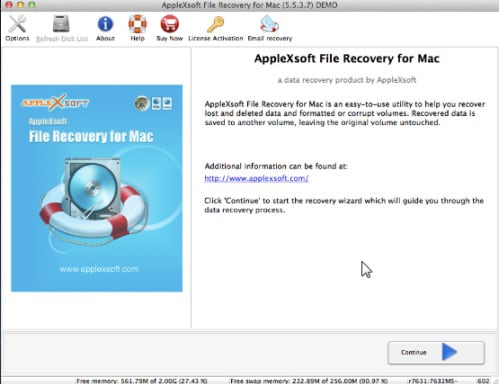
Step 1. Download the trial variant of the software from the official website. Launch the program and click continue, which will then help the user to proceed with the recovery process.
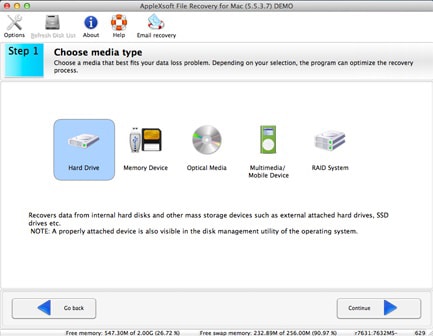
Step 2. Users will have to select the file format that they wish to recover. Depending on the choice, the program will automatically optimize the recovery process. In order to proceed with the recovery, it is essential to select the partition of the hard disk. After selection, click the continue button to head to the next step.
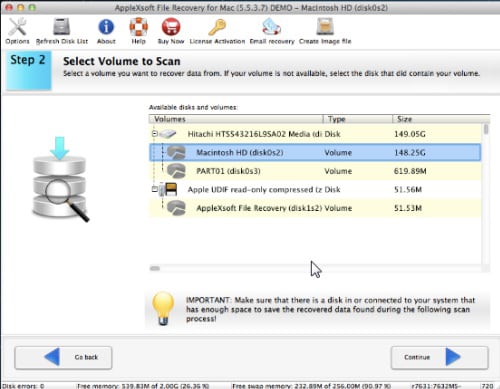
Step 3. Choose the partition from the hard disk. If you are incompetent in finding the volume, you can select the hard drive containing the partition. The program will then begin scanning the drive to search for the selected file format.
Step 4. Depending on the scenario of the data loss, you need to select an appropriate recovery mode. The program offers different options in the recovery mode. However, you will be choosing only one of the options that suit the recovery scenario.
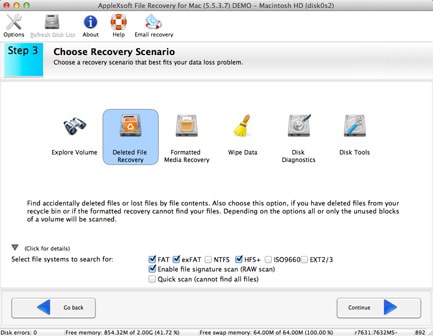
Step 5. In the next screen, ensured that the options you have selected are correct. If everything is correct, click the Continue button to begin scanning for the lost data.
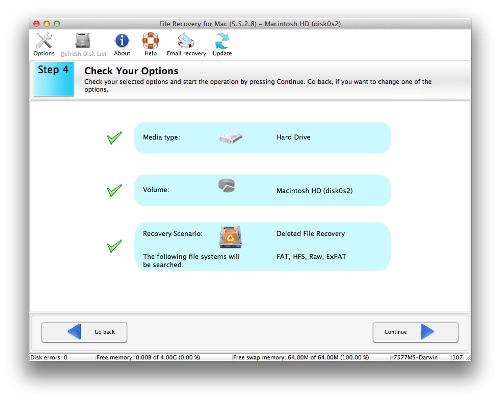
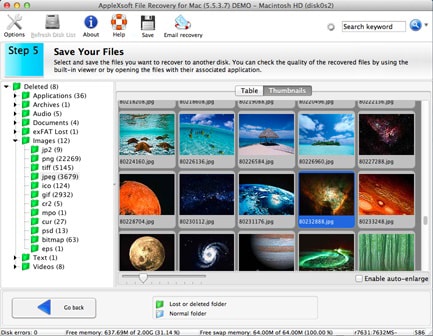
Step 6. The time taken to complete the scan is dependent on the size of the partition. After completion, the program will display all the recoverable files. The software also provides the ability to check the quality of the recovered files using the inbuilt viewer. Users can then mark the files you wish to recover and press the save button to get the back files to another disk.
Troubles faced by users using AppleXsoft File Recovery for Mac:
- The program fails to recognize certain file formats, even though it boasts of deep scan technology for recovering any file format.
- It can be troublesome for a few to understand the options provided by the software in the recovery of data.
- It carries an expensive price tag while there is a possibility for users to look for alternatives at a lower price.


