Contents
- 3. Backup iPad to Computer
The technology nowadays is very advanced that almost all of our memories are stored on digital and electronic devices. Most of us take our pictures on our iPads and store them. The photos are stored on the internal storage or the memory cards. These photos are very vulnerable to the fact that they can get deleted or lost. Anything can happen you might end up losing your iPad or accidentally deleting your photos. For the situations like these there is a feature in these devices to backup iPad photos. It makes sure that our most valuable memories are kept safe and never lost. Making a backup of your iPad photos is not a difficult thing to do. There are various easy methods to do it.
Method 1. Using iPhoto
To back up your precious photos from iPad to iPhoto, iPhoto gives the accessibility of making a backup of pictures that are saved on your devices. To make a backup of iPad photos follow the below step:
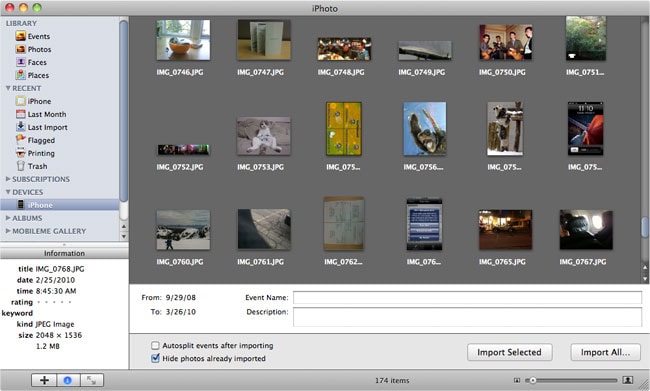
Step 1. Connect Your iPad
To make the backup of the photos first, you have to connect your iPad to the computer. After you have connected the device to the computer the iPhoto launches automatically and goes to the "Import" windows screen. This import screen lists all the photos in your iPad that are under the CameraRoll.
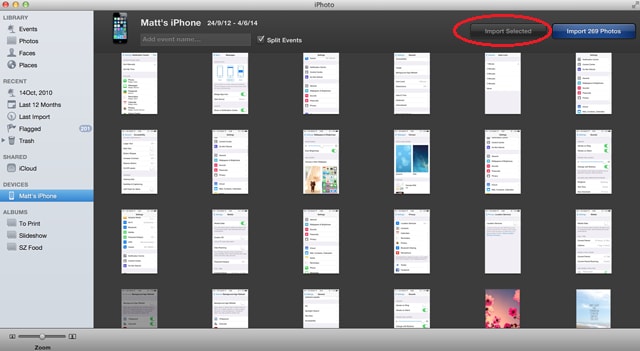
Step 2. Back up Photos with iPhoto
Now that you can select the photos that you want to add to the backup. To do this, check the checkbox on the required pictures. After that select "Import Selected" and the import will begin. There is an alternate way to do this. You can also simply pick the picture from the camera roll and drag and drop into the backup.
Method 2. Using iTunes
You can also make the backup of your photos using the iTunes. This can be done very easily by following the below steps:
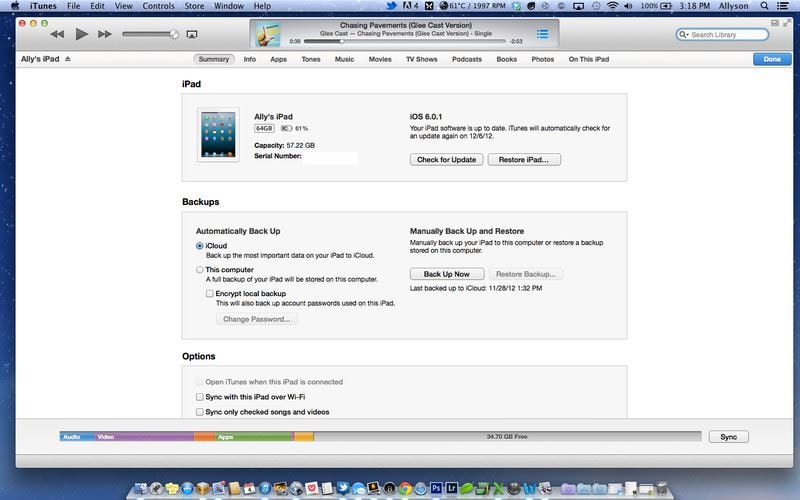
Step 1. Open iTunes
First step is to download and install the latest version of the iTunes software. After you have done that connect your device to the computer and then open iTunes.
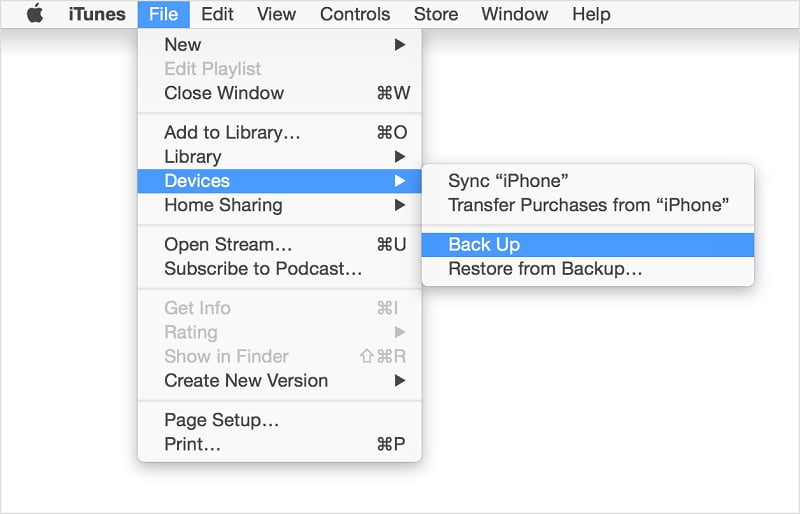
Step 2. Make iPad Photos Backup
To make the backup click on the "File" menu in the top left corner, and a menu will drop down. There is an option "Devices", from there select "Back up". It will make your device backup your photos from your device.
Now that you have completed the backup you can view the backup you have made under the "Preferences" and then selecting "Devices". This will show all the backups that are there.
Method 3. Using iCloud
iCloud is one of the good ways to backup your photos on the regular basis. Backing up your photos on the iCloud relieves you of the fear of losing them. To make the iCloud back up your photos you have to follow these steps:
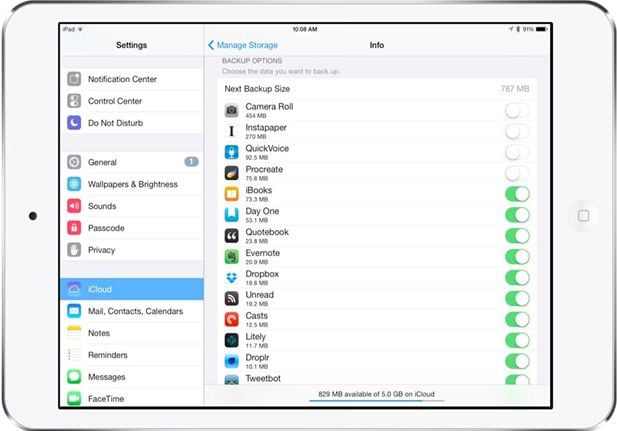
Step 1. Go to Settings on Your iPad
It requires only your iPad to make this kind of backup. First you'll have to open your menu and go into the Settings, where is the place where we will configure your device to take the backup.
Now in your iPad "Settings" you can see an option named as "iCloud" on the left-hand side of the settings menu. Select it and open it to proceed further.
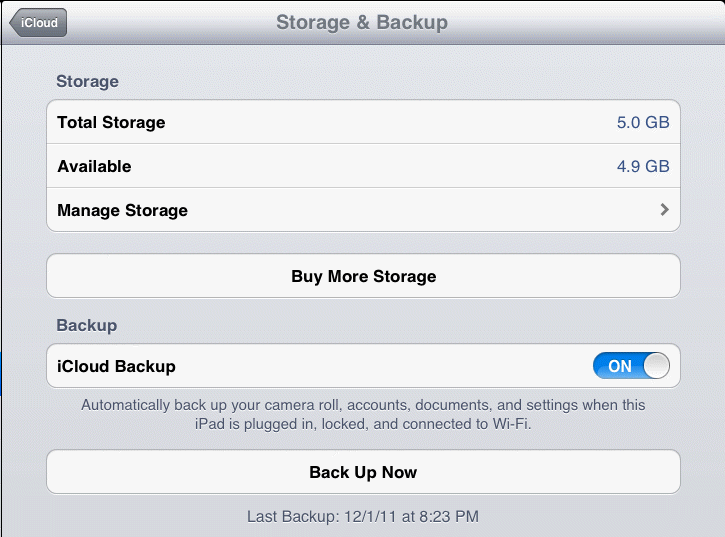
Step 2. Back up Pictures with iCloud
In the next menu, you will be able to see nearly all of your device data including your iPad's camera roll. The only thing you have to do here is to select the photos you want to backup.
Now after selecting your photos you can select "Storage and Backup" option to further customize the backup settings. From there you'll device will make a backup. Not only this but under these options you can set your device to make a regular automatic backup, so that you no longer have to worry about making backups.
Method 4. Using iSkysoft iPhone Data Recovery
Now we all know the typical methods of the making a backup of your photos, we proceed to a much better third party software - iSkysoft iPhone Data Recovery for Mac, It is the recommended software here as it provides access to many functions that are not possible during the backup on the native applications. This program has features like.

- Multiple Recovery – It allows you to have your data recover from your device along with this it can restore backup files from iCloud and iTunes also.
- Expanded File Support – This software supports a very long list of file formats that can be recovered or can be made backup.
- Data Loss Solution – It also manages the lost file recovery. Not only it can recover deleted files but also data lost during failed jailbreak or factory restore.
- It allows the user to choose what they want to recover. As many times, there are many things that we do not want to include in the recovery.
To backup your photos from iPad using iSkysoft iPhone Data Recovery you only have to lead the below steps, and you will create an easy backup.
What You Will Need:
A Computer;
iSkysoft iPhone Data Recovery for Mac
Time Required:
Times will vary according to the file's size
Difficulty:
Easy
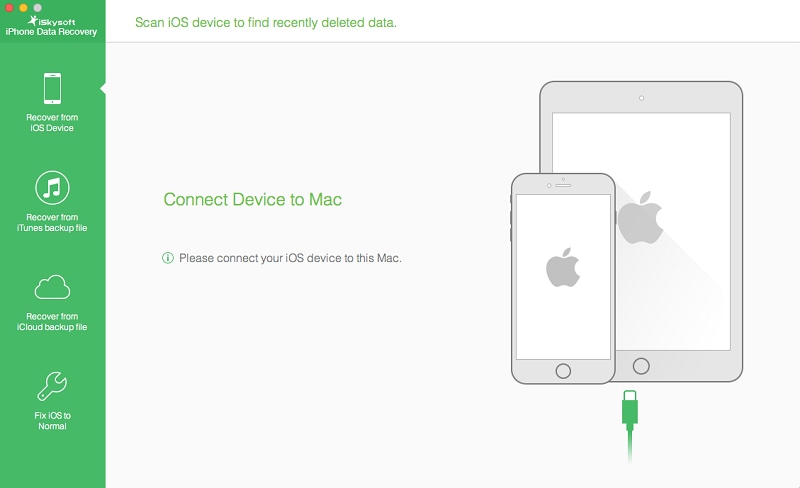
Step 1. Choose a Backup Option
Check whether the device is connected to your computer. Then open iSkysoft iPhone Data Recoveryon your computer. Select "Recover from iOS Device" from the top tabs. Now, this this will be used to make a backup of the photos on the iPad.
Now hit the "Start" button and to start the file scanning on your iPad. This scan the current files also that are present on your iPad device.
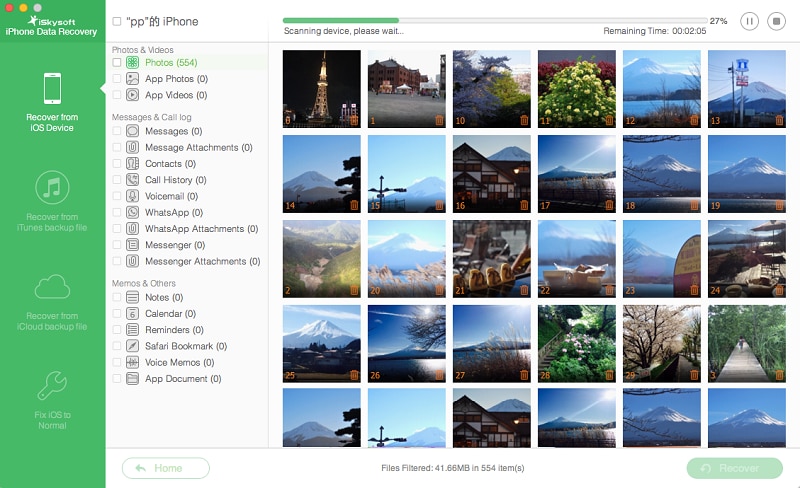
Step 2. Back up Photos to Computer from iPad
After the scan is completed, you can easily select the required file from the displayed file. Which, in this case, will be the photos, we will select the file group photos and hit the "Recover" button, and now you will be able to backup your saved files to a new location.


