I pressed the "Format" button on my Canon EOS 500D by mistake and accidentally deleted all my photos on it. They are very important to me and I really want them back. What can I do? Please give me some advice. Thanks! –from a user
Canon is one of the most popular camera manufacturers in the world. Many photographers love to use Canon cameras like Canon EOS to capture lots of wonderful pictures. But sometimes you may encounter the scenarios like accidentally deleted or lost your lovely images from Canon EOS due to other unexpected error like accidental formatting, transferring failure, power failure, virus affection or other unexpected errors. What would you do if these situations happened? Is there any chance to get them back? Luckily, your images are not erased permanently. Now, follow this guide to learn how to recover deleted pictures from Canon EOS.
Part 1. Photo Recovery Software for Canon EOS
To get back lost images from your Canon EOS camera, you need to get a picture recovery tool first. Here I'd like to choose iSkysoft Data Recovery for Mac as my recommendation. This smart tool can assist you in retrieving deleted pictures from Canon EOS in only several simple clicks.
In addition to photos, you can also use this data recovery tool to get your deleted videos, documents, audio files and other files back. It also supports computer hard drives, external hard drives, memory cards and other storage devices.
Part 2. How to Recover Photos from Canon EOS on Mac (El Capitan Compatible)
Now the following guide will walk you through how to carry out Canon EOS picture recovery on Mac step by step. Windows users can take the same steps after downloading and installing Data Recovery for Windows on your computers.
What You Will Need:
A Computer;
Recoverit (IS) for Mac
Time Required:
Time will vary according to file's size
Difficulty:
Easy
Step 1. Select a Recovery Mode to Get Photos Back
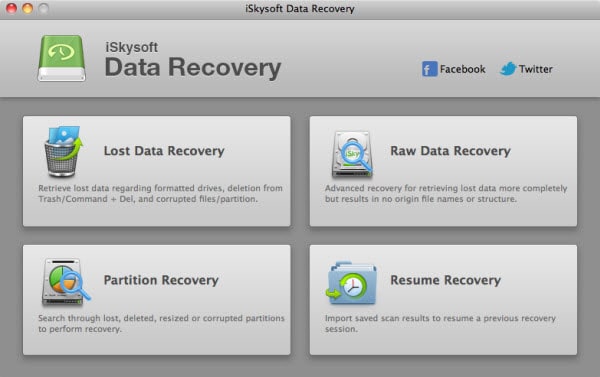
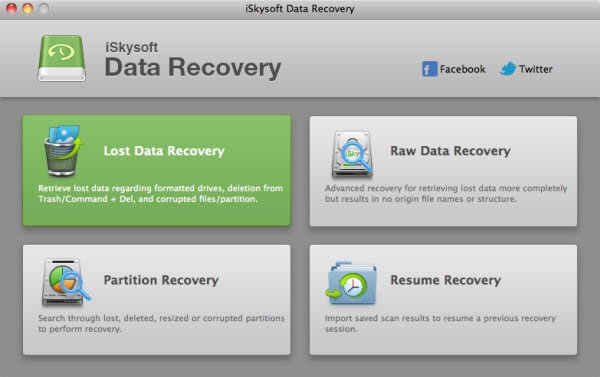
After installation, launch Data Recovery and connect your camera with your Mac. In the main interface, four recovery modes are available. Click the "Lost Data Recovery" mode, which lets you scan and restore files with their original names quickly.
Tips: You can also choose "Raw Data Recovery" mode, which scans files completely and deeply. However, it needs more time to finish the process and you have to wait a little longer.
Step 2. Scan Your Device for the Deleted Images
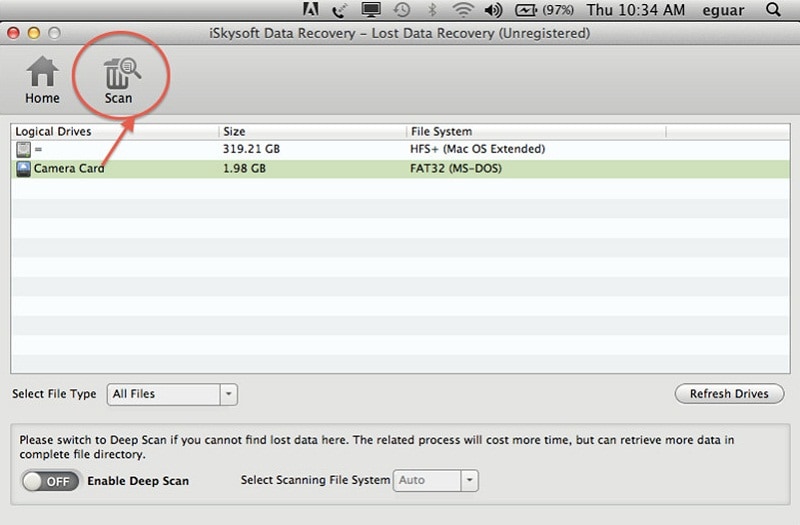
After you've entered into the recovery mode, your camera will appear as a removable storage device in the window. Choose it from the list and move to the top to hit the "Scan" button. The program will immediately scan your device and search the deleted files for you.
Step 3. Restore Deleted Photos from the Camera
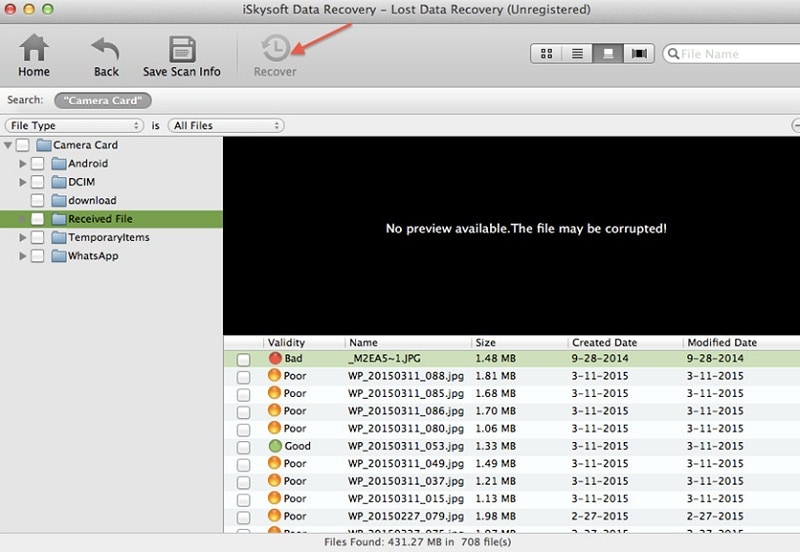
In a few seconds, several folders will show up on the left of the interface. Find and preview the photos to make sure that they are what you want. Then mark the photos you want to retrieve and click the "Recover" button. Choose a folder to save the restored images and click "OK". Then you can get your images back just in a while.


