Every individual had faced such a situation in their lifetime to do erased hard drive recovery on Mac. This circumstance could occur if the hardware has been subjected to any damage. The hard drive might comprises of some important files which is used for business processing or it can also have different types of files related to videos, music, etc. Sometimes the hard drive could be accidently erased while you are running any programs or applications. The reason for the deletion of the hard drive cannot be predicted but still you can find many ways for erased hard drive recovery on Mac. In this scenario you require some reliable source to get back your hard drive along with the necessary files for further usage. The recovery process involves getting back the files stored in the hard drive without any modification. The software used in the recovery procedure should restore the data in the hard drive which has been erased accidently without the knowledge of the user.
Part 1. The Most Reliable Erased Hard Drive Recovery on Mac
iSkysoft Data Recovery for Mac plays a vital role in bringing back the erased hard drive recovery on Mac with less difficulty. This software has many features to recover all types of data stored inside the hard drive. Moreover it has many options to prevent the drive being erased without the knowledge of the user. The optimum utilization of the software enables to protect the hard drive as well as recover the data stored in the erased hard drive on Mac. It serves as one of the reliable software and it is user friendly. The process involved in the recovery in very simple and it can be used even without any technical knowledge. It is highly recommendable to use iSkysoft hard drive recovery software to recover your hard drive files. The process involved is very simple and you can do it by your own without any assistance from anyone.
Why Choose This Erased Hard Drive Recovery Software:
- You will be able to recover any type of data like video files, music files, images, documents etc.
- You can recover more than 50 types of files during the process
- The files will be restored with the help of file signature.

Step-by-Step Guide for Erased Hard Drive Recovery Software on Mac
Step 1. Download the Recoverit (IS) for Mac software. Next install them to begin your recovery process. Launch the application. This application prompts you to select the file types to be recovered. You can reduce the scanning time by customizing using the filter option. This option enables you to select the required data files which have to be restored. This filter option lists out image files, videos, documents etc. Select any one from the list based on your needs. Choose them and then hit "Next".

Step 2. Now the software will lead to a list of drives available in your Mac system. Select the drive in which you need to process the data recovery. And then click "Start" to begin the scanning process.

Part 2. How to Backup Data Before You Erased Hard Drive
The optimum way to backup data on Mac is by using the external hard drive with maximum storage capacity.
Step-by-Step Guide to Get Deleted Videos Back With Backup
Step 1. Connect the external storage using the USB port in your Mac system. You can select the external storage capacity based on the requirement. If you want to backup more data then go for high capacity external storage.

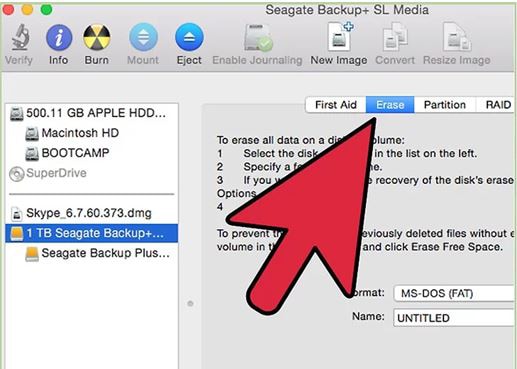
Step 2. Format the external hard drive so that the files have been stored properly in Mac for better recovery process. This process helps to sort out the files which enables in an easy recovery. Select the external drive and click on the format button to establish the formatting process.

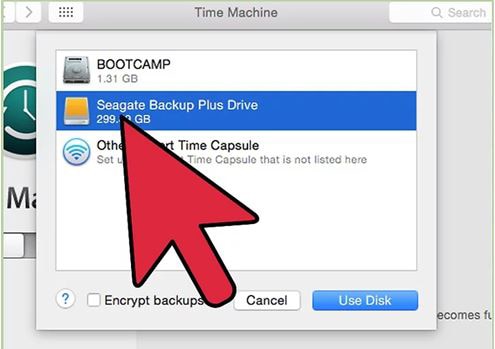
Step 3. The backup process is carried out by launching Time machine application. If this is not automatically triggered then you can make a manual launch by using the system preference options. Select this external hard drive to be the default back up storage when prompted.

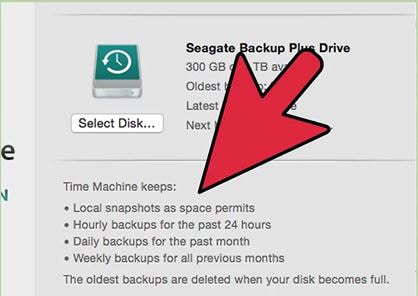
Step 4. Enable the time machine utility to begin your backing up process automatically. Initially it might take more time but later the files get automatically backed up without any difficulty. Schedule the backup process within some interval of time by enabling the given options.

Thus backup your files in the hard drive in an easier method before it get erased accidently. Follow the above process to save your files for future use even the hard drive get erased.


