Windows is an operating system designed and developed by Microsoft. Nowadays, the majority of computers are running on Windows OS. The main reason behind the popularity of windows is security and its friendly user interface. Recent versions of Windows OS are coded with advance algorithm that makes it more secure. While using windows, you need to make different accounts like administrator, guest, and others. All these accounts have different privileges, accessibility. The administrator has the most privileges to modify or delete files and folders in the system. But even as an administrator, you can encounter Access Denied problem where you can't delete/copy or move files between folders. There are many causes for this and each is discussed below in this article.
- Part 1. How to Fix "Access Denied" Error in Windows XP/7/8/10
- Part 2. What is "Error 5: Access Denied" Problem? How to Fix It?
Part 1. How to Fix "Access Denied" Error When Accessing Files or Folders in Windows XP/7/8/10
Selected File or Folder is Encrypted
These days, most of the people use external storage devices including USB flash drive, external hard drive etc. to avoid data loss. They protect their storage devices with a password and encrypt the devices to protect them from unauthorized users. To access these encrypted or password protected storage devices, you have to enter the right password. This is the reason why you encounter access denied problem on your computer. Here below are steps to overcome such error.
Step 1: At the first step, you have to right-click on the external storage device and click on "Properties".
Step 2: Now, check storage device is encrypted or password protected.
Step 3: If you found drive is password protected or encrypted then, try to enter the right password. On the other hand, if it is encrypted then, you can descript the drive with your encrypting hard drive.
Switch to an Administrator Account
On a windows computer, people create numerous of accounts to set system privileges. Such as guest accounts have limited accessibility features, you can only access limited features. Most of the time guest user faces access denied problem due to system privileges. Only administrator users have rights to access, modify and delete the files. If you are facing such errors on your system then follow steps below.
Method 1: First of all, you have to administrator account by entering the valid login credentials. If you don't know login detail then don’t worry.
Method 2: You can delete the original account and create another new account.
Click on Start – Settings – Control Panel – User Account – Create an account – choose administrator account – Delete – Create new administrator account.
If you don't create a new account then your computer may cause a problem. The best option is to restart the computer and repeat the steps again.
Maybe Computer Infected by a Virus
The virus is a harmful program that is mainly designed to infect user system. If your computer is infected by virus then, this may be the reason for access denied problem. It is better to install antivirus and scan your computer. With antivirus, you can remove and repair the harmful program. It is always recommended to scan your computer once a week to avoid facing such problems.
Change Storage Device Access Settings
Have you faced access denied problem while connecting USB to the computer? This problem may be occurring due to some special drive settings on the computer. In the settings, you have to change read and write permission to USB flash drive.
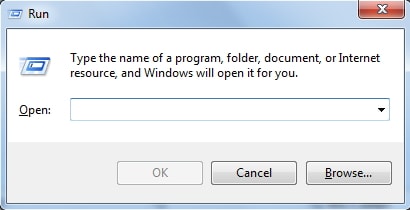
Step 1: Initially, you have to press "windows" + "R" simultaneously to open Run.
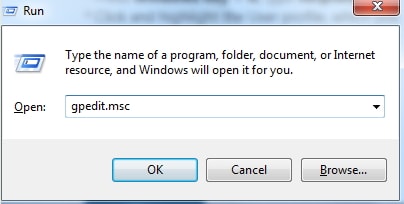
Step 2: Type "gpedit.msc" and hit “Enter” button.
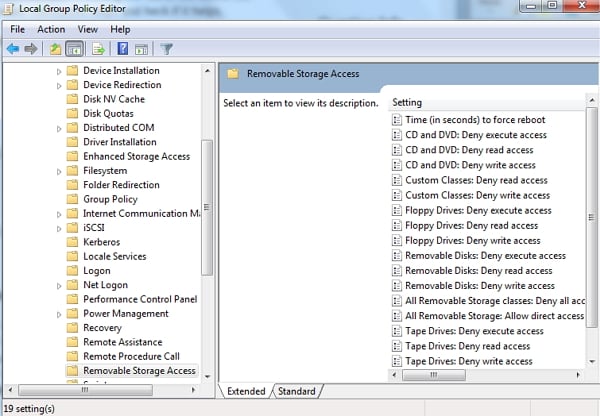
Step 3: Now, click on "Local Computer Policy" – "Administrator templates" – "System" Remove storage device access” and choose the option as per needs.
Part 2. What is "Error 5: Access Denied" Problem? How to Fix It?
Error 5 Access denied problem is a windows error that occurs due to plenty of reasons.
How to Fix Access Denied Rrror on Windows?
Method 1:
Step 1: Firstly, you have to open properties of User profile folder. Simply right-click on the User profile folder and hit on "Properties".
Step 2: Now, you have to go to the "Security tab" and click on "Advanced". Here, you have to tick the checkbox at the bottom of the window namely “Replace all child object permission with inheritable permissions from the object and hit on "OK" button.
Method 2:
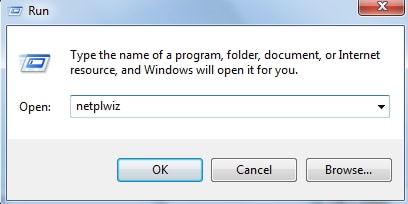
Step 1: First of all, you have to press windows key + R simultaneously and type "netplwiz" without quotes (").
Step 2: Single click on the user profile that you would like to make an administrator.
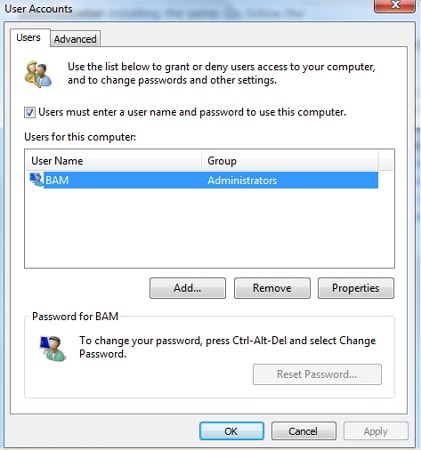
Step 3: Hit on "Properties" and then choose the "Group Membership" tab.
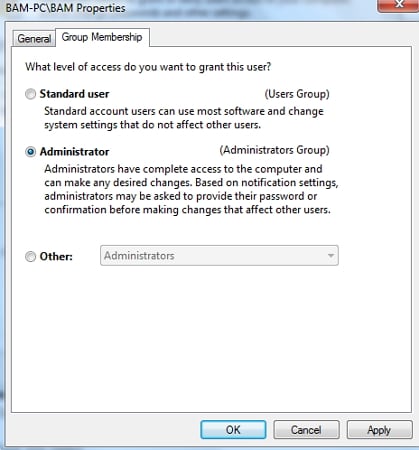
Step 4: Select the administrator and click on "Apply/OK".


