Contents
- 3. Backup iPad to Computer
The World most famous iPad Tablet PC has amazing service of iCloud Online Backup Facility of Apple Inc allows its users to conveniently switch to different Apple Devices with Privacy Protection. i.e You like to buy and switch to latest model of iPad without losing a Single data File. In Order to backup your valuable Data you must to be running iOS 5 or higher and you have working Internet Wifi-Connection and you must know how to get it done.
Part 1. How to Backup an iPad to Your Computer
Making a backup is a great way to protect your data when your iPad is lost, broken or stolen. If you don't know how to backup your iPad files, then don’t worry, your data won't go anywhere as long as you choose iSkysoft iPhone Data Recovery for Mac.
iPhone Data Recovery for Mac is an efficient tool to back up your iPad data to your computer quickly and safely and easily. If you have made the backup with iTunes and iCloud there, this program can also help you extract particular files from the backups. In addition to backup, this fabulous program also helps you recover lost and deleted data from your iPad and other iOS devices. Four recovery modes are offered to recover deleted text messages, contacts, photos, call logs, video and audios, and more either from the device itself or from the iTunes/iCloud backup files.
iPhone Data Recovery for Mac will definitely be of assistance to back up messages, attachment of messages, camera shots, pictures library, call history, contacts, calendars, reminders and bookmarks of Safari from your iPad to your computer. Also, using this software is not a much big deal. There is nothing to bother about special preparation or particular skill, just follow the below mentioned simple easy steps and get your precious data on iPad backed up.
What You Will Need:
A Computer;
iSkysoft iPhone Data Recovery for Mac
Time Required:
Times will vary according to the file's size
Difficulty:
Easy
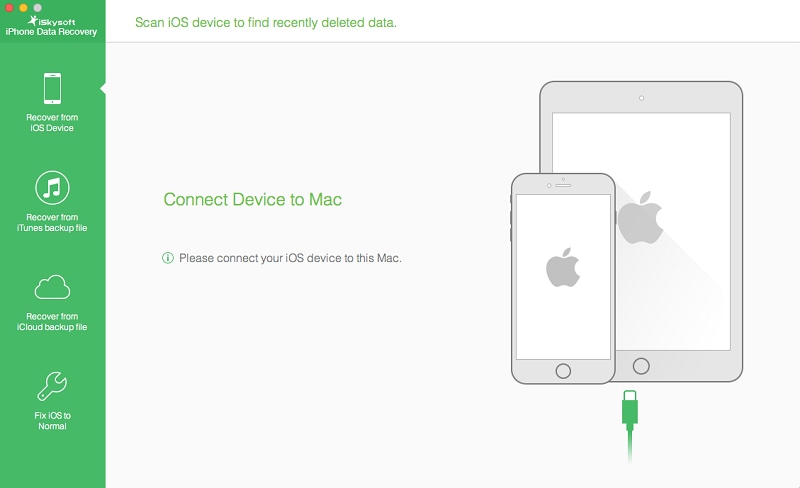
Step 1. Connect Your iPad to Mac
Download and install this iPad backup application. Launch the software and then plug your iPad to your Mac. Then you need to hit the "Recover from iOS Device" tab on the top of the interface. Once your iPad is detected, you can simply click on the Start Scan button to scan all the data on your iPad.
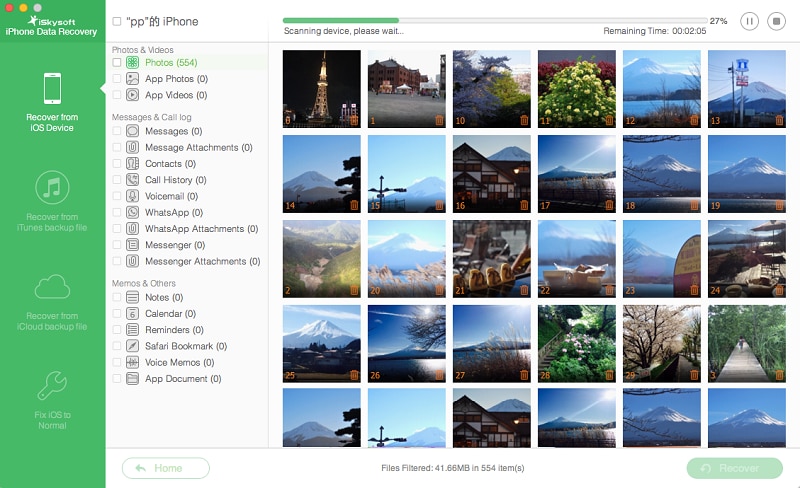
Step 2. Generate Backup for iPad
When the scanning is done, several file categories will be displayed on the left of the interface, all of them can be exported and then backed up on your Mac.
To export these files, you can preview them first and select the files that you want to backup on Mac by checking the boxes in front of the target items. And then click the "Recover" button. Just in a few seconds, you can back up all your iPad data on your Mac.
Part 2. How to Backup iPad Data to iTunes
You can copy and save the data on your iPhone, iPad, or iPod touch by backing up your devices in iCloud or iTunes. If you replace your device, you can use that backup to transfer data like your contacts and photos to your new iOS devices. Let's start with iTunes. Below are its main backup features:
- iTunes stores backups on Mac or PC running Windows.
- iTunes storage depends on your Mac or PC's available storage space.
- iTunes offers encrypted backups (note: It is off by default)
- iTunes allows you make and use backups from your Mac or PC easily.
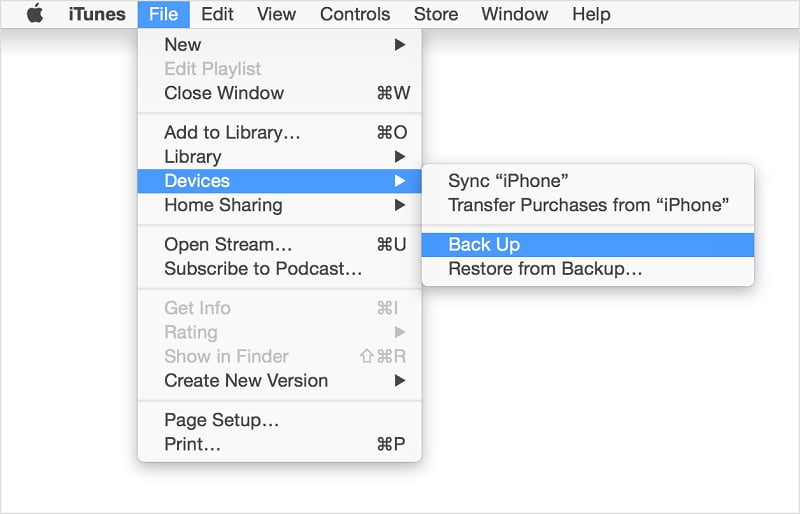
Step 1. Backup Apple iPad to iTunes
Open iTunes and connect your iPad to your laptop or desktop. Then click File > Devices > Back Up.
Note: To save data that you have purchased from the iTunes store or app store, you can click File > Devices > Transfer Purchases.
Step 2. Check Backup File on iTunes
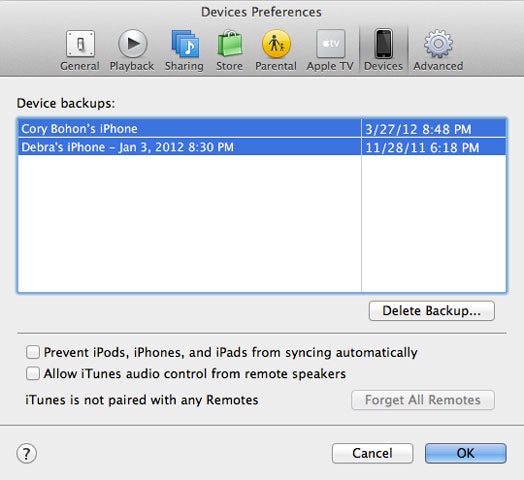
After the successful completion of the backing up process, you can check whether your backup is stored successfully. To do this, you can click iTunes Preferences > Devices. You will see the name of your device with the date and time that iTunes created the backup.
Part 3. How to Backup the iPad to iCloud
You can make a backup of your iPad data using iCloud with an active Wi-Fi network connection. It requires plugging your iPad into a computer or even being at home to make a backup with iCloud. iCloud backups include various kinds of data than iTunes backups.
- iCloud stores backups in the cloud storage.
- iCloud offers up to 1TB of paid storage and up to 5GB free storage.
- iCloud always encrypts your stored backups quickly.
- iCloud allows you to make and use backups from any location by using Internet Wi-Fi connection.
Step 1. Turn on iCloud Backup Feature
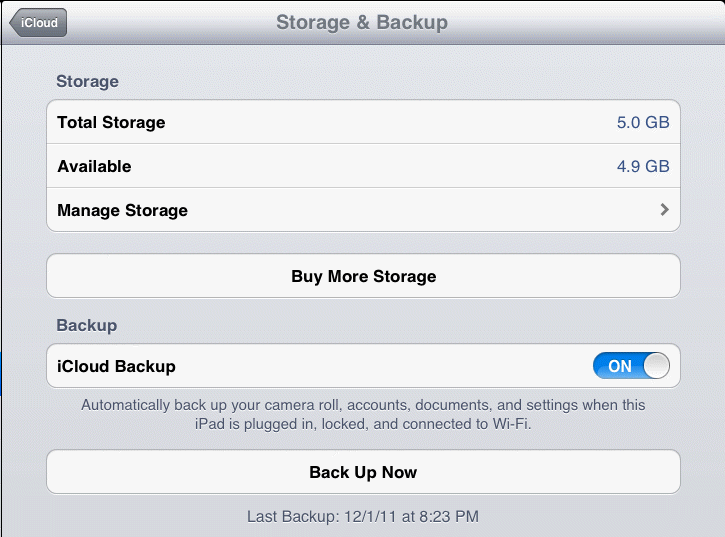
Connect your iPad to a working high-speed Wi-Fi connection. For iPad with iOS 8 or later, Go to Settings > then iCloud > then Backup; While iPad with iOS 7 or earlier, Go to Settings > then > iCloud then > Storage & Backup.
Note : After you turned on iCloud Backup, iCloud will automatically back up your device each day. To ensure the maximum battery life, iCloud makes these daily automatic backups only on the following conditions:
- You have turned on the Backup options;
- Only if your iPad is connected to a charging source;
- Only if your iPad is connected to a Wi-Fi connection;
- Only if your iPad’s screen is locked.
Step 2. Backup the Data You Need
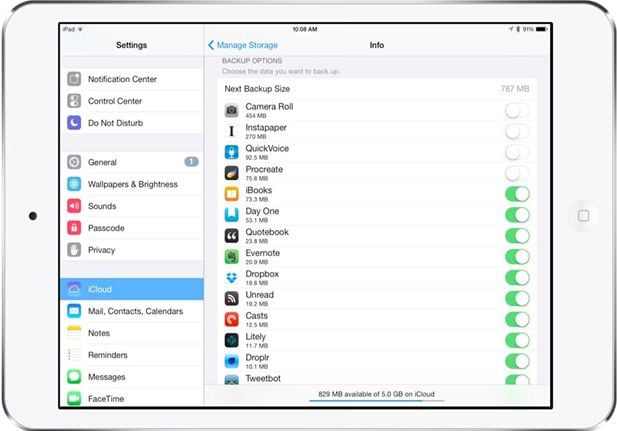
Now you need to tap Back Up Now. Please stay connected to your Wi-Fi network until the process completes. After that, select which data you want to be stored in backup.
Make sure the backup finished by tapping Settings > iCloud > Storage > Manage Storage. The backup you just made should appear with the correct date and backup size.

Learn More about iCloud Backup Features
iCloud backups include nearly all data and settings stored on your device but don't include the following features:
- Data that's already stored in the cloud, like my photo stream, personal contacts, entries of calendars, personal notes, and photo library of iCloud.
- Data stored in other cloud services, like Gmail and Exchange Mail.
- Touch ID settings.
- Content you have not downloaded directly from iTunes, App, or iBooks Stores, like imported MP3s, videos, or CDs.
- iTunes in the Cloud and App Store content.


