Video corrupted is never easy on anyone, especially when that video was treasured for ages up until it was corrupted. From video files to archives: we have all lost some form of data or another. It can be downright frustrating and can cause a lot of angst. However, there is little reason to worry because when data is deleted, the pointer that points to the data is usually erased. Chances are your data is still out there. Unless you have overwritten it with a large amount of new data, the chances to recover corrupted video are quite high and absolutely possible. With a large number of online data recovery software readily available, one has a wide variety to choose from. You can even hire an online professional to recover the corrupted or lost file for you, but this is a worst case scenario. You can almost always recover the file using any recovery software.
Part 1. How to Recover Corrupted Video on Mac and Windows
You have accidentally corrupted or deleted that one video you had been planning to use for a presentation or during a reunion party. You're beginning to panic now. Hold on though: there is a way out. It doesn't matter whether you are a Macintosh fan or a hardcore Windows' user. iSkysoft Data Recovery for Mac (or iSkysoft Data Recovery for Windows) presents to you the ultimate solution to recovering your corrupted or lost video using a minimum number of steps and little time.
Why Choose This Corrupted Video Recovery Software:

- You can recover not only the video file but also audio files, documents, archives, images and emails.
- It can recover them from a range of devices: hard drives, SD cards, cameras, computers or MP3 players.
- It allows you to scan the device, get a preview of all located files, then recover each file accordingly.
Step-by-Step Guide to Recover Corrupted Video on Mac
Step 1. Download and install Recoverit (IS). You can find the software on the official iSkysoft page. Run this software. Select the "Video" file type tab and click on "Next" button.

Step 2. In the window that comes up, you will be shown a list of drives found on your Mac. Click the one where you lost the video from and click "Start". This will initiate the scanning process.

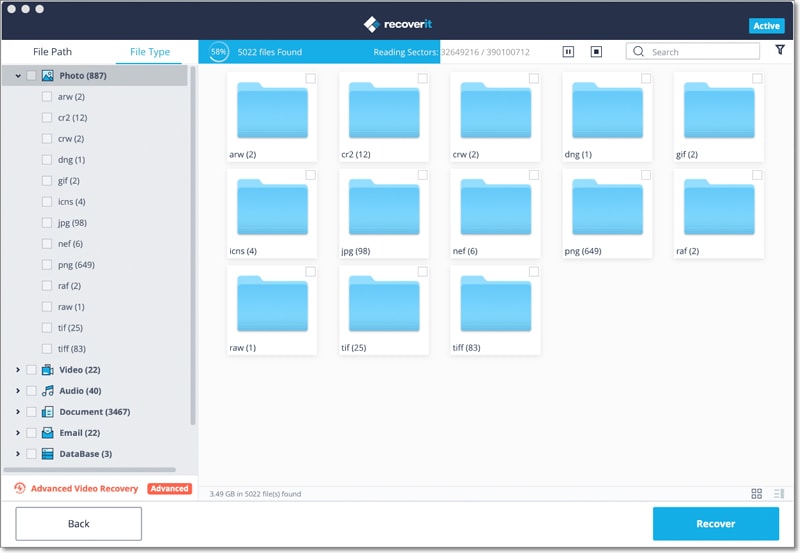
Step 3. After scanning has been completed, you'll be greeted with a list of found files. You can sort through them using the filter option to specifically bring up all video files. You are sure to find your corrupted video file in the list. Click on it, and click "Recover". Voila! Your video will be recovered in no time!

To enhance your experience of Recoverit (IS), try the following tips::
- Use the filter option to specifically locate particular file types instead of rummaging through every file type for a single audio or image.
- If your file does not appear, opt for the Deep Scan option. It will take longer but is almost guaranteed to find the file.
- You can save scan information, or pause and resume it at a later time.
Part 2. How to Play Corrupted Video
Video files can become corrupt because of broken headers, an incomplete read or write operation, unsuccessful compression of the video file, or lost internet connectivity during the downloading process. Whatever the cause, using VLC media player can help recover or repair the video file.
Step-by-Step Guide to Play Corrupted Video:
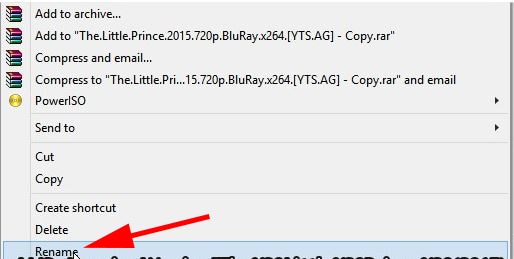
Step 1. Make a copy of the original video file. Rename the video file to AVI.

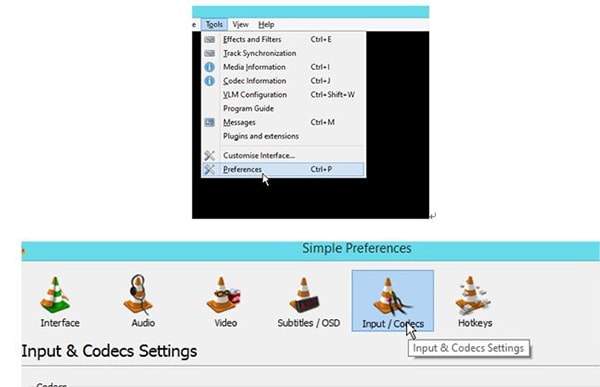
Step 2. Launch VLC Media player. Go to Preferences, then Input or Codecs. Click "Save" at the bottom of the dialog box. Select "Always Fix" near "Repair AVI Files". You're done! Your video file should play uninterrupted now.


