JPEG is the most used format of pictures that we usually take from our digital cameras. This is one of the formats that can easily be used for mailing purposes because of its genuine file size that makes uploading it on the internet very convenient. But because JPEG format like other photo formats is not free from corruption and prone to accidental data loss, JPEG recovery on Windows becomes an absolute necessity. The only way to get your lost, corrupted or deleted JPEG pictures back is to use an awesome data recovery tool.
How to Perform JPEG Recovery on Windows
Only a technically advance and remarkably designed tool with numerous features can allow precise JPEG recovery. Therefore, for Windows users, we have picked and reviewed here the best data recovery tool iSkysoft Data Recovery for Windows. With outstanding features, This tool makes it extremely easy to recover all your JPEG images that you may have lost on your phone, camera, SD card or other such devices.
This professional data recovery tool is the ultimate solution for all your data loss issues. It provides maximum benefits and also ensures most impressive results because of its deep scan. The tool offers four recovery options which can be used according to the kind of data loss. You can use any of the Partition Recovery, Lost Data Recovery, Resume Recovery and Raw Data Recovery options. Apart from JPEG, the tool works exceptionally well for recovering music, videos, documents and many more similar files. There is another amazing option to preview the files before actually restoring them to another external drive.
Why Choose This JPEG Recovery Windows Software:

- The tool performs thorough scan and finds out almost all the files that are lost on your system.
- You can use its ‘Preview’ option to make sure you are recovering the correct files.
- The program has a very user friendly GUI for easy navigation and efficient recovery on this tool.
- This tool is compatible with both Windows and Mac operating system.
- It can recover music, photos, videos, documents and their various file formats.
Step-by-Step Guide for JPEG Recovery on Windows
Using this amazing tool for JPEG recovery, you can avail your photos in their original size and format. It supports a wide range of external storage devices in case your photos are lost from any of them. Here, we will use "Lost File Recovery" mode for restoring all your JPEG images that are accidentally deleted, formatted or completely lost on your system.
Step 1. You can visit the official website of the program to download it from there. The downloading process will take few minutes before your tool is ready for installation. Now when the program is installed, launch it on your computer and choose your recovery mode. On your program's interface, please select the file types that you want to recover.

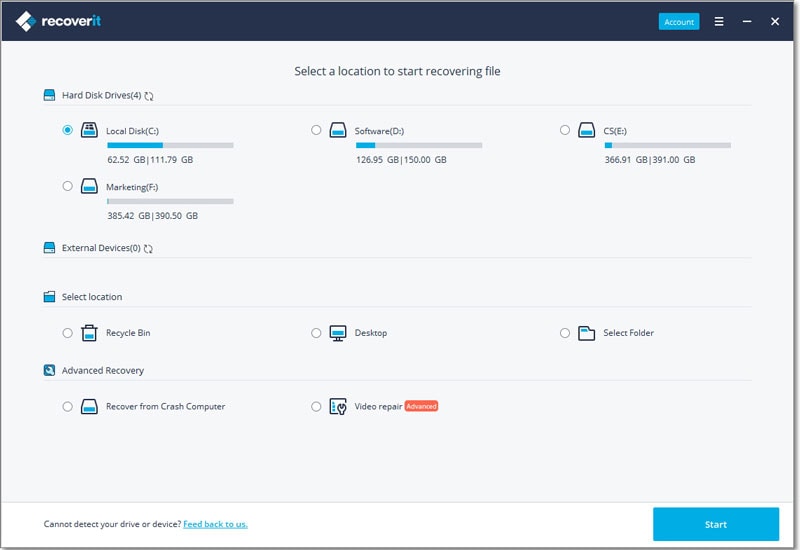
Step 2. After selecting your mode, a new window will come up on your screen with several options of hard drives available on your system. You can choose any of the drive where you know your JPEG image is lost and click "Start" button. The tool also gives you an option to "Enable Deep Scan". This type of scan is more time consuming than the normal scan but it is nore comprehensive and effective.

Step 3. When the scanning of the entire hard drive is completed, all the images and other such data will appear on your screen. You are free to restore as many files as you want. You can also use the Preview option to see your files before restoring them. This will make sure you only save the images that you were actually looking for. After making your selections in terms of images, click on "Recover" and all the images will be recovered again.

Always make sure to save the recovered files in some other external storage devices and not on the same device they were saved before. This will not only ensure the maximum safety of your restored data but will also overcome the possibility of overwritten data.


