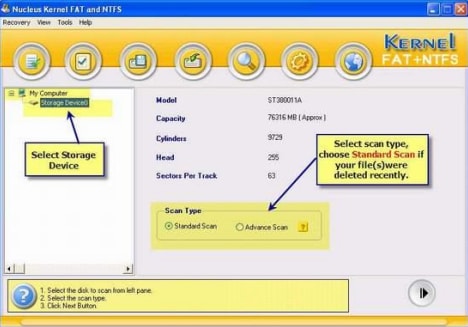
Kernel Data Recovery is one of the most popular data recovery programs in the market for Windows data recovery. This means that if you use Mac, you may need to look elsewhere to find a more suitable data recovery program for your Mac system. While there are many Kernel Data Recovery for Mac alternatives you can choose from, this article will show you the easiest and safest to use. By the time you finish reading this article, you will be ready to recover lost data on your Mac system regardless of how you lost the data in the first place.
Part 1. The Safest Kernel Data Recovery for Mac Alternative Software
If you are looking for a safe and effective way to recover missing data on your Mac system, there can only be one. This is iSkysoft Data Recovery for Mac. The main reason why we recommend this program is because it is so easy to use even if you have never used a data recovery program before. You will be able to recover all the missing data without putting any of the drives on your Mac at risk.
Key Features of Recoverit (IS):
- It is a powerful data recovery software which can recover photos, archive files, video, music, documents and email messages in the shortest time.

- It supports to preview scanned recoverable files before you go to recover them.
- Recoverit (IS) for Mac supports Mac system including macOS Sierra, Mac OS X 10.11 (El Capitan), 10.10 (Yosemite), 10.9, 10.8, 10.7, 10.6 and 10.5.
- You can choose the targeted drive to scan and recover lost data.
Step-by-step Guide to Use Kernel Data Recovery Alternative
Step 1 Launch the Kernel Data Recovery Mac Alternative
Try to download Recoverit (IS) for Mac from its official website, and install this program in another hard drive which doesn't contain your lost data. Then launch the software on your Mac computer, you will have the main interface as below. Choose the types of file which suit your need from the main interface, then click "Next" button on the bottom right corner of the window.

Step 2 Choose Recovery Mode
You will navigate to the next window from which you can choose the drive to search for lost files. Select the location and click "Start" button, the software will begin scanning process.

Step 3 Recover Lost Data
After the scanning process, it is time to recover your lost data with this Kernel Data Recovery for Mac alternative software. You can click the file to preview its content and quality at first before you retrieve it. Then click the "Recover" button to complete the data recovery.

Part 2. Troubleshooting on Kernel Data Recovery
The following are some of the most common problems you are likely to experience when using Kernel Data Recovery and how to fix them.
1. What to do if you've lost all your partitions
Since the program mostly works with partitions, users have been confused on what to do if they've lost all their partitions and can therefore not select a partition for the program to recover. If this is the problem you are experience, the solution is to simply select the entire drive and then choose the "Advanced" scanning mode to see of you are able to recover any data at all from the damaged partitions.

2. Scanning is taking too long
There are some users who have complained that the scanning process is taking too long. In this case it may be that the drive you selected for scanning contains too many folders because Kernel data recovery says it takes no more than 40 minutes to perform a full scan.
If it takes more than 40 minutes, you might want to stop the current scanning process and start all over again. Also, the advanced scanning mode can significantly increase the time it takes to scan a drive so unless it is necessary, use the standard scanning mode.


