Microsoft as one of the premier operating systems is a great solution for data processing. Whether you are creating presentations using PowerPoint or Word documents, Microsoft provides you with the tools to produce the best. But sometimes you can be working on one of these documents only to lose some of the data (text and images). This data loss occurs a lot more often than we think and for varied reasons. You could lose data through accidental data deletion, unexpected power outages, software crashes and even improper operations. The good news is that Microsoft does give you a way to do Microsoft file recovery. To be more specific Microsoft does give you a way to recover missing text. You can get back all the text from the document using this very simple feature. We are going to show you how, in the course of this article as well as provide you with a more comprehensive data recovery solution that can be used to recover more than just text from a document.
Part 1: How to Recover Microsoft File Using "Recover Text from Any File" Converter
The "Recover Text from Any File" converter is a Microsoft feature that allows users to extract the text from any file even if the file is not a Word document. It is a good way to recover text from any document. Here's how to use the feature.
Step-by-Step Guide to Recover Microsoft File
To Open a Word Document
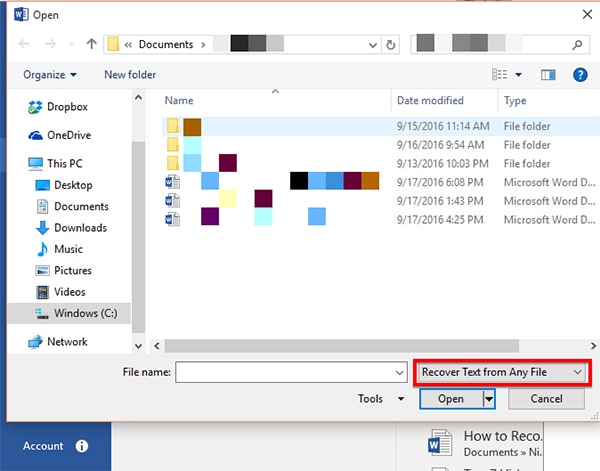
Step 1. Begin by launching Microsoft Word and in the "File" Menu select "Open" and in the "Files of Type" box select "Recover Text from any File".

Step 2. Select the document you want to recover text from and click "Open".
To Open a Non-Word File
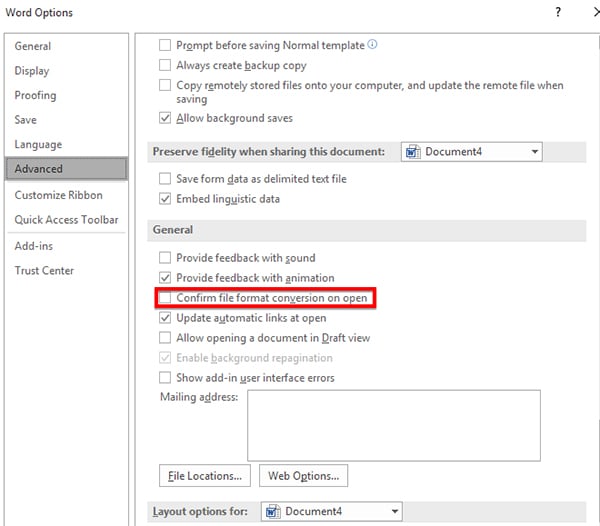
Step 1. Again begin by opening Word and then click "File > Options" or if you are using Word 2007, "Microsoft Office Button > Word Options". Click on the Advanced tab and select "Confirm File Format conversion on Open" and check the box under General and click "OK".

Step 2. Now click on "File > Open" and in the "Files of type" box click on "Recover Text from Any File". Select the file you want to open and click "Open".
As effective as this Microsoft feature can be in the recovery of text data, there are a few shortcomings. They include the following:
- Document formatting as well as anything that is not formatted as text will be lost.
- Objects such as photos, graphics and drawn objects will also be lost since they can't be converted.
Please note that when you change the selection in the "Files of Type" to "Recover Text from any File", this may become the default setting the next time you open a document. It is therefore a good idea to reset this setting as soon as you are done with this process to avoid future problems.
Part 2: The Best Solution for Microsoft File Recovery
While the "Recover Text from any File" converter might be a good solution under certain circumstances, you may need to invest in a good data recovery program if you want to recover all aspects of your document. That data recovery program is iSkysoft Data Recovery for Mac (or iSkysoft Data Recovery for Windows) This program is the best because it will recover all aspects of any document in a few simple steps and in the shortest time possible. This ease of use makes it the ideal program to help you get your data back.
Key Features of Recoverit (IS):
- The program is very safe to use. None of the data on our drives will be at risk of loss or damage if you install and use this program.

- It comes with a preview features that allows users to see the files they are recovering to make sure they recover the file they need.
- It is also useful when recovering data that has been lost due to accidental deletion, virus infection, unexpected power outages, software crashes and even improper operations.
- The program's features are highly specialized and all of them work together to help you recover all of your deleted data in the shortest time possible and in the original condition.
Step-by-Step Guide to Recover Microsoft File
Step 1. Download and install Recoverit (IS) for Mac to your Mac. It is very important that you install the program on a separate drive other than the one containing the missing data. This will present the missing data will be overwritten. If the data is overwritten it will be almost impossible to recover with any data recovery tool. Once the program has been correctly installed on your Mac, launch it and from the main window, select "Document" option and click "Next" button.

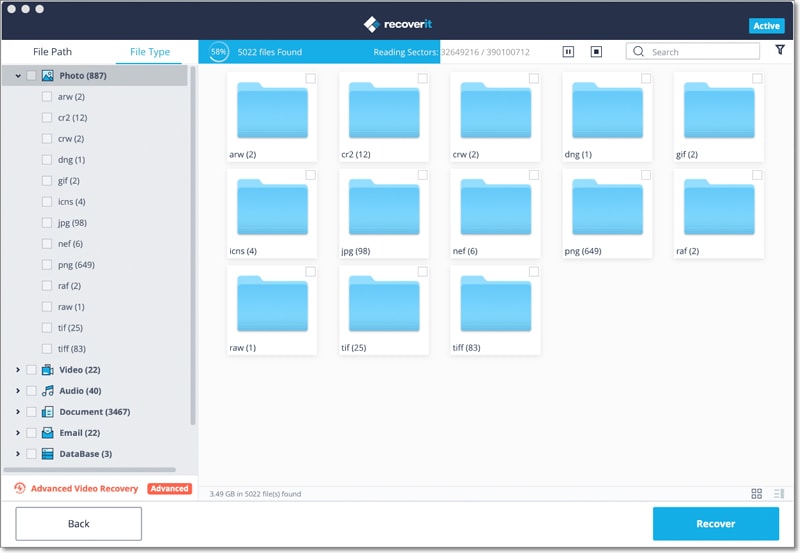
Step 2. Now you will see the partitions on your Mac. Select a partition and then click on "Start" to begin scanning process.

Step 3. When it is complete, check the files you want and click the "Recover" button to save them to another drive on your Mac. Once recovery is complete, save all of the recovered files on a separate drive or if you can on an external drive. This is to avoid losing the data again and having to go through this process in the near future.


