Contents
- 1.1 Print iPhone to Network Printer
- 1.2 Print from iPhone without AirPrint
- 1.3 Google Cloud Print iPhone
- 1.4 iPhone Printer App
Is there any way to help print documents from iPhone SE?
iPhone SE, the new breed coming from the Apple family, is surely going to capture the attention of people across the globe. Given the recent upgrades to the iOS, you can expect a lot from the upcoming phone from Apple. You can easily print documents directly from your iPhone. Yes, you heard it right. You can print all your photos, documents, emails, and other files with the help of AirPrint, recovery tools, or third-party applications that allow you to send a printing job directly to a printer.
Most Pracitcal Tool to Print Documents from iPhone
When it comes to printing documents from iPhone SE/6s(Plus)/6(Plus)/5s/5c/5/4s/4/3GS, you can't miss iSkysoft iPhone Data Recovery, which provides several ways to help print iPhone documents.
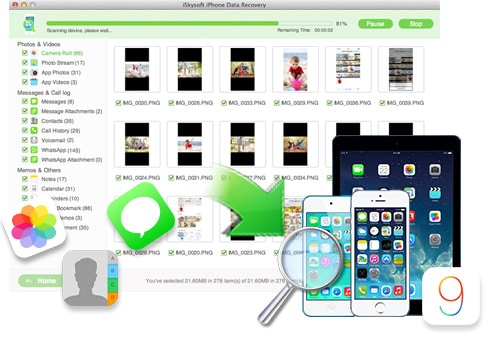
Key Features of iSkysoft iPhone Data Recovery
- It supports to directly print documents from iPhone via local printer. And it helps extract iPhone documents to Mac/PC, so that you can freely print them whenever you want.
- Recover, print and extract data from iPhone device, iTunes or iCloud backup.
- Shows preview of the extracted data, making it easy to select only those files that are useful for printing.
- Selective recovery option allows you to select only those needed files rather than downloading the entire backup.
- Allows you to extract and print both existing and lost data.
- Quick scan technology scans the device thoroughly and deeply for the selected file format.
Step-by-step Guide to Print Documents from iPhone SE/6s(Plus)/6(Plus)/5s/5c/5/4s/4/3GS
As I've mentioned before, iSkysoft iPhone Data Recovery allows you to directly print documents via printer. And it also helps print documents after exporting from iPhone to your Mac or Windows PC. Now check here to learn detailed guide.
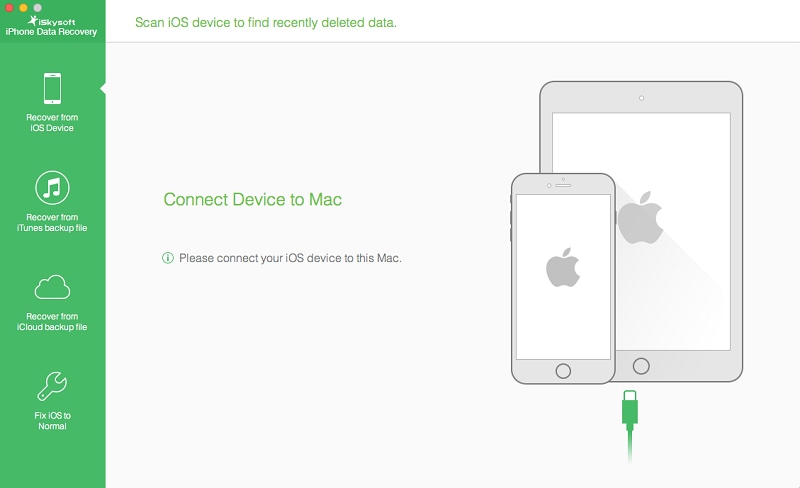
Step 1. Connect iPhone to Mac
To start with, download the program and launch it. Connect your iPhone to Mac, then the software will detect your device soon. After that, click "Start Scan" to let this tool scan the documents on your iPhone.
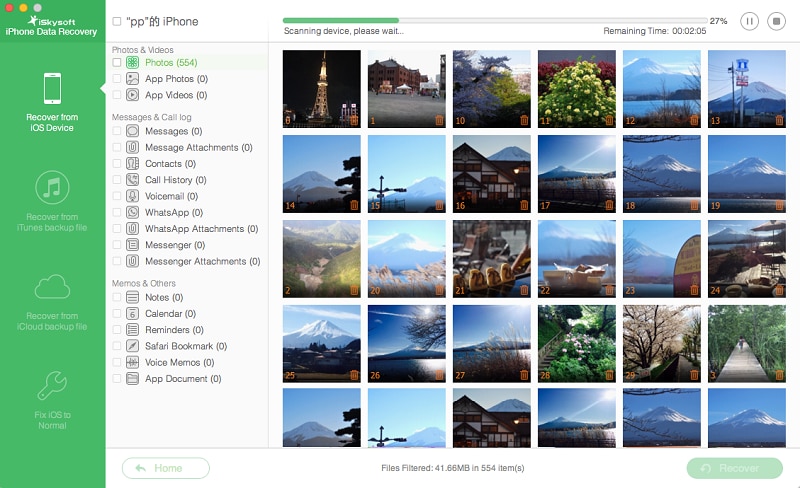
Step 2. Scan iPhone Documents
It may take a few time to scan your documents. By the way, you can choose to scan documents only, which would reduce the scanning process. After that, you can get all lost and existing files listed on the main interface.
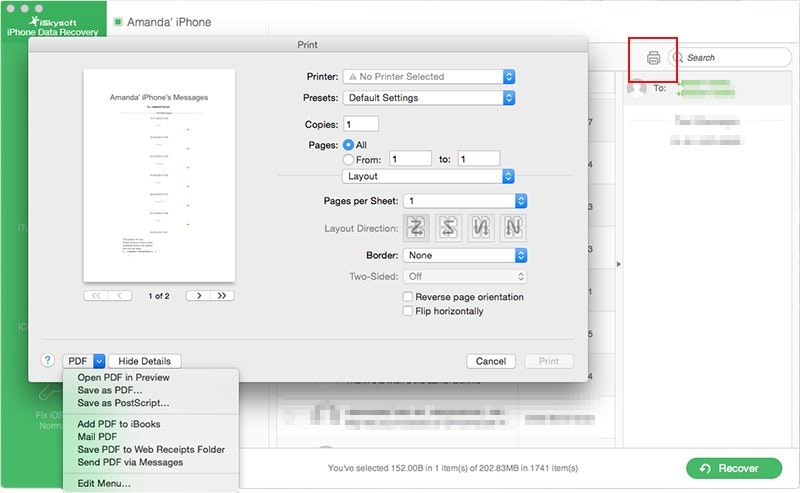
Step 3. Print iPhone Documents
Now you can select the documents you want to print. After marking them, please click the "Printer" icon on the menu. You can get a pop-up window immediately. Then you can click the "Print" button to print your documents via the printer you have connected with Mac.
Well, in order to print documents whenever you want, you can extract them to your Mac for further usages. Here you need to click the "Recover" button after you select the documents you want to print. Then click "Recover to Mac" to save all documents to Mac without any loss. After that, you will be able to print iPhone documents in any printer as neede.
Aside from the method I've introduced above, you can get two different ways to print iPhone documents using iSkysoft iPhone Data Recovery in the following article. And the two methods are for users who have kept a backup of documents on iCloud or iTunes. Keep reading to learn more.
Alternative Way One: How to Print iPhone Documents as Needed
If the documents that you wish to print are in your iTunes backup then you can follow these simple steps to extract the data to your computer. Note that you do not have to connect your iPhone to your system.
Step 1. Run the program
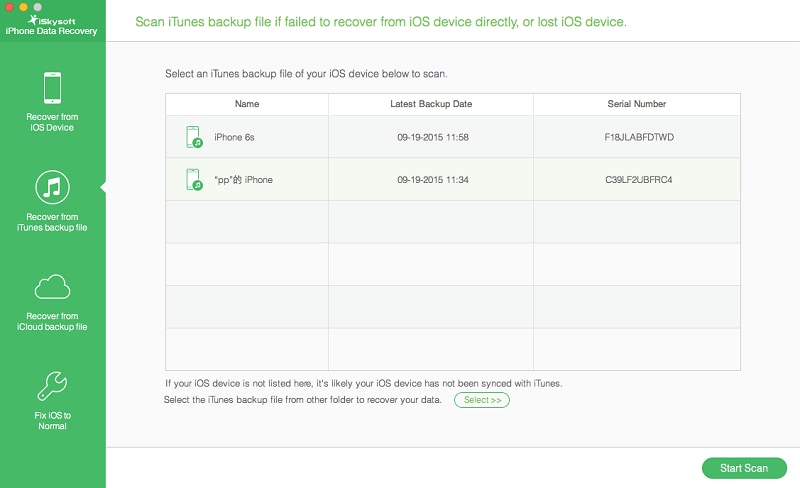
From the main window screen, select “Recover from iTunes backup file” option. The option will allow the program to scan your computer for all the available iTunes Backup files. It will display the files once it completes the scan. It will list the files are in chronological order. You can then select the preferred backup file from which you wish to recover the documents for printing. Once done, click the “Start Scan” button. It will allow the program to extract the data from that particular backup file.
Step 2. View iPhone documents on iTunes
As the program completes extracting the backup file, it will display all the recoverable and existing files according to the file format mentioned. You can then mark the necessary files and click “Recover” button.
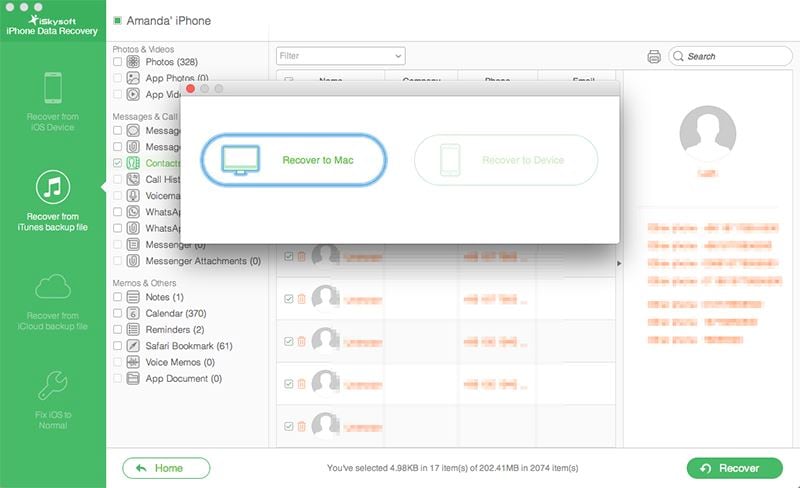
Once you select the recover button, the program will ask you to select a folder on the computer to save the extracted files. The time taken by the program in extracting the data depends on the number of files selected from the backup file. Therefore, it is important that you wait until the process is complete.
Once done, you can browse the folder to view the documents that you extracted from the backup file. You can then open the files that you wish to present.
If you want to directly print documents with the iTunes backup, please hit the "Printer" icon and then click "Print".

Alternative Way Two: How to Print Documents from iPhone with Ease
If you have your content backed up in iCloud, you can then extract the content with iSkysoft iPhone Data Recovery, so that you can recover only the needed files.
Step 1. Choose recovery mode
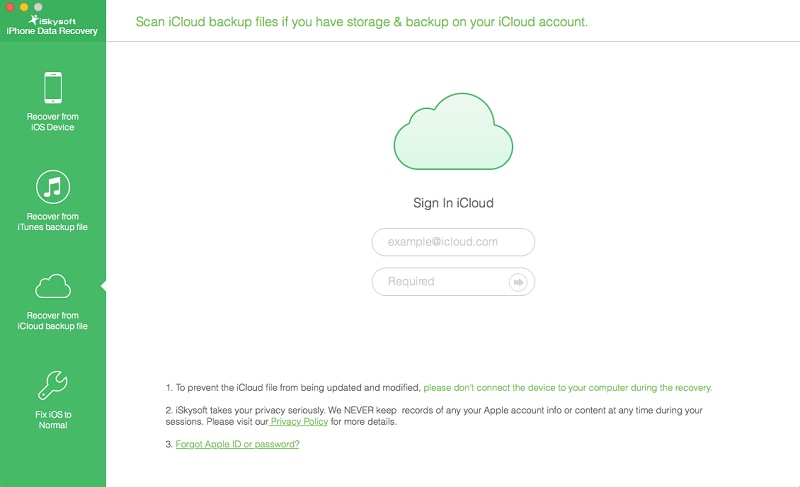
From the interface of the software, select “Recover from iCloud backup file” option. You will then have to sign into your iCloud account to allow the application to scan for the available backup files. Ensure that the Internet connection is stable throughout the process.
Step 2. Download iCloud backup data
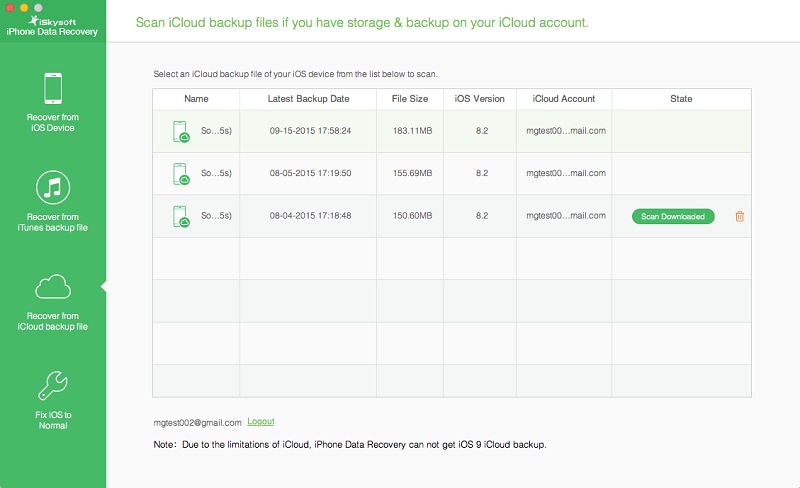
From the displayed backup files, choose the one that you would like to access and click “Download”. Wait until the process is complete. After the conclusion of the download, you can extract the content. Click the “Scan Downloaded” button to retrieve the content quickly.
Step 3. Extract documents from iCloud backup
Once extraction is complete, you can preview the content of the backup file in detail. You can pick the files that you wish to recover by clicking “Recover” button and saving them to your computer.
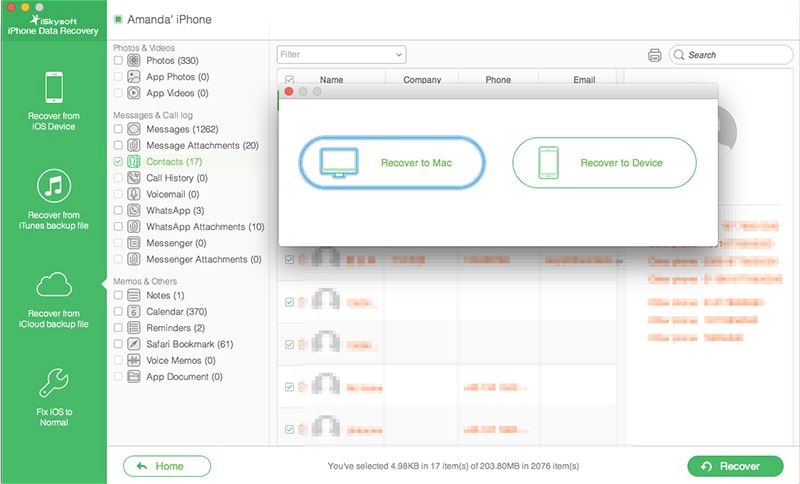
Congratulations! You have successfully extracted the needed is from your iPhone, which you can now print.
Step 4. Print documents from iCloud backup (Optional)
You can directly print documents from iCloud backup. After marking all documents you want to print, click the "Printer" icon on the interface. Then you can make settings for printing them. At last, hit the "Print" button to print iPhone documents via your printer.


