Imagine for a moment that you have been working on a 10-page report that is an insane number of words on Microsoft Word. Just when you are about to begin writing the conclusion, something happens and all your 10 pages just vanish. Naturally, you would be panic, an understandable reaction especially with a deadline looming. But before go crazy, please understand that this is quite a common occurrence for users of Microsoft Word. It can happen for a number of reasons. For instance, a document may be lost if an error with the system occurs, forcing Word to quit. It can also happen when there is a power interruption while editing the document or you accidentally close the file without saving the changes. Fortunately, there are solutions to recover lost word document and this article will provide you with a complete list of all of them.
Part 1: The Best Way to Recover Lost Word Document
One of your best bets when it comes to recovering deleted data is to use a data recovery tool. It may be difficult for you to find the right tool to recover your word documents because of the sheer number of different data recovery tools out there. This is why we have saved you a lot of time and effort you would have otherwise spent testing many different tools to present you with the best tool in the business. This tool is none other than iSkysoft Data Recovery for Mac (or iSkysoft Data Recovery for Windows) and it's features work together to make it very easy for you to recover your lost Word Document. With Recoverit (IS) you can get your Word Document in just a few minutes as we shall see shortly.
Key Features of Recoverit (IS):

- It is very easy to use. As we shall see in a tutorial below, data recovery is very easy and quick. You should have your lost Word Document in no time at all.
- The program works by scanning the drive on your Mac and PC and then allowing you to select the files you want for recovery.
- Aside from just Word documents, Recoverit (IS) is effective in the recovery of all other file types, a worthy investment.
- It is compatible with all versions of computer including macOS Sierra and Windows 10.
Step-by-Step Guide to Recover Lost Word Document
Follow these very simple steps to recover your lost Word Document using Recoverit (IS) for Mac.
Step 1. Download the program in to your Mac. It is very important that you install the program in a different folder other than the one containing the data you lost. This will reduce the chance that the document may be overwritten and hence unrecoverable. Complete the steps on the installation Wizard and then launch the program. From the 6 file types options presented in the main interface select "Document" tab and click "Next" button.

Step 2. You should see the following window. From here, select the drive that likely contains the lost Word document and then click on "Start" to begin the scanning process.

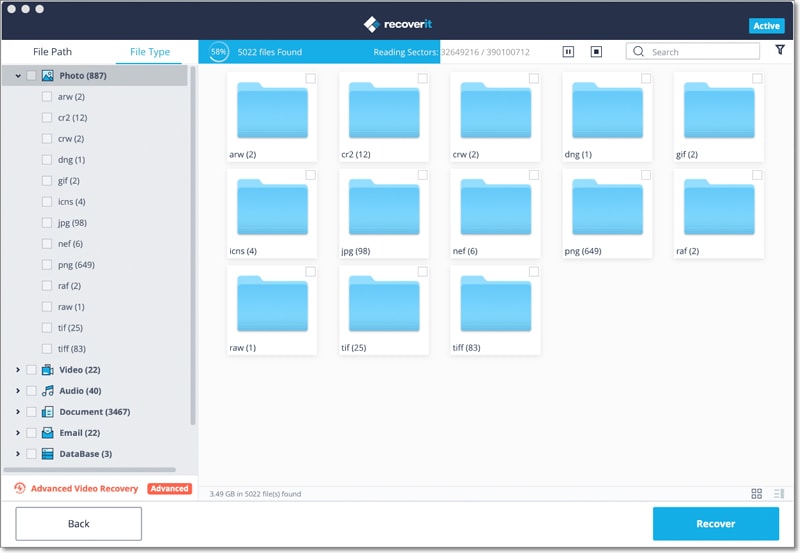
Step 3. After the scan is complete, you should see all of the files found in that drive. Here, you can choose to preview the different files that have been found before recovery. Select the files you would like to recover (in this case the missing Word document) and then click on "Recover" to save them. It is a good idea to save a different drive location to save the recovered file. In fact, it is recommended that you save the file on an external drive to prevent any further instances of data loss.
Part 2: Other 7 Ways to Recover a Lost Word Document
If you would rather not use a data recovery tool, there are several other procedures within word itself that you can try. The following are some of them. We cannot guarantee that they will work but they are definitely worth a try.
Method 1. Try Searching for the Original Document
This will only work if you had actually saved the word document on your computer before it disappeared. If you had assigned the document a filename and a file location within your Windows computer, it may be entirely possible that you just misplaced the file and now can’t find it. it therefore makes a lot of sense to try looking for the file. Follow these simple steps to do that.
Step 1. Click the "Start" Menu on your computer. If you are using Windows 10, you should click on the search icon (magnifying glass) at the bottom-left corner of the screen, next to the Windows icon. In the search box that appears, type in the filename for the document you are trying to find and then press "Enter" on the keyboard.
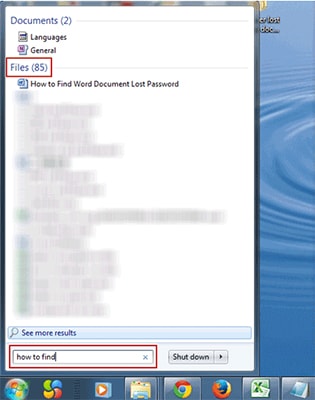
Step 2. You will see a list of files with that filename in them displayed in a list. Double click on the file if you see it. if you don't, click "Start" again or the "Search" if you are using Windows 10 and this time type in ".docx" and then press "Enter".
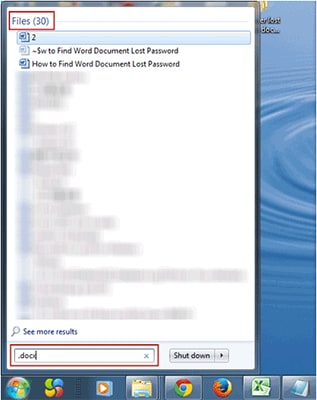
If you stil cant see the filename in the list of search results, try our second option.
Method 2. Restart Word to Look for the Missing Document
Again, this will only work if you had saved the document under a specified filename. If you hadn't we're sorry to say that you may never get the file back. Here's what to do.
Step 1. Here. We are going to end all Word related processes in Windows Task Manager. To open Windows Task Manager, Press CTRL + ALT+ Delete on the Keyboard, select it and open Task Manager.
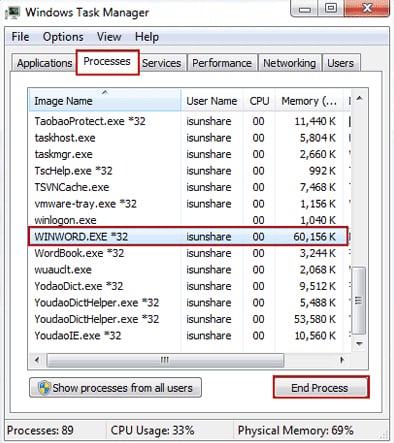
Select the "Processes" tab in the Task Manager Window and click on "Winword.exe" or "Microsoft Word" and then clcik on "End Process". Repeat the same process until you have quit all of Winwoed.exe and Word processes that are active. Once you've got all of them, close the task manager.
Step 2. Now restart Microsoft Word and then see if the missing document appears in the "Document Recovery" panel. By default, Windows will always search for "Autorecover" files each time it is restarted.
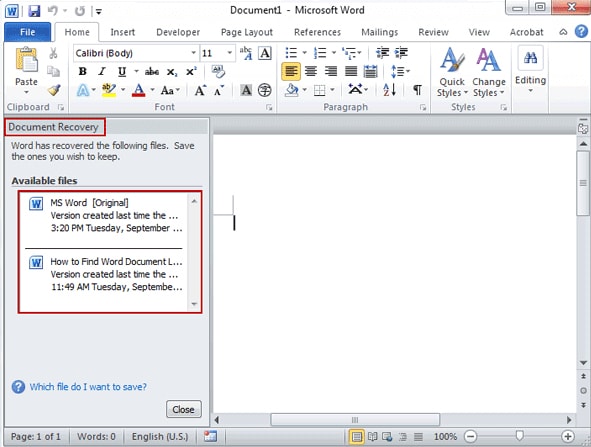
Now simply, double click on the "Autorecovery files" one by one. If you find the missing file, save it immediately.
Method 3. Search for Autorecover Files
If that doeant work, you may want to try manually searching for the autorecover files. Follow these versy simpe steps to find them.
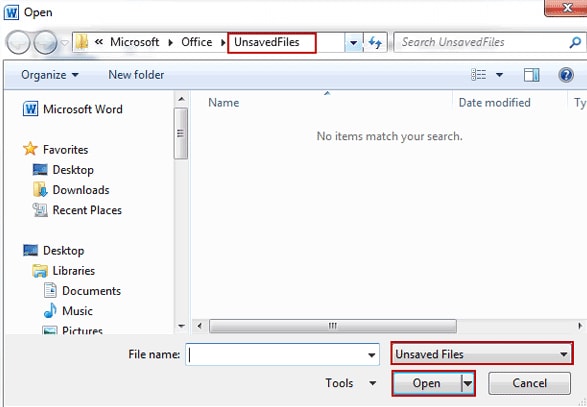
Step 1. Open Microsoft Word and on the File Menu and then click "Recent". Next, click "Recover Unsaved Documents".
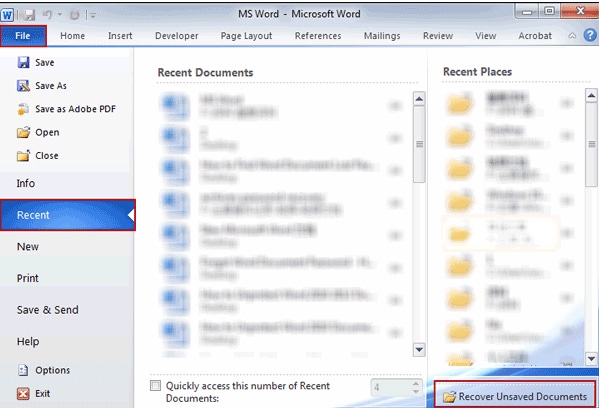
Step 2. If you see the document you are looking for, double click on it to open it and then save it immediately.
Method 4. Search for Word Backup Files to Reciver Documents
If you are unable to find the file in any of the ways described above, maybe it is in one of your backup files. Here's how to find out.
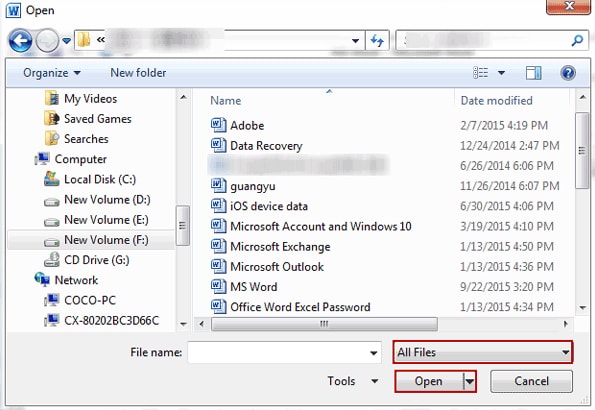
Step 1. Start Microsoft Word and then click on the File Menu. Select "Open" and then select the folder in whch you had saved the missing file.
Step 2. In the Types of file click "All Files" The backup file will be named "Backup of (filename)". If it is there Doubleclick on it to open the document and then save it afresh.
Method 5. Search for Temporary Files to Look for Lost Word Document
Now we're getting a little bit desperate and it is time to take drastic measures. If so far, you have been unable to find the file so far after trying everything. You might want to see if any of the tempraty files are your missing document. Follow these simple steps to do it.
Step 1. Just like we did in the first option above, click on "start" and perform a search, except this time search for Temporary files.
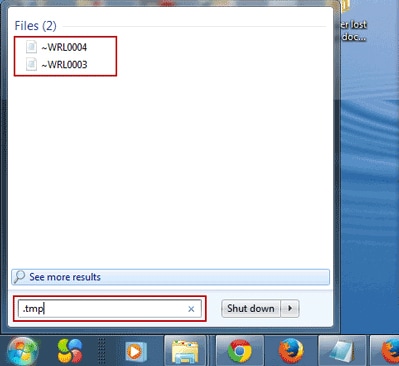
Step 2. Whatever temporaray files you find during your search, save them to a location on one of your drives.
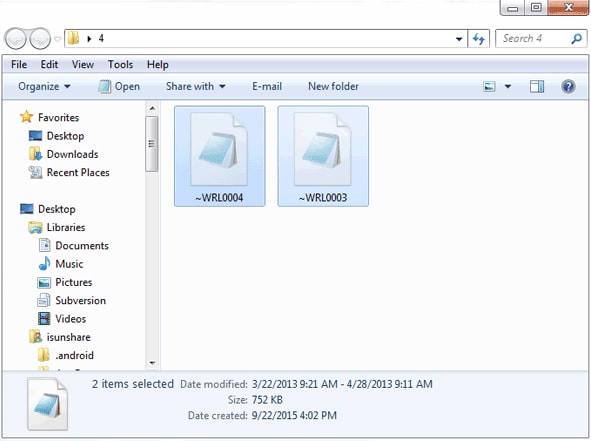
Step 3. Now Launch Microsoft Word on your computer and then click on the File Menu. Select the "Open" option. Browse to gthe location where you saved the temporary files you found during your search. Just ensure that the "All Files" option is selected or the temporary files will not be displayed.
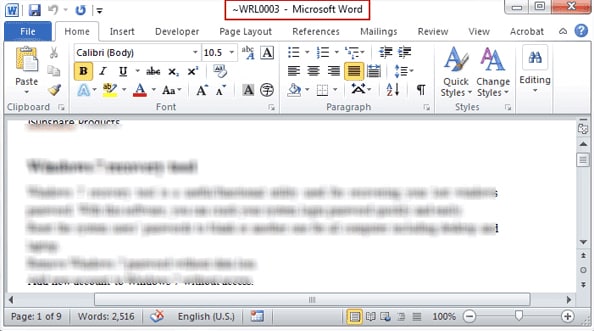
Try opening all of the files one by one. If any of them is your missign Word document, it should open withing word. If it does, save it in a different location immediately.
Method 6. Search "~" files to find the Lost Document
If you can't find the file in the temporary files or if all the temporary files are not word documents, it may be likely that the temporary filenames begin with the tilde (~) character. It therefore might make more sense and make it easier to find them if you searched for filenames that begin with this this character instead. Here's how to do it.
Step 1. Again, click on the "Start Menu" and then select "Search". Instead of typing in a filename, this time type in the tilde character (~). This should search for the temporary files that begin with this character.
Step 2. Once you have located them, go ahead and save them to another location on your computer, just as we did in Method 5 above. Open Word and then click on the File Menu and select "Open". Proceed to browse for the temporary files and open them in Word. Remember to select "All Files" to ensure that the temporary files are displayed.
Step 3. If you are able to open the temporary files in Word and one of them is the missing document, save it immediately.
Method 7. Check Your Recycle Bin
This will only work if you accidentally deleted the file yourself. In hindsight it should have been the very first option to try because all deleted files often end up in the Recycle bin. But we're desperate, so let's try it.
On the computer's desktop, double click on the Recycle Bin icon. This will open a window with all of the deleted files displayed. Look through the files listed and if you are lucky enough to find your Word document, right-click on it and then select "Restore".
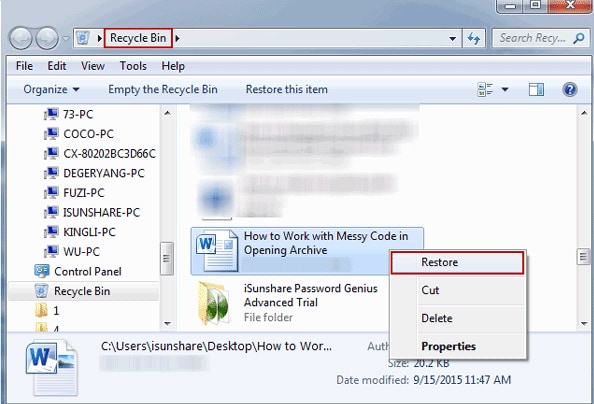
The file will be sent to the original folder you saved it in. if you are not exactly sure where that is, you can simply perform a search for the document like we did in method 1 above.
So what if you do all of the above and you are still unable to find the document? In this case it might mean that you accidentally deleted the file and then emptied the recycle bin. Under normal circumstances, this usually means you will never be able to find the document. It might be time to start thinking about recreating the document.
But wait! There is hope for you yet. As a matter of fact, data that has been deleted from the computer and even cleared from the recycle bin doesn't really go away. Only the file-marker has been deleted. The file itself is still available on the computer and with the right data recovery tool, you can get the document back.
So yes! It is time to get Recoverit (IS). But it is very important that you resist from saving any new files on the drive until you have used the data recovery tool to restore it. This way you will significantly reduce the chance that the file will be overwritten before you can get to it.


