If you have a Sony Xperia phone, you may have a ton of photos stored in it. There is a lot of space for media content, but have you ever run into such a situation wherein you end up losing photos. In such cases, you may be wondering the apt ways by which you can recover photos from Sony Xperia. Here in this article, we will be listing the key details for you.
- Part 1. Recover Photo from Sony Xperia Using Recoverit
- Part 2. How to Recover Photos from Sony Xperia by Using iSlysoft Toolbox
- Part 3. 5 Tips on How to Avoid Image Data Loss on Sony Xperia
Part 1. How to Recover Photos from Sony Xperia by Using Recoverit

The Recoverit for Mac (or Recoverit for Windows) is one of the top software that comes packed with too many powerful features. It offers different ways to recover your lost data and you can also restore selective content as well.
Why Choose This Software to Recover Photos from Sony Xperia:
- It offers no risk deep scan for the sake of raw data recovery.
- It has the option of previewing the content before recovering them.
- The software is compatible with the latest Mac and Windows system.
- One can recover data even because of emptied recycle bin or formatting of storage device too.
Steps to Recover Deleted Photos from Sony Xperia
Now that you know the key features, the next step is to know the methods by which you can use this software and recover the lost photos. Let us see what you need to do.
The first thing which you need to know is that you should connect your phone as an external SD device to you can take out the SD card and connect it separately. This is how the software will work.
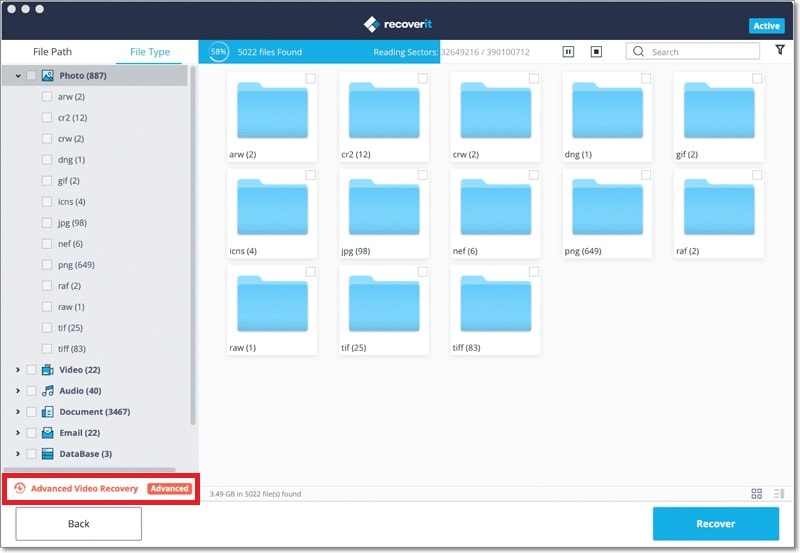
Step 1. Download Recoverit on your system. Connect the phone as a SD card or the memory card separately to the same system. Now, in the main window, choose "Photos" as the file type which you want to recover. Then click on the "Next" button.
Step 2. Now, you will see a list of devices. Choose the memory card from which you want to restore content. When you are done selecting, click on "Start" button present at the lower corner.

Step 3. The software will scan the memory card and then show you the results. Review them and select the ones you want to save. Then click on "Recover" button.

You can choose to opt for "Deep scan" if all your content isn't displayed. It will take more time but give more thorough results.
Part 2. How to Recover Photos from Sony Xperia by Using iSlysoft Toolbox
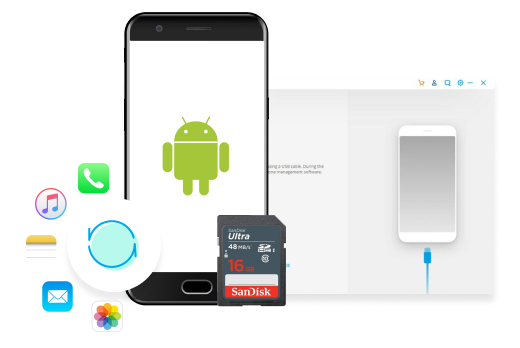
If you want recover photos that are stored in the internal storage of your phone, we have another tool for you which can come to your rescue. The tool is iSkySoft toolbox- Android Data Recovery. This tool is packed with the best features and comes with the kind of interface which is really easy to use.
Why Choose This Software to Recover Photos from Sony Xperia:
- You can recover files that are lost or deleted on any Android phone.
- It offers the highest recovery rate in the industry.
- You can recover multiple file types using this tool.
- This is compatible with as many as 6,000 Android devices.
- It handles multiple data loss scenarios.
Steps to Recover Deleted Photos from Sony Xperia
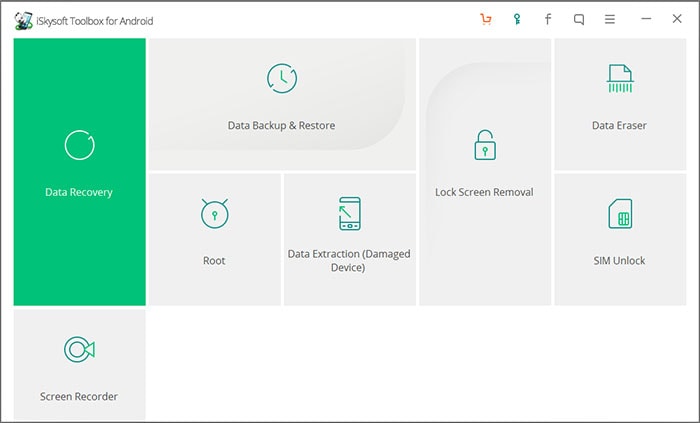
Step 1. Download iSkySoft toolbox on your system and install it. Connect your android phone to the same system. Now, run the tool and then click on "Data Recovery" menu.
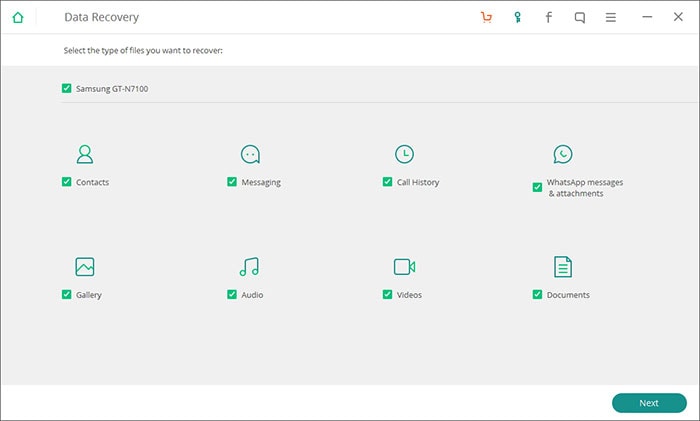
Step 2. You need to enable USB debugging on your phone firstly. Once you have done this, you then need to select "Photos" from the files types you want to recover. Then click on "Next" button.
Step 3. In the pop up box, choose the scan mode. You can choose standard mode or advanced mode. Advanced mode will do a more thorough search but entail longer time.
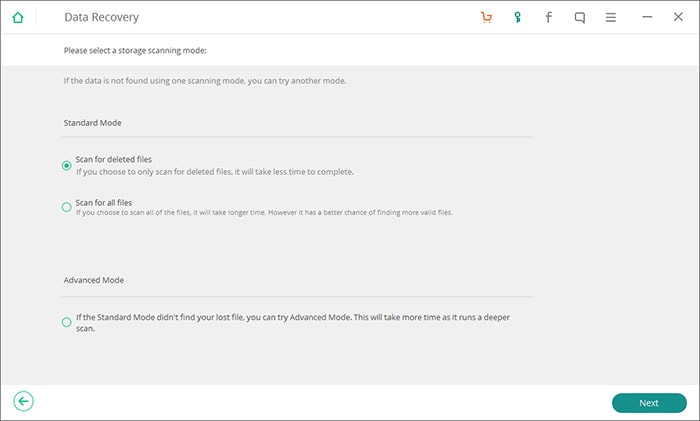
Step 4. When the scan is done, you will see the results. Preview them and choose the ones you want to select. Click on "Recover" and then store them at the desired location.

Part 3. 2 Tips on How to Avoid Image Data Loss on Sony Xperia
While there are software available which can help you restore the lost content, your key aim should be to try and avoid losing the photos. So, here are 2 ways using which you can avoid the issue of data loss.
1. Create a Google Backup
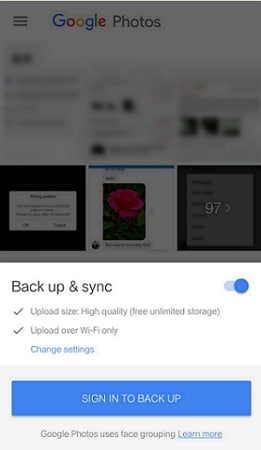
You can sync the content to your Google account. This also allows you to save your storage space too because you can delete the content that has been backed up to your Google account. Here is how to do it.
• Download the Google photos app on your android phone and launch it.
• You can choose how to upload the file and file size as well.
• Sign in to your Google account and create a backup.
2. Backup Data with Android Backup Restore
You can use tools like Android backup restore which helps you back up the data which can be restored later when you want.
• Plug your computer to the system which has the software installed.
• Choose "Data Backup & Restore" option and then click on "Backup".
• Now, you can select the data type you want to backup and then click on "Backup" button.
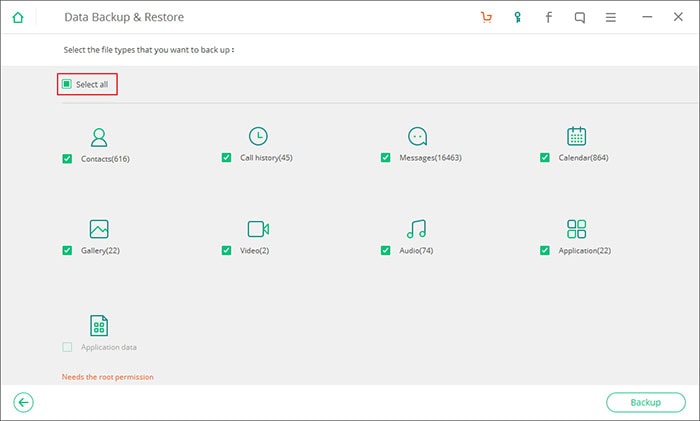
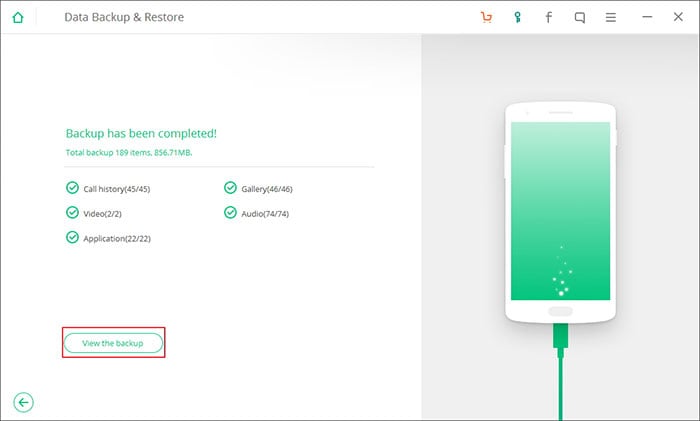
• When the backup is done, save it on the computer.
With these steps, you will be able to save your photos from being lost, but, in the odd case that you lose them, choose any of the above tool and fix your problem and get your lost content back.


