Spinrite Data Recovery is capable of recovering data from a damaged drive. It contains an extensive arsenal of recovery techniques that helps the program pullback majority of the content from a disk. Recovering data has become an important task in the last few years. Given that primary hard disks have a lower shelf life, they give up performing without notice. Users can notice this when they sense a reduction in the performance, loss of data, deletion of files even after saving them, and improper functioning of the operating system.
- Part 1. A Better Alternative Data Recovery Software for Mac and Windows
- Part 2. Troubleshooting on Spinrite Data Recovery
Part 1. The Best Spinrite Data Recovery Alternative Software for Mac and Windows

With the advancement in the field of software, we often look at programs that function automatically while leaving the basics to the user. In this case, Recoverit (IS) for Mac (or Recoverit (IS)) stand out, as it is the fastest, safest, and most convenient recovery program. The robust scanning and algorithms make sure that they do not leave behind any of the data. It is capable of collecting data from a damaged/corrupted disk, formatted disk/partition, and resized partition.
Why Choose This Alternative to Spinrite Data Recovery:
- Recovers everything from a Mac/Windows based hard drive
- Functions on Mac OS 10.5 and above, and Windows XP, 7, 8, 8.1, 10
- Identifies exFAT, FAT16, FAT32, NTFS, HFSX, and HFS+ file systems
- Allows saving of scan information and single click start and stop scan functionality
Step-by-Step Guide to Use Spinrite Data Recovery Alternative
Step 1. Launch Spinrite Data Recovery Alternative
Download and install Recoverit (IS) on your Mac. Upon starting the application, the product window appears with different file types exhibited on the screen. Choose the data types that you have lost and hope to recover with this software, and then click "Next".

Step 2. Connect Drive to Mac
The program will launch a new screen, where you will notice the partitions of the hard drive, along with any external drives connected to Mac. Choose the needed volume/partition for data recovery and press "Start".
Step 3. Complete Recovery Process
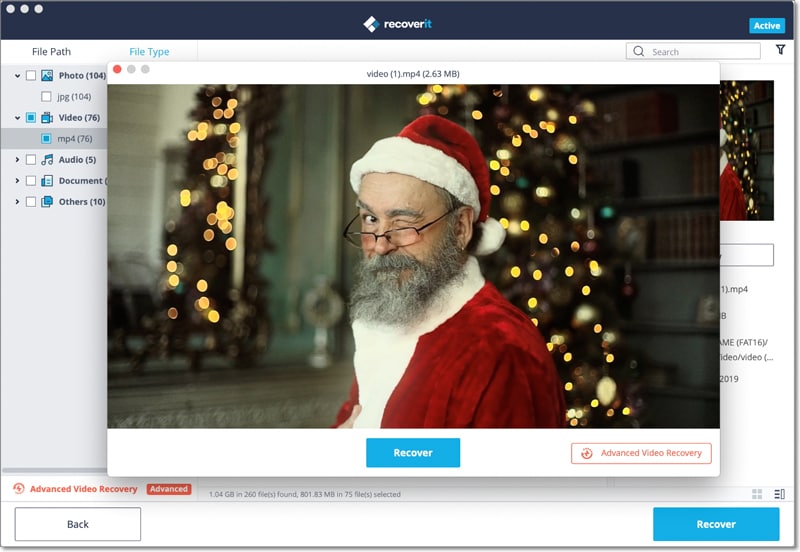
Upon completion of the scan, the application displays the recoverable files listed according to their file type and folders. You can preview the content in the same window by clicking a particular file. The preview screen supports images, documents, and parts of audio and video files. Begin marking the files for recovery using the provided checkboxes and press "Recover" from the top menu bar. A small window prompts you to choose the saving location. Opt for an external drive and click "OK" to begin the recovery process.

Note:
• Perform selective file search using the "Select file type" option. • Enable "Deep Scan" checkbox to obtain files from formatted or resized drives. • Save the scan information for future use or for continuing directly with the recovery process. • The file validity attribute collects information about good and bad sectors of a file. Based on it, the program will tell you whether it is easy to recover a file. It will help in pick up necessary files with good sectors for a quick recovery.

Part 2. Troubleshooting on Spinrite Data Recovery
Spinrite Data Recovery examines the defective drive thoroughly and disables the auto relocation feature, which ensures that the hard disk does not replace the defective sectors with spares. Due to this, it is possible for the software to study this sector and help to recover data as necessary.
Step-by-step Guide to Recover Data Using R-Studio Data Recovery
Step 1. Download the software from the website. The data recovery tool operates with hundred percent IBM-compatible PC, XT, AT, PS/1, and PS/2 personal systems with at least one diskette drive and DOS version 2.1 or later. The utility tool uses all the available system resources, and therefore, it is necessary to see that the system is free from terminate and stay resident programs. Running the system in the clean boot is important. You can create a clean boot diskette with the help of the following points.
• Type FORMAT A:/S and press ENTER in DOS command. Next, type SPINRITE and press ENTER. Next, type letter N and press ENTER. • Next, you have to copy device drivers. Type C:\CONFIG. SYS | MORE and press ENTER. If this system uses any third party hard disk partitioning device drivers, it is important to name the same in the clean boot diskette’s • CONFIG.SYS file. Create the CONFIG.SYS by typing COPY CON A:\CONFIG.SYS and press ENTER. Then, type the device driver name. For example, if the system uses disk manager partitioning software, then type DEVICE = DMDRVR.BIN and press ENTER. • Now press F6 key and press ENTER. The window will show ^Z displayed along with a message. Now, copy the file to the clean boot diskette. Type COPY C:\DMDRVR.BIN A: and press ENTER. Copy SPINRITE files by typing COPY B:\SPINRITE.EXE A: and press ENTER. • Reboot the system with clean boot diskette. Ensure that diskette is in drive and press the following keys in order – Ctrl > Alt > Del. Run SPINRITE by typing SPINRITE and press ENTER.
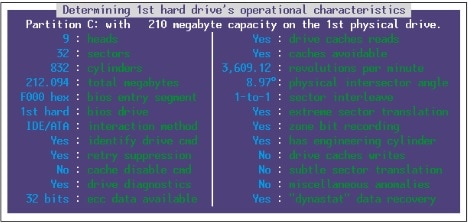
Step 2. In the next screen, choose "Begin SpinRite". Use the arrow keys to select the drives. It will show hard drive information.

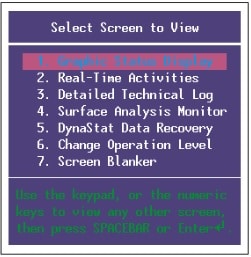
Step 3. SpinRite will ask you to plug a removable media and start its task. During operation, the software will display seven different screens without hampering the background recovery process.

Problems faced with SpinRite Data Recovery:
As we can see from the above-detailed description, the entire process is not convenient for a regular computer user. Additionally, the use of diskette drive and typing so many commands makes one exit the program right before the exact process begins. Another disadvantage is the failure to provide a preview of the content of the files along with the absence of selective file search. Only a technical person with sound knowledge of commands would be able to use it appropriately.


