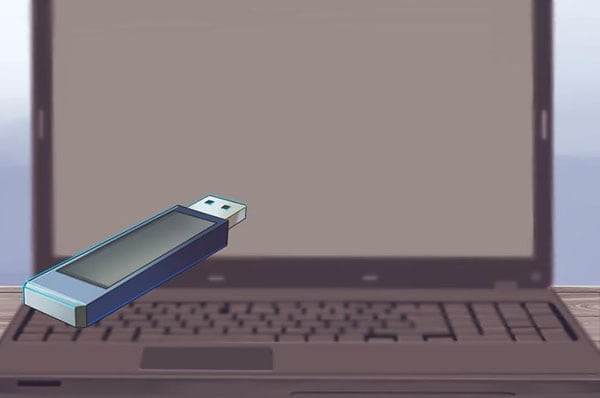
The availability of flash drive changed the way we carry data from one location to another. Many of us carry a flash drive that holds sensitive or confidential information. Although it is durable, the microelectronic device is susceptible to damage/failure and cause data loss. Common causes include virus attack, electrostatic discharge, accidental format flash drive, improper ejection of the drive from a computer, and the filesystem changed to RAW. Therefore, the thumb drive data recovery becomes a priority.
Part 1. How to Recover Data from Thumb Drive
Data recovery has become a priority with the advancement of technology and increase in the use of paperless transactions. In the nascent stage, recovering data require the help of data recovery specialists. However, the change in the software field led to the development of recovery programs that now effortlessly retrieve data with ease. With the cooperation of iSkysoft Data Recovery for Mac (or iSkysoft Data Recovery for Windows), you can do the needful in a painless way with complete safety.
It is a single stop solution for all your recovery requirements. The powerful algorithm and deep scan technology help in retrieval of accidentally deleted data, data from formatted hard disk/partition/thumb drive, and external memory devices. It recovers almost any file from a drive and supports the latest OS released by Mac.
Key Features of Recoverit (IS):
- NTFS, FAT16, FAT32, HSF+, and HFSX file system support
- Three-point recovery - scan, preview, and recover
- One-click pause and restart scanning process
- Distinguishes valid and invalid files and saves scanning information
Step-by-Step Guide to Recover Thumb Drive Data
Step 1 Launch Recoverit (IS)
Visit the iSkysoft website and download Mac version. Install it by dragging the executable file into the Applications folder. Start the program by clicking the icon on the desktop. You will notice the following interface of the program appearing on the screen. You have to select one or more types for the data you want to recover and click "Next" button later on. This program is capable of getting back deleted data from formatted/resized/corrupted thumb drive and hard disk.

Step 2 Choose the Thumb Drive
The program will open a new screen that will display the partitions of the hard disk within the computer and any other external memory devices connected to the Mac. Here, you have to select the connected thumb drive and click "Start" from the menu bar to start scanning the device. If the list is blank, click "Refresh" icon at the right side of "External Removable Device".

Step 3 Recover Lost Data from Thumb Drive
Once the scan is complete, Recoverit (IS) will display all the recoverable data in a list and according to the file type. Here, you can see the content of a file in the preview screen before recovery. You can use this procedure to select confidential, sensitive, and important data from the thumb drive. Make a selection of the files, and press "Recover" from the menu bar. A new dialogue box appears asking you to choose the saving destination. Navigate to an external folder or a folder on the computer desk and click "OK" to begin recovery.

Part 2. 4 Methods You Can Try If You Found Thumb Drive Damaged
Method 1: Preparing Physically Damaged Thumb Drive
Step 1. Decide if the files on the damaged thumb drive are important. If important, it is preferable to find a data recovery company. If you decide to take a risk, you require flux, solder, old USB cable, wire cutter, small flathead screwdriver, and magnifying glass.
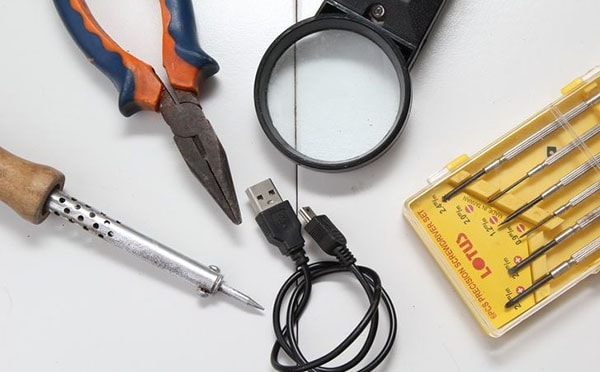
Step 2. Remove outer casing using screwdriver. Use a magnifying glass to inspect the PCB board. If there is damage to the PCB board, you need professional assistance. If there is no damage, then you have to solder the pads. Turn the device backside and place it on a hard surface.
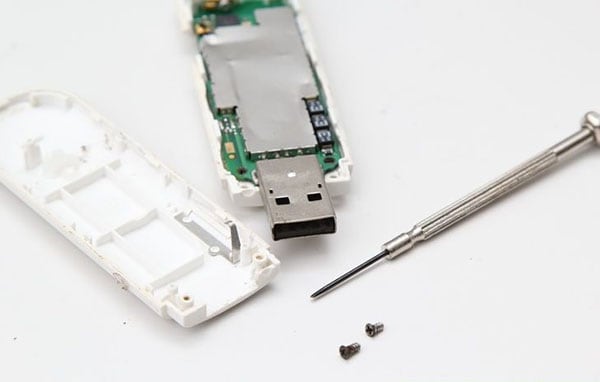
Step 3. Use the wire cutter and cut one end of the old USB cable. Expose the four wires within the cable and use them to solder with the thumb drive. Cut the female end of the cable. Follow the order from left to right – black, green, white, and red. Be careful with the order. Any wrong soldering will end up in a disaster.
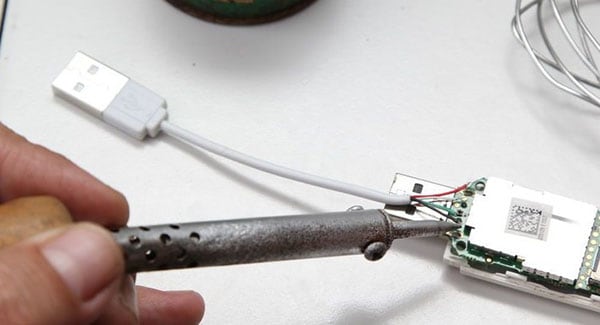
Step 4. Plug the device to a computer and see if it functions. If yes, then quickly copy the content to your computer and discard the thumb drive. If there is no response, then there exists an underlying problem. You can prefer to send it to a professional or totally forget about the drive.
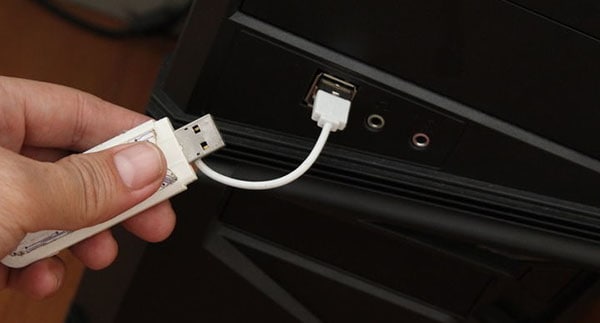
Method 2: Scanning for Problems
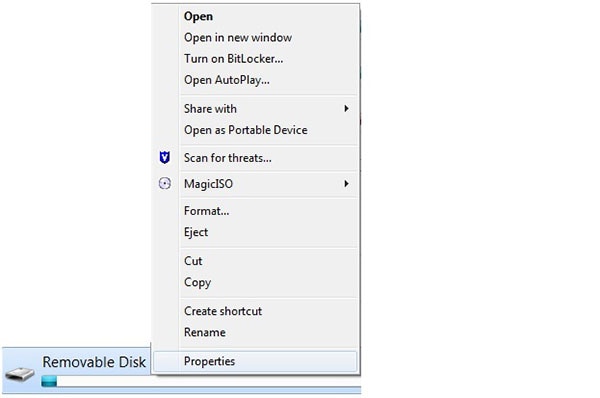
Step 1. Insert the thumb drive to a USB port on the computer. Choose Properties option after right clicking the removable disk icon from My Computer explorer window.
Step 2. Choose Tools tab. Press Click Now button. Tick "Automatically fix file system errors" and "Scan for and attempt recovery of bad sectors" checkboxes.
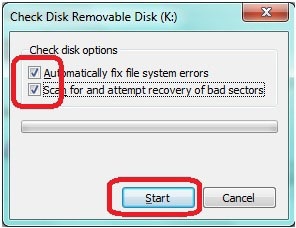
Step 3. Close the operation after the action completes the process of scanning the drive.

Method 3: Reformatting the Drive
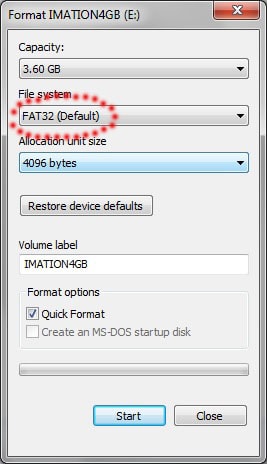
Step 1. Plug the thumb drive into the computer. Choose Format option. Select Format with and opt for NTFS rather than FAT32.
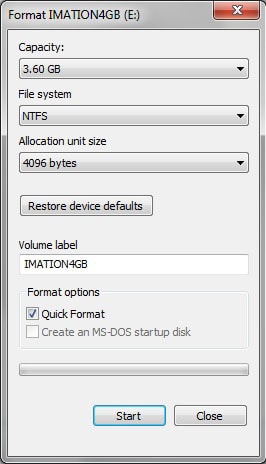
Step 2. After formatting with NTFS, reformat the drive again with FAT32.
Method 4: Testing the USB Port
Step 1. There is a chance that at times the USB port on your computer functions abnormally than the thumb drive. Reboot the computer, connect the thumb drive, and see if it functions. If yes, then you can copy the contents of the drive with ease. If not, then move to the next step.
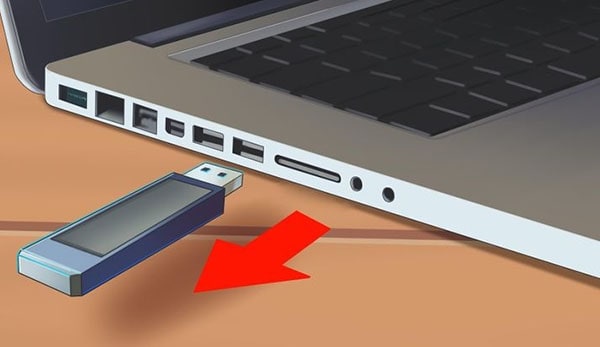
Step 2. If you have access to another computer, plug the thumb drive and check if it is functioning. If the drive is working, then there is a problem with the USB port on your computer. At times, one port functions while the other fails. If you have more than two ports, test the thumb drive with all the ports. Perform the previously stated action, and retest it on another computer. Based on the results, you can decide whether to copy the content and discard the drive or give up entirely.
