Apple has just released its new mobile operating system, iOS 8, and many fans are planning to update their devices with it. The new system comes with many improvements, like the Siri voice assistant, revamped notifications, a new health app, and many more. If you also want to make the transition for iOS 7 to iOS 8 as smooth as possible, here are some tips for you.
Part 1. Which Devices Can/Can't Run iOS 8 Perfectly
The first thing you need to do before installing iOS 8, you need to check the compatibility of the phone with the operating system. You must keep in mind that not every Apple device is compatible and can be updated to iOS 8.
#1. List of Apple Devices that Can Run iOS 8 Perfectly
According to Apple, only the next devices can be updated to iOS 8:

If your device is included in this list, you can be happy and proceed to update it to iOS 8. These devices are still very popular among users, but some of them needed new solutions for the old problems. According to Tim Cook, CEO of Apple, the company is very proud about the solutions that the new operating system brought. These products are a priority for the company, but some of them are on the market before Apple identified cool solutions and application for their devices. That is why, it is the time to offer them more features and usability than before, and users can find all of them on the new operating system iOS 8.
#2. List of Apple Devices that Can't Run iOS 8 Perfectly

It is true that iOS 8 brings a lot of new software features for the iPhone and iPad, but unfortunately not all the mobile devices are able to support an upgrade. All the Apple devices that were launched before the iPhone 4, including it, cannot support the new operating system. These are the devices that cannot be upgraded to iOS 8:
- iPhone 4 and all the other older iPhone versions;
- iPod Touch fourth generation and all older versions;
- iPad – the original versions.
Part 2. Preparation for the iOS 8 Upgrade - Backup Your Data
Before proceeding to any upgrade, you must backup your data. Even if there are extremely low chances to run into a major issue while you are performing the upgrade, it is always a great idea to do a backup of the device before. It is better to be safe, than to regret later. These being said, you have two methods of backing up your Apple device:
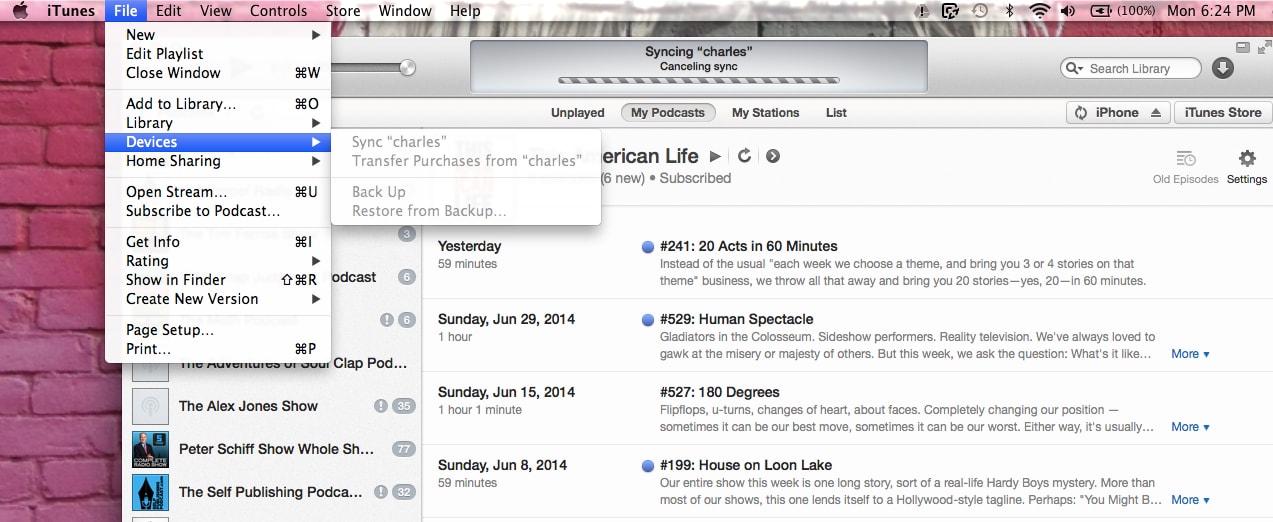
Method #1. Use iTunes
The first method to protect your data is to use iTunes. It will store a backup of all your files on your computer. However, before you proceed, make sure you check that the latest version of iTunes is installed on your device. The next step is to connect the iPhone or iPad to your computer, using a USB cable. Select your computer, and click the "Back Up Now" button. It is that simple!
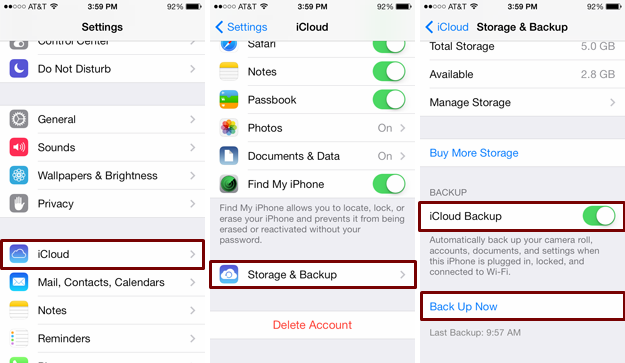
Method #2. Use iCloud
The second method for users who need a backup is to use iCloud. All your data will be backed up straight from your iPhone or iPad to iCloud. Check your Wi-Fi Connection, and go to Settings. Make sure you select iCloud, and then go to Storage and Backup. You can select all the files or settings you want to be stored on iCloud. Once the selection is done, go to the bottom of the page, and click on "Back Up Now".
Part 3. Troubleshooting for iOS 8 Upgrade
Unfortunately, the upgrading process can cause some problems with your device. Even if it sounds simple, many users complained about performance issues or poor battery life after updating to a new operating system. However, the biggest problems that users have while they are performing an update, is the loss of their important data.
#1. What to do if you’ve lost important data after upgrading to iOS 8
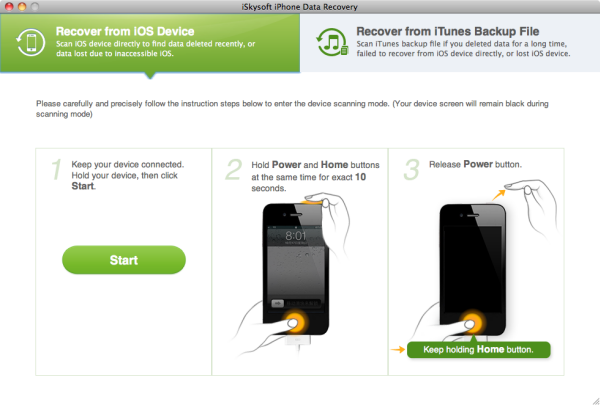
Let's say you've already performed an update from iOS 7 to iOS 8, but you forgot to do the backup. Do not despair if you lost all the important files you had on your Apple device. There are many applications that could help you to recover your files. We would like to recommend you iSkysoft iPhone Data Recovery for Mac. It is a free program that will help you to recover all your lost or deleted data from any iPhone, iPad, or iPod touch, like messages, contacts, notes, histories of your app, and many more.
Here are the simple steps for recovering your data using iSkysoft iPhone Data Recovery for Mac:
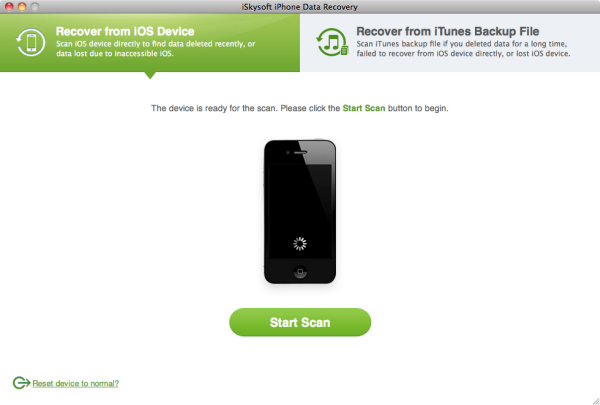
- Start iSkysoft iPhone Data Recovery for Mac and connect your device to your computer. Select "Recover from iOS device", and "Start Scan".
- Wait until the program scans your iPhone or iPad.
- The program will show you all the lost files on your device. You will see different categories.
- Choose the lost files you want back and click "Recover". You will get back your lost data.
#2. Apps incompatible with iOS 8 (the latest version of iOS)
Also, before upgrading to iOS 8, keep in mind there are some applications that are not compatible with the new operating system. Here is a list with some of them:
- ESPN/ESPN Sports Center;
- Google Docs;
- Evernote;
- Hike Messenger;
- Wikipanion;
- AT&T;
- Navigon USA;
- Camera +;
- iPhoto;
- Solitaire;
- WordPress;
- WhatsApp;
- Pocket Casts;
- Adobe Photoshop Touch;
- SoundCloud;
- LinkedIn Pulse;
If you want to downgrade to iOS 7 from iOS 8, you can also get the best solution from iSkysoft.


