Contents
- 1.1 Best Windows Recovery
- 1.2 Windows Recovery Tools
- 1.3 Windows 10 Recovery Tools
- 1.4 Windows Recovery Freeware
- 1.5 Stellar Phoenix Alternative
- 1.6 Remo Recover Alternative
- 2. Recover Files from Windows
- 2.1 Recover Deleted Files
- 2.2 Recover Permanently Deleted Files
- 2.3 Restore Deleted Files
- 2.4 Recover Files from Recycle Bin
- 2.5 Recover Folder
- 2.6 Recover Mail
- 2.7 Recover Document
- 2.8 Recover Photo
- 2.9 Recover Partition
- 2.10 Recover Password
- 3. Windows Recovery Solutions
- 3.1 Windows Backup Recovery
- 3.2 Windows Restore
- 3.3 Windows System Recovery
- 3.4 Windows Error Recovery
- 3.5 Windows Recovery Disk
- 3.6 Windows Recovery Disc
- 3.7 Windows USB Recovery
- 3.8 Windows Recovery Mode
- 3.9 Windows Unexpected Shutdown
Windows is a powerful operating system; however, users are sometimes left with a blank blue screen or other issues and may need help. Instructions on Windows error recovery come real handy at such times. As new versions are released, recovery options are likely to change. It is highly beneficial keep in touch with recent releases by Windows and topics of recovery. It may save valuable time and help avoid costly mistakes.
Part 1. The Instruction on Windows Recovery Error Fix
Minor changes in methods to recover are likely to be introduced in new versions of Windows. Learning how to recover from unforeseen problems is vital just to ensure you have a reliable operating system and can work at optimum speeds at all times. Here are some of the most common concerns warranting quick solutions.
1. Want Your Old Windows Version Back?
Windows 10 has powerful features most suited for recently-released computers. Prompts help fulfil minimum requirements during installation. Nevertheless, users from several countries are not offered support after upgrades from earlier versions. It does pose problems hindering smooth, uninterrupted flow of information. For example, you need to manually install Internet Explorer. It's likely Cortana, the powerful virtual assistant controlled by voice, does not function. A solution applicable to English-speaking countries may help resolve the problem.
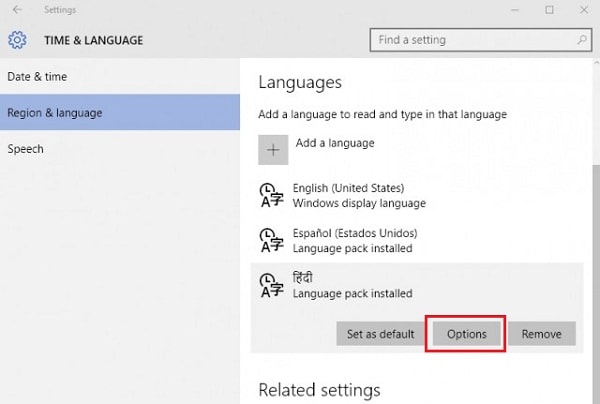
- Load Settings, then Time & Language, then Region & Language.
- Choose the default option under Languages. (could be English UK or English United States)
- Click on Options.
- Select and initiate download of your chosen language with Download Language Pack.
- After completion of Download, choose Speech under the same Time & Language option.
- The new language should appear as an option, which should be selected.
- Changes are applicable only if you reboot the system, so go ahead and do it.
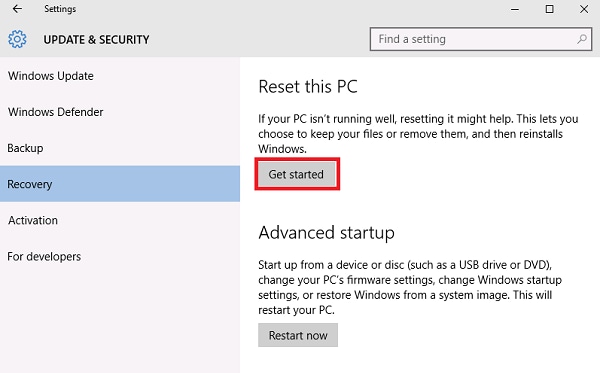
You can always go back to the earlier version of Windows in case you're dissatisfied with results. Windows 10 can be uninstalled for a month after the upgrade. Just go to Settings, then Update & Security, then Recovery. All apps and drivers after the upgrade are uninstalled. Personal files are untouched.
Basic precautions to be taken are:
- Save all files in $windows.~bt and windows.old folders since the upgrade.
- Additional user accounts created after upgrade must be removed.
- Remember or locate password used for either Windows 7 or Windows 8.1.
- If you've used a USB drive to upgrade, keep it ready.
2. What If You Can't Go Back To The Earlier Version?
The first option is to restore factory settings, if they are available. The original operating system installed on your PC is loaded, but changes to settings, personal files, drivers, and apps installed after the upgrade are removed.
The process:
- Visit Settings, then Update & Security, then Recovery, then reset this PC, and finally Get Started with Restore Factory Settings.
Users owning earlier versions with installation media can revert back to the earlier version of Windows. Also, users offered a free upgrade to Windows 10 as part of the Windows Insider program can do the following:
- Visit Settings, then Update & Security, then Recovery, then Go To An Earlier Build.
Part 2. How to Recover Files after Windows Error
Windows does provide a solution to restore lost data with the help of a backup. Users must choose an external drive or location on a network to initiate backups from C:\Users\username every hour. A better option and a highly reliable one is to use iSkysoft Data Recovery for different versions of Windows. It literally resolves data loss problems with great ease.
- Virtually all kinds of files in different data loss scenarios can be recovered.
- Deep scanning conducted to increase lost-data recovery success rate.
- File systems including FAT 16, FAT 32, exFAT, and NTFS can be recovered.
- User-friendly interface simplifies the process.
- Users can browse through recovered data with previews.
- Risk-free read-only process used to recover data.
- Compatible with latest version of Windows – Windows 10.
The simple interface of Recoverit (IS) allows users to recover data with just a few steps:
Step 1. Select the Target Recovery Mode
Choose from available "Standard Mode" options including Resume Recovery, Lost File Recovery, Raw File Recovery or Partition Recovery, and click the option "Lost File Recovery".
Note: Users wanting comprehensive data recovery in quick mode have the option to choose Wizard Mode Recovery. Fill in answers to two simple questions, and iSkysoft Data Recovery takes over to complete the entire process.
Step 2. Search for the Lost Files
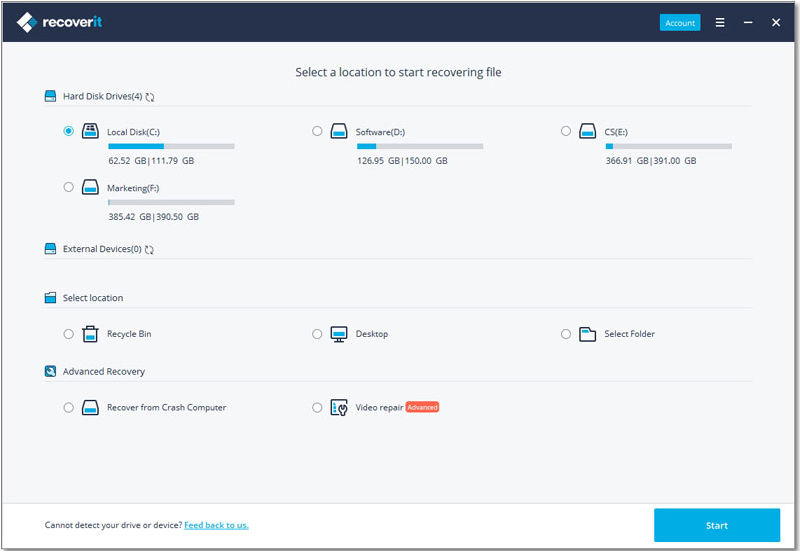
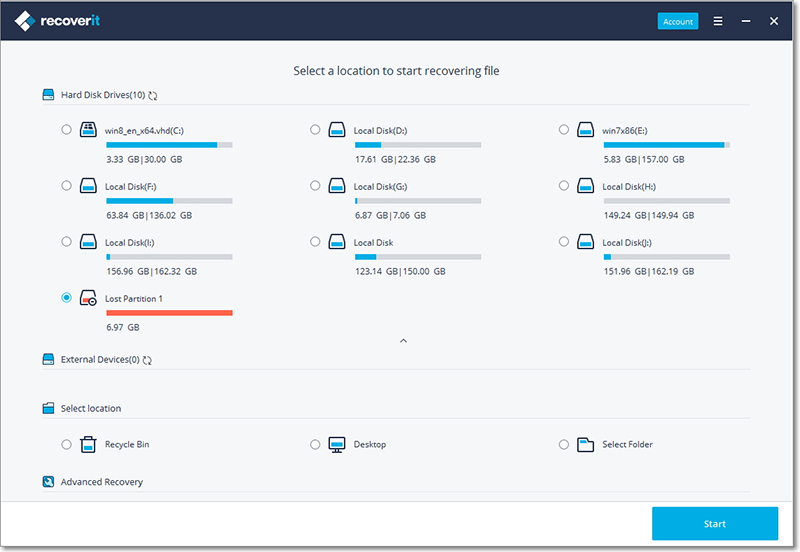
Tick type of file to recover. Tick drive to access and complete path. (To get better scanning result, choose to Deep Scan). Click "Start". Then the program will automatically scanning the target drive.
Note: Full control over the scanning process is offered including "Pause" and "Stop". Scanning results can also be saved for future use.
Step 3. Restore Lost Data
After scanning, different types of files with path are displayed for easy selection. Make one or more selections from status provided and click "Recover" to finish the quick process.


