For a long time, most people have been using iDVD for Windows 10 to burn their favorite videos into a DVD. However, in today’s world, these people seem to have been fed up with this software and they are therefore looking for the best alternative of it, which has more powerful features.
Below, you are going to encounter highly effective software that you can use to burn videos into a DVD on Windows 10.
Burn DVD with iDVD for Windows 10
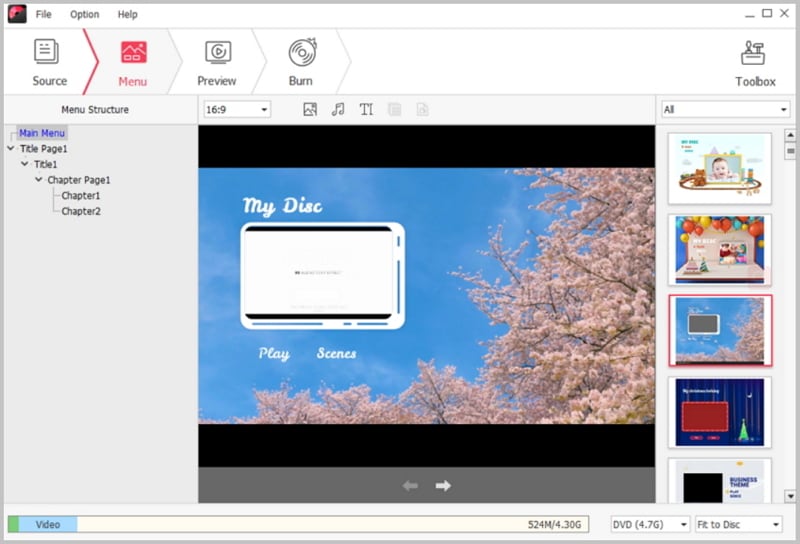
iSkysoft DVD Creator for Windows (or iSkysoft DVD Creator for Mac)is a program that has been developed to allow you to transfer all your digital videos into a DVD disc. It comes with a wide variety of DVD templates, giving you the opportunity to create a unique DVD from your audio and video collection within a very short time. What’s more, this DVD creator has the capability of transforming all your photos into a unique photo show, accompanied with your favorite audio files as the music background and promptly burning it into a DVD.

Key Features
The key features of this DVD Creator include:
- It supports the burning of a wide range of video formats into a DVD. These formats include MP4, AVI, MKV, MTS, VOB, DAT. MPG, MEG, TRP.
- It allows you to create a DVD movie from a web video. With the DVD creator, it’s now possible to burn videos downloaded from torrent as well as online sites such as Facebook, YouTube, Vimeo into a DVD!
- It supports the burning of homemade videos into a DVD. Homemade videos are those taken using your digital camera, camcorder, iPad, iPhone, and other devices. Using DVD creator has never been this fun!
- It gives you the opportunity of creating a top quality DVD at a blazing speed. This is very useful as it helps you burn all downloaded movies and videos to a DVD as fast as possible, freeing up more space on your PC to hold other videos waiting to be downloaded.
A Step by Step Guide on Burning Videos to DVD on Windows 10
As you have learnt, the main work of DVD creator is to burn videos into a high quality DVD, at a super speed. How you do all this is what you’re going to learn in the following step by step guide, with no step skipped.
Step 1 Import the Videos into the DVD Creator
Assuming you have already installed this program on your PC, your first step to burn videos to a DVD involves adding the videos you intend to burn. To do this, open the program and click on the “+Import” button. Now you can select the videos you’d like to burn.
Step 3Preview the DVD
Now move your cursor to the bottom of the window and chose the D5/D9 disc you`d like to burn your videos to. Also remember to set your preferred resolution. Once you have done the above steps, you can now preview how your DVD would like after burning through the preview screen and then make the necessary changes.
Step 4 Burn to DVD
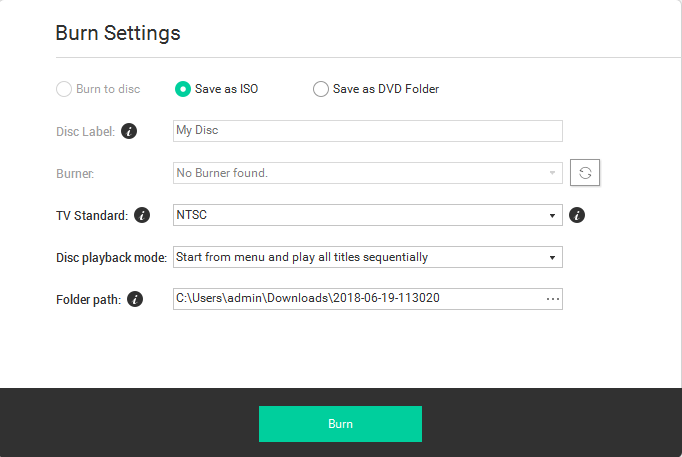
Once you are satisfied with your DVD design (as shown on the preview screen), click on the Burn button. This prompts you to choose your output file’s location and format. When everything is now ready, click the Start button and there you are! The iSkysfot DVD Creator starts creating high quality DVDs for you.
That’s all you need to know about DVD Creator, the best alternative for iDVD for Windows 10. With the program`s superior features that includes supporting all file formats, photo show creation, burning all home videos and producing top quality DVDs at a lightning speed, transforming your favorite videos into DVD will be more than fun!


