Most of the videos you find on the Internet are in the MKV format. However, you won't be able to enjoy MKV with DVD players for the compatible issue. You might try an application like the Windows DVD maker to convert the MKV files to the DVD formats.
But, as you try to create a DVD directly from the MKV files using the Windows DVD Maker, you will notice that Windows DVD Maker won't burn MKV to DVD for you aren't able to add the desired videos to the "create video" list. This happens because the Windows DVD doesn't support MKV. So, what do you do when you need to convert MKV to DVD with Windows DVD Maker? The best solution is to gep help from an alternative to Windows DVD Maker. Go on and learn how to make Windows DVD Maker burn MKV.
Burn MKV to DVD with Windows DVD Maker Alternative
The good news is, there is application like iSkysoft DVD Creator for Mac(or iSkysoft DVD Creator for Windows) that can help you to convert MKV formats directly to the DVDs. It has similar functions but is better than Windows DVD Maker and you will not encounter format compatible issues. With it, you can burn videos in any format into DVD in high quality.

Why Choose This Windows DVD Maker Alternative
Burn any videos to DVD

It is easy to burn videos from a wide array of formats to DVD. And you also can burn online videos as well as home made videos into DVD.
Edit videos

You can edit videos before burning bu cropping, trimming, adding effects and more to make your videos special.
Free menu templates

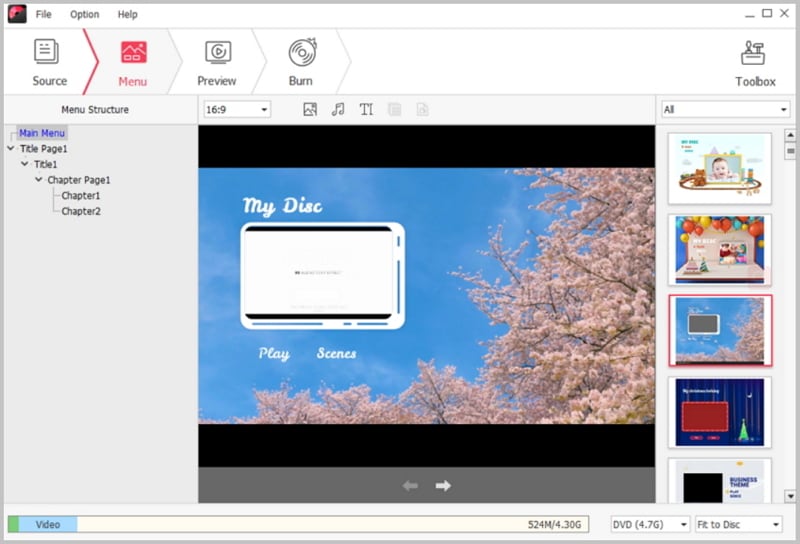
It comes with hundreds of free menu templates that you can apply any one to fit your video themes.
Make photo slideshow

It is easy to drag and drop photos into the program and add background music to make a photo slideshow.
How to Burn MKV with Windows DVD Maker Alternative
In just 3 convenient steps you will be able to edit and convert the desired videos in the DVD format using the iSkysoft DVD creator.
Step 1: Upload MKV files
At first you need to upload the MKV videos to the DVD creator. You can find the "+" button on the top right corner of the main screen of the application. You can upload the desired files por can also drag and drop those to the application for loading those to the application. You can choose to convert multiple videos simultaneously using the video converter.
Step 2: Apply menu
The Windows DVD Maker alternative also provides you with multiple free menu templates. You can go to the "Menu Template" tab on the right of the main interface, and then double click on any menu to apply it to your video.
Step 3: Start to burn MKV to DVD
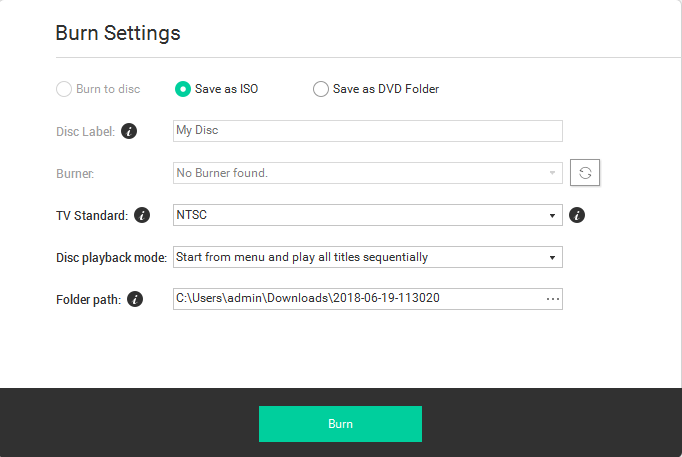
Burning the MKV files to DVD is easy and convenient with the alternative to Windows DVD Maker. Just click on the "Burn" button in the application after making the necessary changes and edits on them. Now, you must choose the desired output format you want to convert to. There are several output formats you can choose from. Give a name to the DVD and save those.
Common problems when burning MKV to DVD using Windows DVD Maker
1. Problem: One of the biggest problems of trying to burn MKV to DVD format using the Windows DVD Maker is that the DVD maker does not support the MKV format. In just 3 convenient steps you will be able to edit and convert the desired videos in the DVD format using the iSkysoft DVD creator.
Solution: As a solution you need to use other software like iSkySoft Video converter to convert the videos to the format that the Windows DVD maker would support.
2. Problem: There is no sound on the DVDs being burnt using the Windows DVD Maker.
Solution: If such a thing ever happens, you need to restore the settings of the Windows DVD maker.
3. Problem: There is no sign that the DVDs are being burnt inside the drive.
Solution: The issue might be in the Codec. T might be missing from your system altogether. Install a new one. You can download and use the K-Lite Codec pack for the same.
4. Problem: Hearing sounds while creating preview with the DVD maker.
Solution: You need to install the drivers for the audio devices in your system. You can also download the Windows DVD Maker from the official website once again and check whether the problem persists.
5. Problem: The disc may not be functioning properly.
Solution: Check whether the type of disc you are using is compatible with the system you are using. Different DVD players play different types of discs.


