Part 1: Matters need you to pay attention when transferring music to iTunes
iTunes is far and away the world’s most popular way to organize and listen to music on computers. It boasts a whole host of exciting features, connects with all Apple devices and helps us all listen to our music wherever we are in the world.
However, it can be a little tricky to get used to each update, and there are plenty of new tips and tricks to be learned, however long you’ve been using iTunes for. Today we want to talk to you about a few tips and tricks that might help you get a bit more out of iTunes and your music library.
First up, let’s take a look at a few of the things you should bear in mind when transferring music to iTunes:

#1. Make sure you’re connected to the internet if you’re burning your CD collection to iTunes! iTunes will connected to the internet and automatically fill out the song, artist and album details, so it’ll save you a lot of time in the long run.
#2. If you’re planning on burning lots of CDs in one go, save time by setting iTunes to automatically start importing the CD and ejecting the CD when it’s finished.
#3. A lot of research has been done to discover what the best settings to use are when you’re transferring new music to iTunes. Apparently the below settings are the ones to use with popular music (rock, jazz, pop, country, etc.) to get the best results:
AAC (Apple Advanced Coding)
VBR
128 kbps
Error Correction ‘On’
#4. Likewise, there are preferred settings to use when copying classical music to your iTunes. To make your music sound its best, use the following:
AAC
VBR
160 kbps
Error Correction ‘On’
#5. If you have a poor copy of a song in your music library, you might want to look into using iTunes Match, which will allow you to download a better-encoded version of the song.
#6. If you find your iTunes is getting overloaded with music and starting to run slowly as a result, you might want to archive your less listened to tunes in an additional library. To create a new library open iTunes, press the ‘Option’ key, then select ‘Create Library’ and away you go - no more slow iTunes!
#7. For any songs that iTunes hasn’t automatically found the song title and artist information for, try right clicking on the file and selecting ‘Get Track Names’.
#8. If you want to speed up how quickly iTunes runs, try deleting your Smart Playlists. Apparently removing them can help your iTunes run up to three times faster.
#9. Unless you frequently use them, try turning off the Genius and Cover Flow features in iTunes, to see if it runs faster and more efficiently.
#10. If you’ve just transferred your whole music collection to iTunes you might find yourself with lots of duplicate files. To highlight these and remove the duplicate tracks, simply click on File and Display Duplicates, to see a handy list of the tracks you have doubles of.

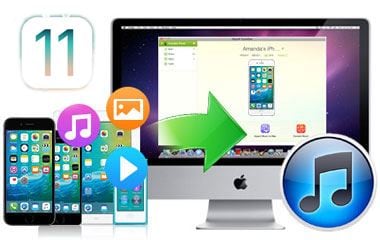
Transfer iPhone/iPad/iPod touch music, videos and photos to Mac and iTunes.
One-click backup to iTunes and manage your songs, videos, and photo albums.
- Copy music from iPhone, iPod, iPad to Mac or iTunes.
- Export videos from iPhone, iPad, iPod to iTunes/Mac.
- Transfer all photos from photo album to Mac or iTunes.
- Copy playlists with rating and play counts to iTunes.


