Over time, the iPhone has become more than just a smart phone that can handle practically all the files you need. Being a music player is just one of its many uses. In this article, we’ll see how to sync music to iPhone with and without iTunes.
Part 1: How to sync music to iPhone with iTunes
If you wish to simply sync your music to your iPhone using iTunes, then you might have your work already cut out for you. Just follow these instructions and you’re good to go:
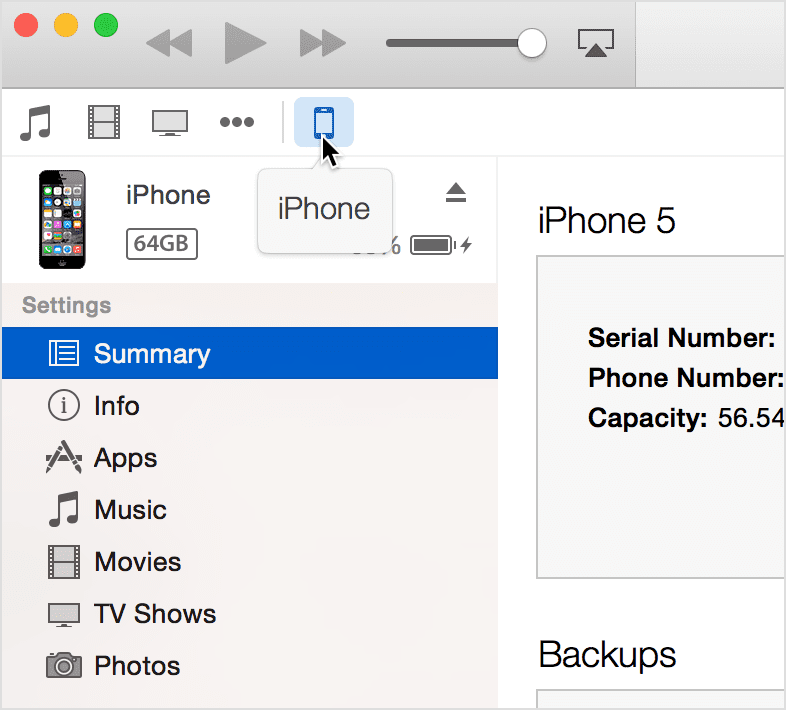
Connect your iPhone to your computer with USB cable. Once it’s connected, iTunes should launch automatically. If it doesn’t, then you’ll have to launch it yourself. You’ll also need to make sure that you’re running the latest version of iTunes. Then click the iPhone icon to access the different options and features available for it.
After locating your iOS device, you should see several tabs under Settings. Click on Music to see the different syncing options available for your iPhone. Now turn on the syncing by ticking the checkbox beside Sync Music. You will also see the number of songs that can be synced to your iPhone. You may also opt to try out the different options available by ticking the corresponding checkboxes.
At this point, you have successfully enabled syncing music to your iPhone via iTunes.
Now that you’ve learned just about how to do the trick, you might want to know the pros and cons by using this method.
Pros:
- Because this method is officially supported by Apple, there are a number of guides about this from Apple’s site that can help make the process easier.
- You need to worry less about doing this method, since all steps have been provided by your phone’s manufacturer.
Cons:
- This method is heavily dependent upon iTunes so it’ll be a big hassle if you haven’t got the latest version of iTunes installed yet.
- You will need to erase your iPhone’s content before having anything, particularly music, synced to your iPhone from a new computer.
Part 2: How to sync music to iPhone without erasing
In some cases, when you try to sync a new computer to an iPhone via iTunes, you might encounter iPhone contents erasing. Or sometimes the music won’t sync to iPhone with iTunes.
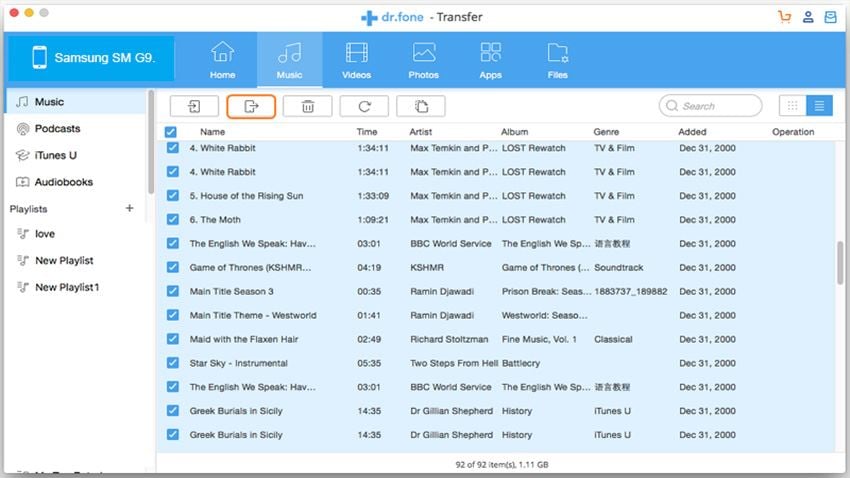
To sync music to iPhone safely, you may need to use a third-party application. One application to help you do the trick is dr.fone for Mac (or dr.fone). This transfer application can transfer media files between your iOS devices and iTunes library or Mac without any hassle. You can sync music, video, and photos to your iPhone, iPod, or iPad without iTunes. And the built-in conversion ability will automatically detect the file format and convert it to the iDevice compatible format. Just try it out!
To use dr.fone to sync music to iPhone without erasing its contents, do these very easy steps:
What You Will Need:
A Mac or Windows PC;
dr.fone
Time Required:
Very fast
Difficulty:
Easy
Step 1
Connect your iPhone to your computer and launch dr.fone. Once it launches, your iPhone should be detected right away. You should see your iPhone’s information in the main interface.
Step 2
Now click on the "Music" tab. Hit the "Add" button at the upper portion of the window to start browsing for music files you want to sync to your iPhone. Choose the music files and sync them to your iPhone directly.


