Aside from music and photos, videos are among the file types that are given more than enough support by Apple and third-party developers. Thanks to that, iPhone users are provided with various methods to sync videos to iPhone. In this article, we will discuss just that. We will tackle two ways on how to sync videos to iPhone.
- Part 1: How to sync videos to iPhone with iTunes
- Part 2: How to sync videos to iPhone without erasing (Recommended)
Part 1: How to sync videos to iPhone with iTunes
You should have known by now that iTunes isn’t just an app that takes care of all your music needs in your iOS devices and computers. Music, photos, and videos are just several of the files that it can sync with your iPhone. To sync videos, follow these steps:
Step 1.
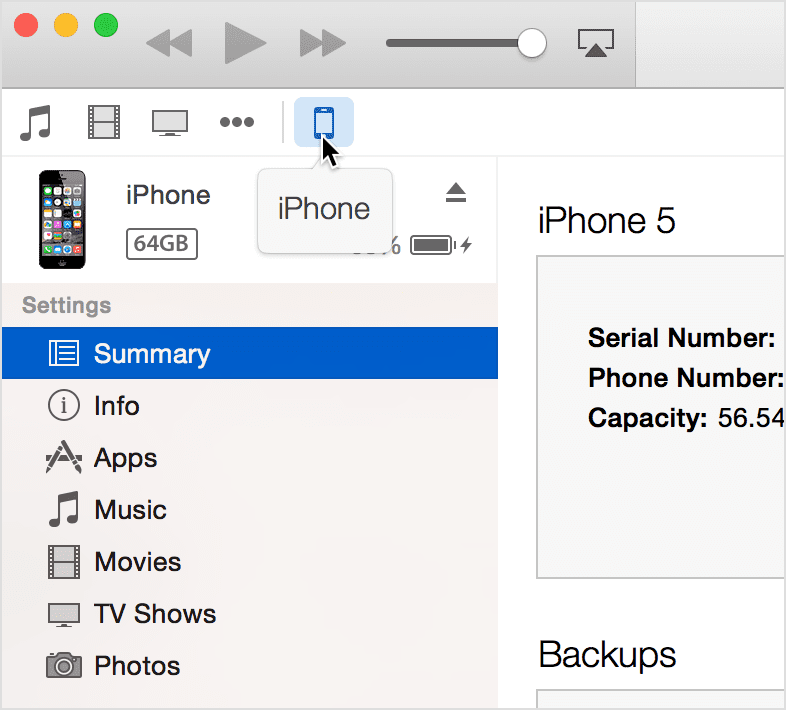
Make sure your iTunes’ version is the latest one. Have your iPhone connected to your computer via the USB cable. Now click on the iPhone icon below the music playing options to access different contents.

Step 2.
On the left sidebar, under Settings, click Movies to see the different features that iTunes has to offer when it comes to syncing videos to iPhone.
Now on the main pane, tick the checkbox beside Sync Movies to enable iTunes’ video-syncing features. At this point, you can choose to automatically sync all movies, or select the ones you have to sync. iTunes should now start to sync movies to iPhone.

After learning how to sync videos using iTunes, you might as well be interested in the pros and cons that this option has to offer to weigh it out against other video-syncing options.
Pros:
•This method makes use of a feature created by Apple itself, so you do not need to worry about guides and support you may need during the process.
•The steps are pretty straightforward and simple and iTunes practically does all the work for you.
Cons:
•To ensure you get the most in iTunes syncing features, you’ll have to update it to the latest version, which will definitely mean more work if you haven’t got it installed yet.
•You cannot sync with a computer after syncing with another computer without erasing the contents you’ve previously synced with the other computer.
Part 2: How to sync videos to iPhone without erasing
This method serves as the solution to iTunes’ inability to sync videos to iPhone from different computers. With this, you should be able to sync videos from different computers without having to delete the data you’ve previously synced to your iPhone.
For this method, you will need to use a third-party application to handle the task for you. We strongly recommend dr.fone for Mac. This application is easier to handle media files with your iPhone, iPod, iPad, Mac, and iTunes library. It can automatically detect the video file format and convert it to your iDevice supported format so you can enjoy the videos without any hassle.

These are the instructions you’ll need to follow to sync videos to iPhone using dr.fone:
Step 1.
Get your iPhone and connect it to your computer. Open dr.fone. It should automatically display your iPhone’s name once it has been detected. After then, you have 2 options to transfer videos to iPhone without iTunes.

Option 1.
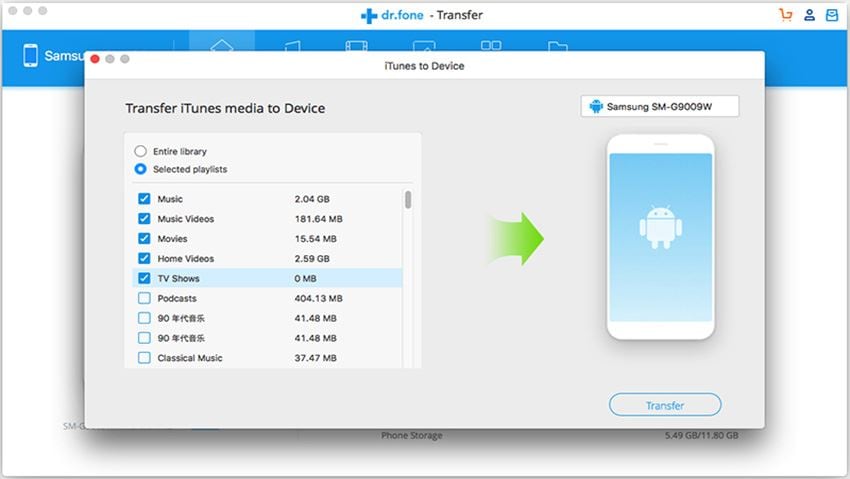
Click "Transfer iTunes Media to Device" if your videos are in your iTunes Library in the main window. Let the software scan your iTunes Library to sort files. Next, select videos and click "Transfer".

Option 2.
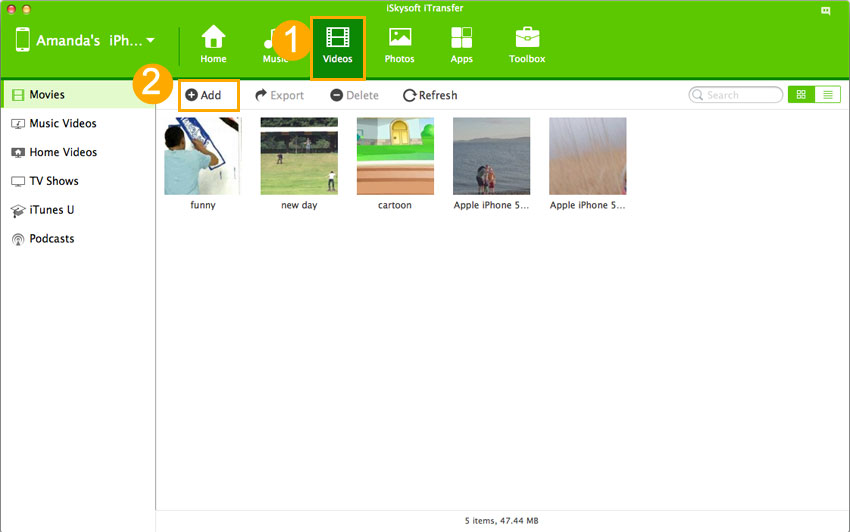
Click the "Videos" tab in the main window to enter the video management panel. From there, you can see a "Add" button. Click it to browse your computer for the videos you want to add to your iPhone. Select them and click "OK" to transfer them to iPhone.
Above are the whole process about how to sync video to iPhone. Have you learned yet?


