At present, more and more people work with data in several platforms. Be it music, videos, or applications, seamlessly working with different systems was an issue before that has already been solved by the different tools and applications we have today. Nowadays, any computer can easily communicate with even the smallest of smartphones, thanks to the different solutions and applications that are being developed.
For users of Apple products, working with different files in various systems is even easier. If you're using your iPhone to hold files and you want to work with these files on your computer, you will find yourself enjoying the hassle-free experience of getting the job done, especially if you're interested in music, video, and application files. And to do just the trick, you might want to read on to find out.
- Part 1: How to Transfer Music and Video from iPhone to iTunes
- Part 2: How to Ttransfer Apps from iPhone to iTunes
Part 1: How to Transfer Music and Video from iPhone to iTunes
When transferring music and video files from your iPhone to the iTunes library on your computer, you'll have to use a third-party application. While iTunes supports music transfer, only music purchased from the store can be transferred. Anyways, a lot of these third-party tools can be easily downloaded or bought online but it is definitely recommended that you try out a tool that has already established a good reputation over lots of iPhone users. You can try the way below.
What you need: dr.fone for Mac
Difficulty: Easy for people with any computer level
Time required: 5 mins or less, depending on the amount of data on your iPhone

Bring media files from iPod, iPhone, or iPad straightly to iTunes library or Mac
Exporting photos, music, and videos from any of your iOS devices has never been this easier.
- Enjoy hassle-free music transfer from your iOS device to your iTunes library.
- Export videos from iPhone, iPad, iPod to iTunes/Mac.
- Transfer all photos from photo album to Mac or iTunes.
- Copy playlists with rating and play counts to iTunes.
How to transfer music from iPhone to iTunes in 1 click
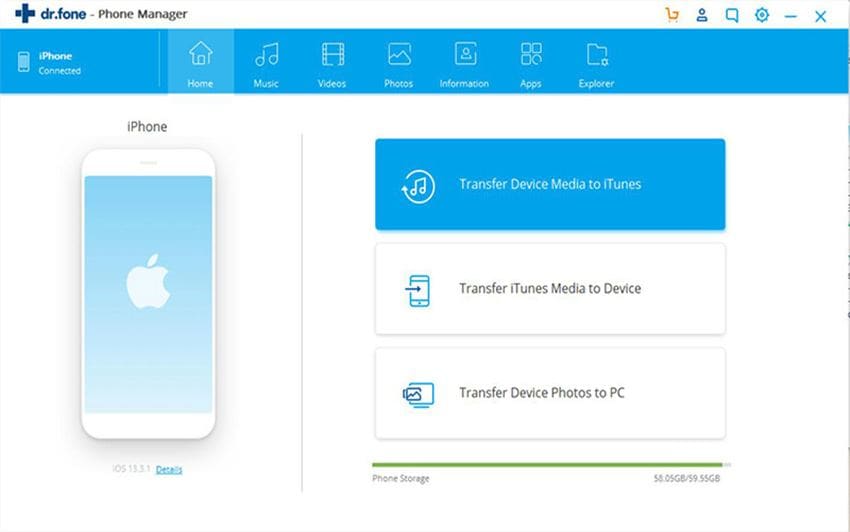
Step 1. Using the cable that originally came with your iPhone's packaging, connect it to your Mac. Download and launch dr.fone. Your iPhone's information will be displayed in the main screen. Select the "Rebuild iTunes Library" option.

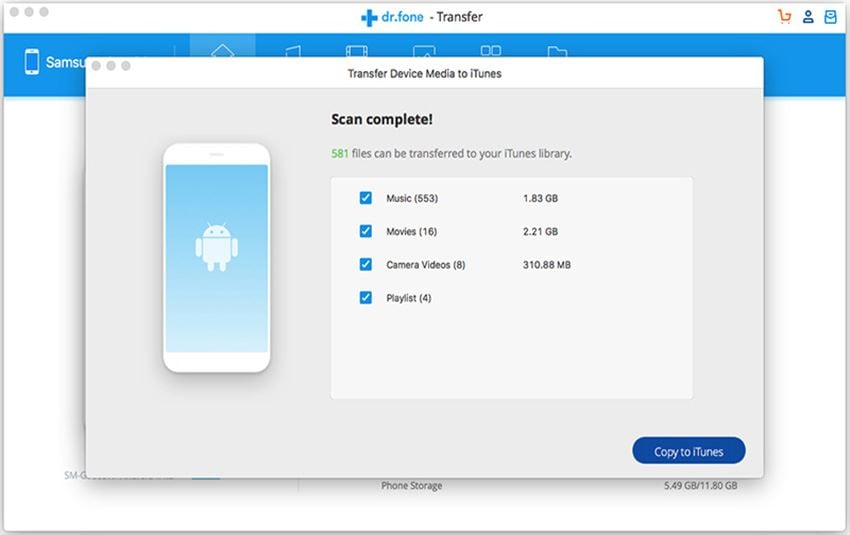
Step 2: Click "Start" on the pop-up window. Next you can choose the file types that you want to trasnfer from iPhone to iTunes. Here you can select "Music" option and click on the "Cope to iTunes" button. And let the software take care of the rest.

How to transfer video from iPhone to iTunes in 1 click
Step 1. Follow the step 1 in the previous guides to show the file types. Click the "Movie" option to transfer video from iPhone to iTunes with dr.fone Toolbox.

Part 2: How to Transfer Apps from iPhone to iTunes
If transferring apps from your iPhone is your concern, then all you'll have to use is your iTunes application itself. The process is pretty simple and easy, and in just a few clicks, you're good to go. Just follow these instructions:
Step 1. Have your iPhone connected to your PC. Your iTunes application should launch automatically but if it doesn't, you can just open it yourself.
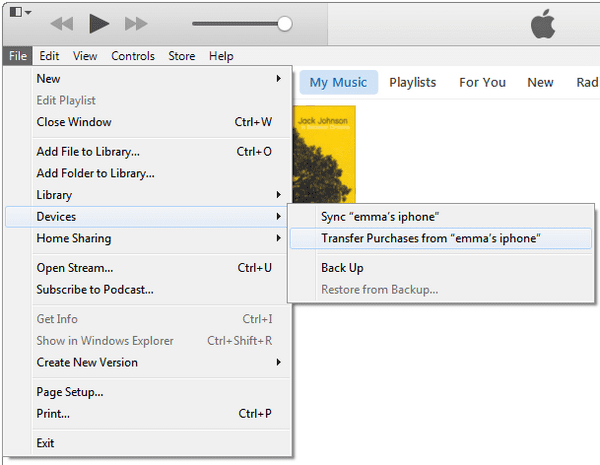
Step 2. Check that the left sidebar is visible. If it isn't, head to the "View" menu and select "Show Sidebar". Once you see it, see the "Devices" entry and right-click on your iPhone's name. From the list of options, select "Transfer Purchases".
Step 3. Now iTunes will start transferring all purchased content from your iPhone, including your apps. Wait for the process to finish and soon you'll have your apps safely kept by iTunes.


