- Part 1. How to Assign Photo to Contacts on iPhone
- Part 2. How to Activate Facebook Pictures for contacts on iPhone
Whenever, you receive a call or a text from a person, a number or the contact name (If the contact is saved in your contacts’ list) is shown on the screen of your iPhone. If you are in-contact with that person, it would be easy to identify the person but if you aren’t in touch with the person, it would become difficult to identify the person calling or texting you. That’s where the photo of that contact comes in, if you add a contact photo, a photo will be shown on the whole screen and it would become easier to identify the person calling you. Moreover, it will also help you in the messages because a contact photo will be shown in the list of conversations. So it would be pretty easy to recognize that specific person. You can follow this step by step guide to assign a photo to a specific contact on your iPhone.
Part 1. How to Assign Photo to Contacts on iPhone
Steps to Assign Photo to Contacts on iPhone
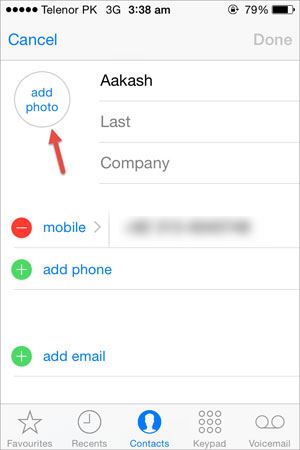
Step 1: Open the contacts application from the main screen and select the contact to who you want to assign a photo. Once the contact is opened, tap on the Edit button in the top right corner. Now, Click on the “Add Photo” to add a photo. If the person is right in-front of you, you can tap on “Take Photo” or Click on “Choose Photo” to choose a photo from already present photos on your iPhone.
Step 2: Select a photo and that’s it! A photo will be added to that contact, Click on done to save the photo for that contact.
By this way, you can assign photos to any contacts that you want, but if you have a large contact list, assigning a photo to each and every contact will become a very hefty task. It will not only take a lot of time but it can be tiresome. Facebook is the largest social networking website available in the whole world and most of our contacts on iPhone are already present on Facebook. As we know, Apple has already embedded the Facebook in settings, so with this new iOS system, you can activate Facebook Pictures for contacts. The biggest benefit of this feature is that it will not only save a lot of time but all you have to do is some taps on screen and boom , all Facebook Pictures for the contacts will be automatically imported on your iPhone. Another good part about this feature is that it will also add some other information such as Place where he/she lives, birthday of the person, user name of Facebook and Facebook profile name. Moreover, it will automatically update photos for contacts time to time from Facebook which will help you easily identify the person. Here’s the step-by-step guide on how you can activate Facebook pictures for contacts on iPhone.
Part 2. How to Activate Facebook Pictures for contacts on iPhone
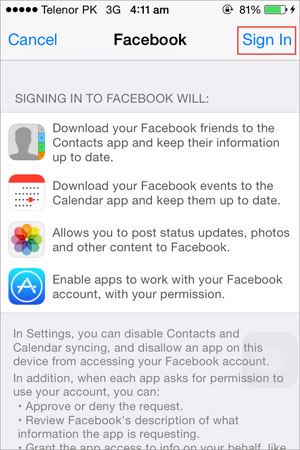
Step 1: From the home screen on your iPhone, tap on settings. Scroll down to bottom and Tap on Facebook. Log in with your Facebook Account and tap on Sign in. Now, it will show you a lot of information. Simply tap on the “Sign in” button in top right corner. Wait for a few seconds and let it verify your Facebook account.
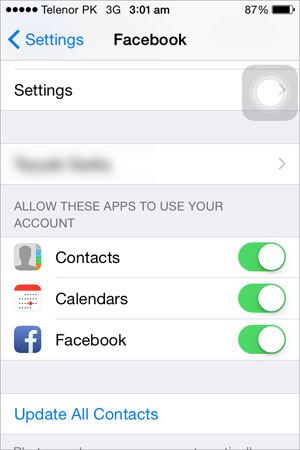
Step 2: After verifying, you will see three apps. You can enable them to use your Facebook Account. Such as contacts to copy contacts from Facebook to contacts on iPhone, Calendar to manage the upcoming events from Facebook and Facebook to use the application on iPhone.
Step 3: After enabling these options, tap on “Update All Contacts” and let it update the whole contact data base on your iPhone. After updating the database, navigate to Contacts on iPhone and click on “Groups” to see the contacts from different groups. Make sure that you have checked the “All Facebook” option and Tap on “Done” on the Top right corner.
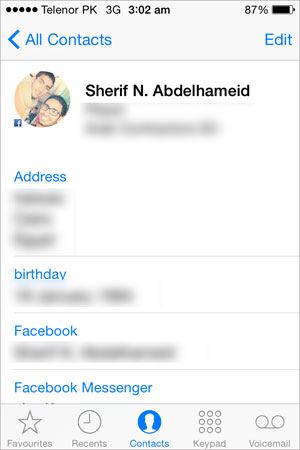
That’s it! Now tap on any Facebook contact and you will see the whole Facebook contact information is shown including the picture of that specific contact.


