A Playlist is defined as a compilation of songs according to a particular occasion. For example: you can have a playlist of best songs of 2015, a playlist composed of songs that you love to listen while working out or a list of the songs while reading a book on your iPad. iPod was one of the first music device which got Apple into the right track after years of sufferings and loss. You can sync and copy hundreds and thousands of songs on your iPod and can listen them while travelling, working out or in other situations. You can also make different playlists of these songs to listen the songs for these particular occasions. You can easily make playlists on iTunes and can transfer them to your iPod without any problem. Here’s the step by step guide to import existing playlists from iTunes to iPod.
Part 1. How to Import Existing Playlists from iTunes to iPod

Step 1. Connect your iPod to the computer and launch the iTunes on your PC. Once you have connected your iPod with the computer, the left side of the screen will show different options such as Music, Photos, TV Shows, Podcasts and iTunes U. Please click on the Music.
Step 2. Now, Click on Sync Music to transfer all music from your iTunes to the iPod. However, if you want to transfer the selected songs or playlists, please check the “Selected Playlists, artists, albums and genres”.
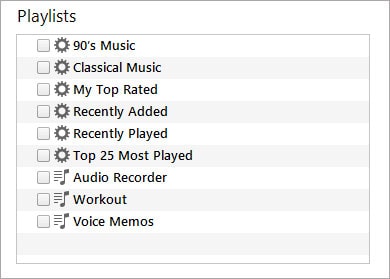
Step 3. Now, select the Playlists that you want to transfer to your iPod from the first box. You can either check one Playlist or can select all of them. Lastly, hit the sync button at the bottom of the screen to complete the process. Please don’t remove your iPod during this process, otherwise you may lose all music on your iPod.
That’s it! Although it seems very easy to transfer the playlist from iTunes to the iPod, sometimes this whole process becomes troublesome. For example, if you one of the song in the playlist is deleted from iTunes, then when you play the playlist on iPod, then the song will gray out. And Apple only allows users to create and add playlists directly from the iTunes and there is now way by which you can directly create a new playlist on your iPod. To resolve such issues, you will need a third party, standalone music managing application such as dr.fone which is available for both windows and Mac.
Part 2. How to Create Playlists on iPod Directly

dr.fone - Your Best Option to Make Playlists on iPod
dr.fone helps you transfer, create, delete or even backup your playlists from your iPod to the computer. It is actually a complete music managing tool which will let you transfer music from your computer to the iPod without removing the existing data on your iPod. dr.fone allows you to create a playlist in the iPod and you can even directly remove or backup other Playlists to the computer with play counts, rating artwork and tunes. Here’s the step by step guide to use dr.fone to create a new Playlists with songs on iPod or songs from your computer.
Step by step guide to use dr.fone to create Playlists on iPod:
Step 1. Download and run the latest version of dr.fone on your computer. Connect your iPod with the computer.
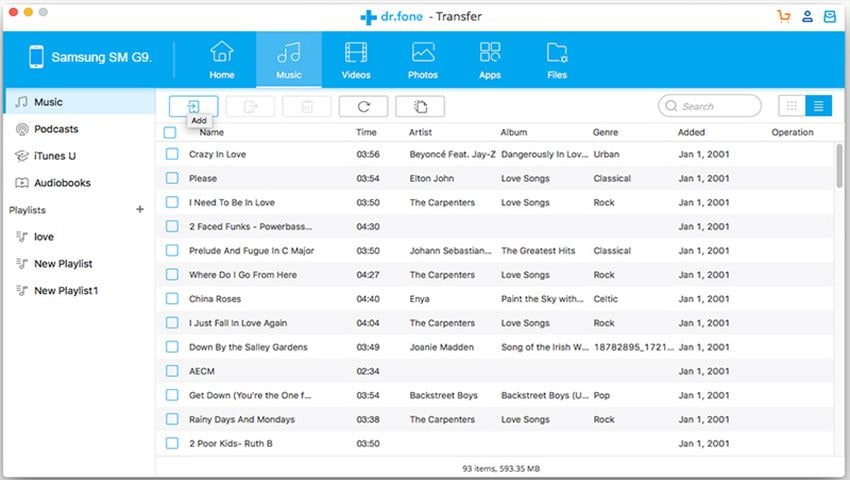
Step 2. Click the "Music" tap at the top of the main surface. The window will show all of your music on your iPod. You can see the playlists from the left panel. In order to create a new Playlist, please click on the Add button at the top and write down the name for this Playlist.
Adding Songs from Computer to Playlist: Once you have created a Playlist, click on it to open it. Please click on the Add button to add new songs to this particular Playlist. Now, please select the songs and click on Open to add them to this particular Playlist. That’s it! Wait for a few seconds to complete the transfer process.
Adding already present songs on iPod to a Playlist: If you want to add the already present songs from music library to a particular playlist, please click on the "Music" tab and select the songs that you want to copy to the playlist. Right Click on these songs and please select “Add to Playlist". Now, let it complete the transfer process.


