Want to browse your video clips more easily, or to share your favorite moments and create beautiful HD movies and trailers with the look like of Hollywood? Intend to upload your HD videos in to Facebook, Vimeo and add CNN iReport? You can finish all these staff by editing them with iMovie. With iMovie now available on iPhone, iPad and iPod touch, you no longer have to transfer the video from your iPhone to iTunes then import into iMovie. Now you can bring it right into iMovie without going through the hectic middle steps. To do so, follow the simple steps outlined below:
- Part 1. Step by step Guide on how to import videos from iPhone to iMovie
- Part 2. Tips to import Video from iPhone to Computer
Part 1. Step by step Guide on how to import videos from iPhone to iMovie
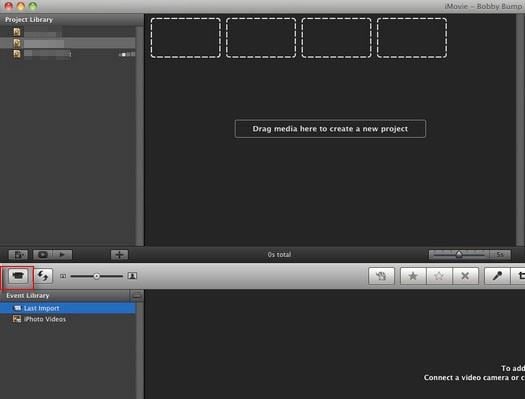
Step 1: Connect your iPhone to your Mac via the white sync cable provided. If there is any program running likes video capture or iPhoto, quit it first. Launch iMovie by either double clicking its icon from the Application folder or by clicking the iMovie icon in the dock. Once this is done the iMovie import window should open automatically. You can manually click the camcorder button on your left end of the toolbar to open the import window if it doesn't open automatically.

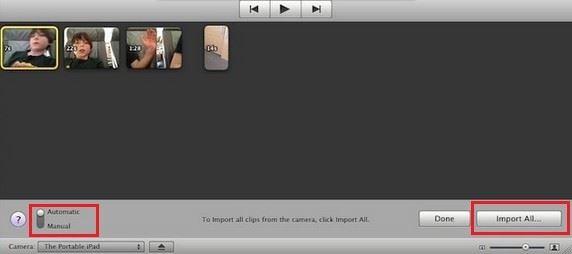
Step 2: On the "import window" you will find two options for transferring videos from iPhone to iMovie, i.e automatic and manual. If you want to import selected videos, go to Manual Settings and pick import checked. If you want to import all videos select 'Automatic' and then hit "Import All" button.

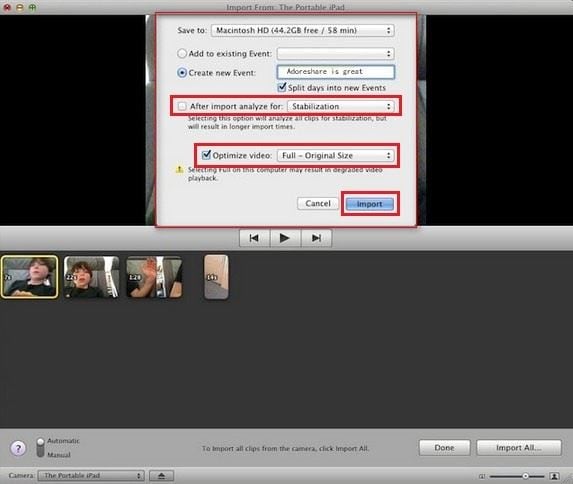
Step 3: After selecting your option, a dialogue box will pop up and ask you where you want to save the videos, length of the video to be imported and the storage space available on your Mac.You can save them immediately if there is an existing event in your iMovie or you can create a new one. You can choose to stabilize the video by checking in the box, which is optional and then choose the final size by checking in the box. Then hit " Import" as illustrated in the screenshot above.

Importing will be completed in a short period depending on the number of videos to be imported. When importing is finished, hit “Done” in the iMovie import window and you will see all the movies you have imported in the lower section.
Part 2. How to import Video from iPhone to computer via dr.fone
dr.fone for Mac (or dr.fone for Windows) allows you to import any video from any iPhone to any Mac, so you can later import them to iMovie. During the process of transferring videos to Mac, there will be no data erased. Feel free to try it.
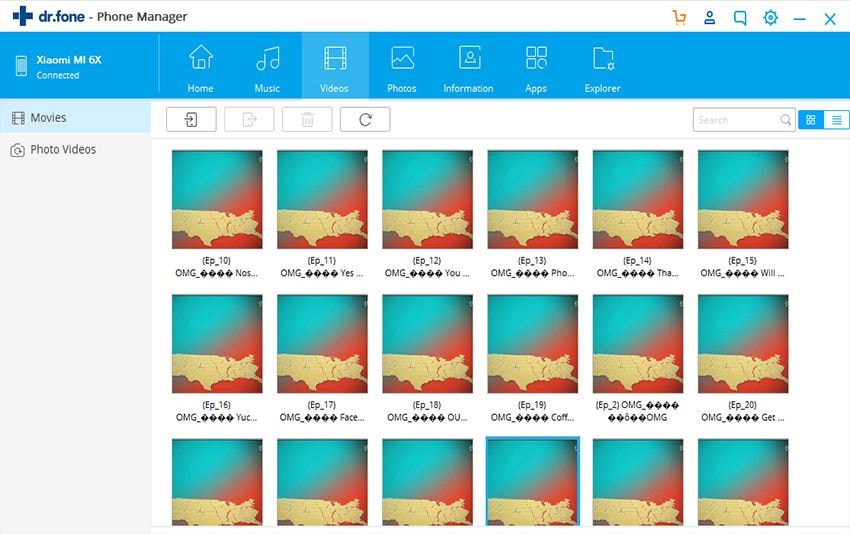
Step 1: Connect your iPhone, iPad or iPod touch to your Mac with the use of the provided USB cable. Launch dr.fone. The new window will be displayed as shown in the screenshot below.

Step 2: If you're going to import your iPhone recorded videos to iMovie, you're supposed to click "Photos" on the top of the main window and find "Camera Roll" in the left sidebar to select your iPhone recorded videos. Click "Export" to save them on your computer. After then, launch iMovie and import them to iMovie. If you want to export videos (not iPhone recorded videos), you are supposed to click "Videos" on the top of dr.fone, and export them to your computer.


