Most times sharing that moment is not complete until you send the photos to your family and friends. There could be some other reasons that may require you to send photos from your iPad but whatever the case, it is important to understand ways this can be done. Fortunately, sending photos from your iPad is a simple process as we are going to see in this article. This article looks at how to send pictures through email, photo stream and iCloud.
- Part 1: Send photos from iPad to Computer/ iPhone/iPad/iPod touch
- Part 2: How to Email Pictures from iPad
- Part 3: How to Use iCloud Photo Library to Upload Photos to iPad
- Part 4: Use iCloud Photo Library to Send iPad Photos
Part 1: Send photos from iPad to Computer/ iPhone/iPad/iPod touch via dr.fone

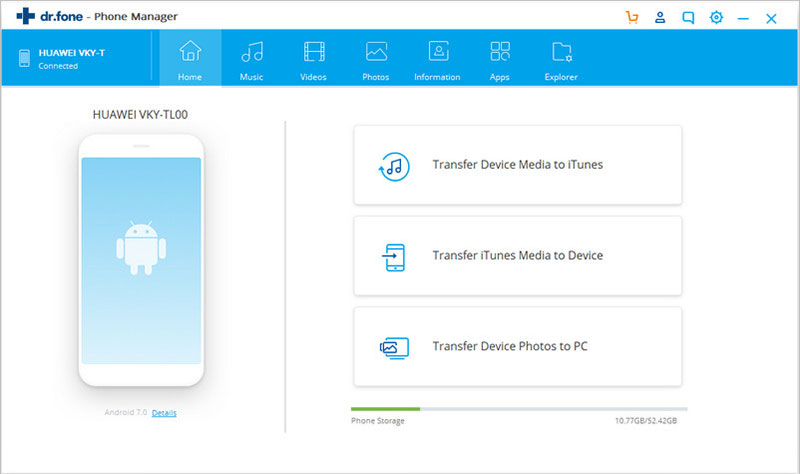
There are many ways to share photos from your iPad with another iPhone, iPad or even iPod touch but some of these processes end up erasing data on your device. However, one tool stands out of the crowd and it is the dr.fone. This tool lets you add songs, photos, videos and more files from your iPad directly without erasing any data on your iPad. Other features of dr.fone include:
- Send photos from iPad to Mac/PC.
- Convert live photos to GIF to keep the animation.
- Share Photos from iPad to iPad/iPhone/iPod touch
Download the free trial version now!
To send Photos from your iPad to iPhones, iPad or iPod Touch via dr.fone, kindly follow these few steps.
Step 1: Connect your devices to computer
Install the dr.fone on your Computer. The installation process is quite simple and easy to do. Once this is done, connect your iPad and another device to the computer. The iPad data is expected to be displayed on the interface of the computer.
Step 2: Export photos from iPad to other device
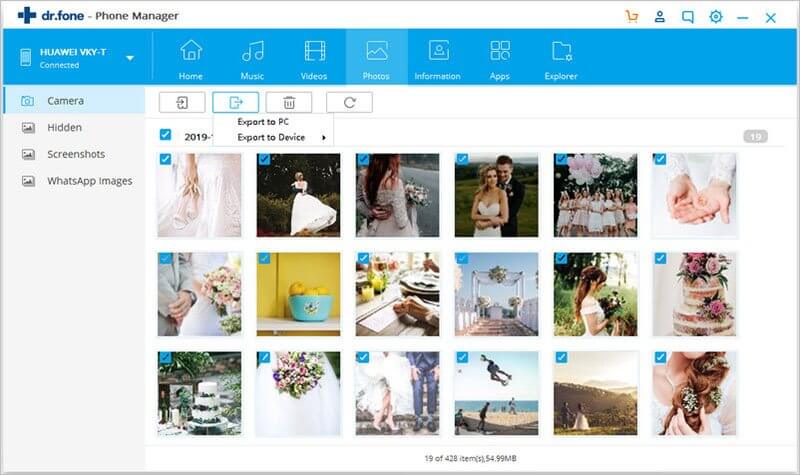
Click the “Photos” tab on the top of the main window. Next, you can see all the photos files are sorted by category and displayed in the sidebar. Click the file type in the left sidebar, then click to select the photos you need to transfer to another device. Click “Export” > “Export to (the name of the second device)”. That’s it!
Part 2: Detailed Guide on How to Email Pictures from iPad
It is always fun taking photos and sharing them with others. You can actually share photos stored on your iPad by sending them as email attachments and it can be done from within the photo app. The following step by step guide will help you do that.
Step 1: Tap the photo app icon found on the home screen of your iPad device.
Step 2: The next thing to do is to tap the photo tab and locate the photo you want to send.
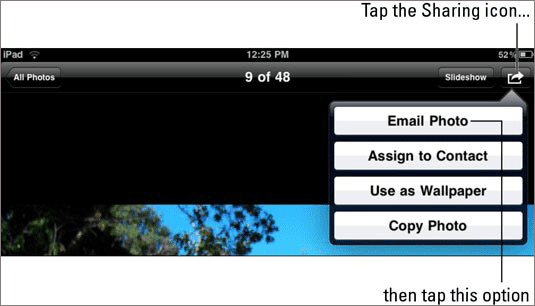
Step 3: Next, tap the photo you have identified to select it after which you tap the sharing icon. You can tap as many photos as you will like to share.
Step 4: At this point, you are required to tap the email photo option.
Step 5: An email form will appear. In the form that appears, you have the option of changing the fields. For example, fill in the To, Cc/Bcc and subject fields. You can also add more text by tapping into the body of the message. Tap ‘Send” button.
When you tap the send button, the photos attached in addition with the text on the mail is sent to the receiver who would then open the attachments to view the photos and read the text.
Note: If attachment seems difficult, you can also explore the option of copying the photos on document processors. However, the photos will be sent as a direct email without an attachment as the receiver will view it directly without opening any attachment.
Part 3: Send Photo on iPad Via Photo Stream
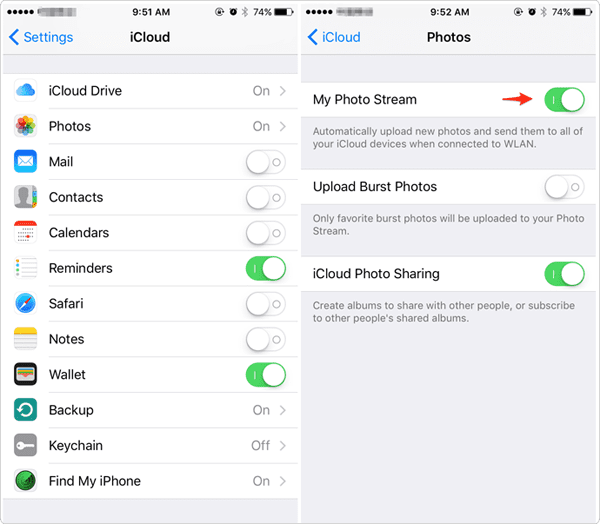
Photo Stream is a feature of iOS devices for iOS 7 and later users. The photo stream uploads your photos to iCloud so that they can be accessed from any connected iOS device. The following step by step guide will help you share photos from iPad to another iPad device.
Step 1: Enable photo sharing on both the iPads.
Step 2; Open the photos app on the first iPad > Tap the “shared “ tab on the bottom of the screen > use the “ +” to create a new photo stream > Enter the beneficiaries of the shared photos > Open the new photo Stream > Use the “ +” button to select the picture to add.
Step 3: Access the Photos from the new iPad > Save the photos to the new iPad.
Part 4: Use iCloud Photo Library to Send iPad Photos
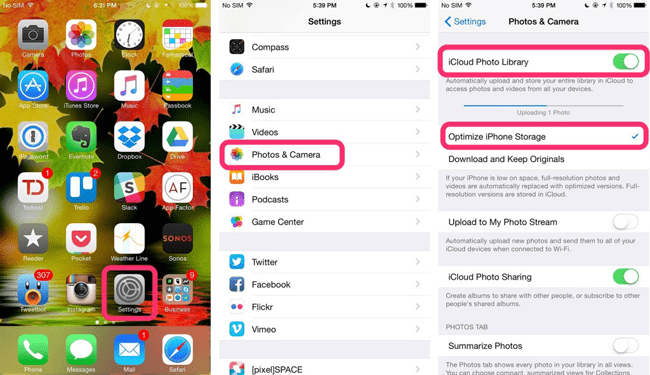
iCloud Photo Library is a great service Apple have provided for users to save photos. You can send photos from iPad to iCloud Photo Library, access to these photos via computer or any other device.
Step 1: Open the settings app on your iPad > select “iCloud” from the menu > Log in with your Apple ID.
Step 2: Go to “Photos” Option > Put on the “iCloud Photo Library”.
Step 3: Connect your iPad to a wireless network > Open the photos app on the other iOS device > Select ‘All Photos” from the Album > Look for all the photos you want > Tap the “Select” button and send them to shared album.


