Part 1: How to directly transfer music from computer to iPhone via iTunes
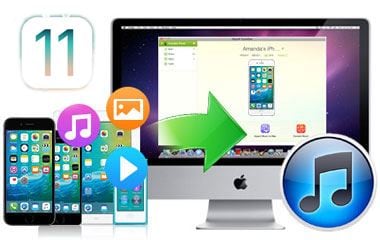
Ever since the introduction of the iPod in 2001, Apple Inc. has changed the way the world listens to music. They have come up with innovative ways to serve you the best quality with a beautiful marriage of the most powerful devices with software that takes the “user-friendly” tag to a whole new level. Apple introduced its flagship Smartphone, the iPhone in the year 2007 and has since changed the way the world views a mobile phone. It made accessing music so much easier and always available on-the-go. So how do you transfer music from your computer to your beloved iPhone?
In order to transfer any file from your computer to the iPhone, you need to use the iTunes software which works like a conduit between your iPhone and computer. The software is pretty user friendly once you start using it and allows you to build a library on your computer and then later you can simply sync it to your device.
You need to download iTunes and update it to the latest version. Once you’ve done this, open the iTunes software.
In order to transfer files through iTunes, you need to first add these files to the iTunes library. You can either drag and drop the files you want to into the library section at the top left column. In case they are of different formats, iTunes automatically formats them and adds them to the library. You can also click "File" and then select "Add file to library" (shortcut key: Ctrl+O). Choose the files you want to transfer and click "Open".
So now that your songs have been transferred to the iTunes library, you need to transfer them to your phone. Click on the iPhone name and choose the "Music" tab. Click "Sync Music".
If you want to synchronise the entire music library then hit "Entire Music Library" and all the tracks in your library get transferred to your phone. If you want to sync selected music and not the entire library, then chose from "Selected playlist, artists, genres, albums" and check the relevant box and hit "sync music".
This is the method if you already have music on your laptop. What about the music you purchased from the iStore? The music you have purchased can be transferred easily as well.
Step 1. Search for “Sync only checked songs and videos” in the summary tab of iTunes sync settings.
Step 2. Check all the song purchases you want to transfer.
Step 3. Make sure your computer is authorised with your Apple ID.
Step 4. Click “Sync music” inside iTunes sync settings under the music tab
Sounds simple, isn’t it?
The use of iTunes might be thought to be unnecessary initially, but it is a brilliant tool for all your music needs. Firstly, it is one of the most user-friendly music apps which address all your music needs comprehensively. And guess what? It’s free. You do not have to give a penny for this software. You can browse through your impressive music collection very easily and find the exact type of songs you want as it segregates music on the basis of Artists, Albums as well as genre. The Apple music store has a collection of almost all the songs that you want to hear. The music is of brilliant quality as you’re buying the original version of the song and not some pirated MP3 and that too it isn’t that costly.
While iTunes can make this easy for you, it isn’t your complete solution. The main disadvantage of iTunes is that all the songs you buy from the Apple iStore can only be played on Apple devices. Besides, you cannot copy these songs into any external drive such as a CD or a DVD.
Part 2. How to transfer music from Mac to iPhone with dr.fone
There also other softwares which can help you do the same thing as iTunes. So, if you are not comfortable using iTunes, fret not, there is dr.fone for Mac from Wondershare. It is a brilliant software which lets you transfer media from the computer to your iPhone or iPod. It is available for free as a trial version online. If you want to transfer files from your computer to your iPhone without having to "sync" your phone with your library then this is your best bet. Also, you may not have the song in your iTunes library, so instead of transferring the song to the library and then to your device, use dr.fone to transfer it directly to your device.

Transfer iPhone/iPad/iPod touch music, videos and photos to Mac and iTunes.
One-click backup to iTunes and manage your songs, videos, and photo albums.
- Copy music from iPhone, iPod, iPad to Mac or iTunes.
- Export videos from iPhone, iPad, iPod to iTunes/Mac.
- Transfer all photos from photo album to Mac or iTunes.
- Copy playlists with rating and pla y counts to iTunes.
Step 1. Run the program and connect your iphone
After downloading the program, install and run it on your Mac. Then plug in your device and wait for it to read it. Once it detects your iPhone, your phone will be shown in the main window.
Step 2: Transfer music from computer to iPhone
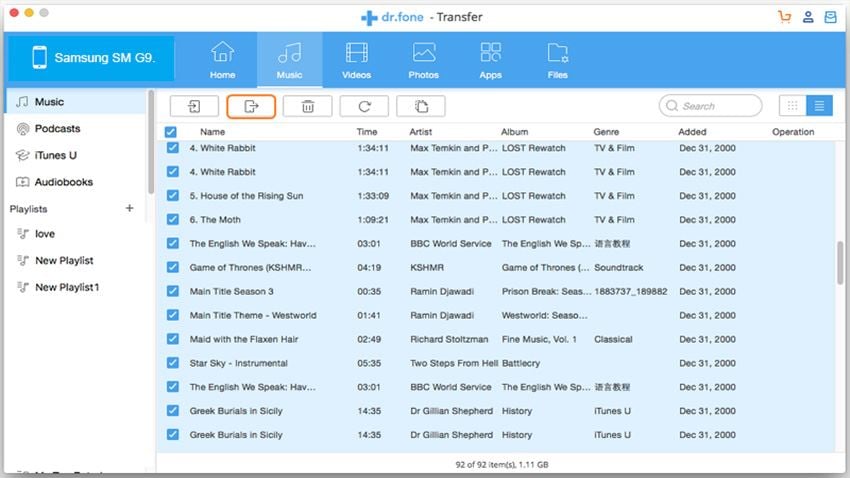
Click the “Music” tab on the top of the dr.fone to enter the music management window. All the music on your device are displayed there.Click the “Add” button on the top to add files to your device. If you try to transfer music from Mac to iPhone, iPad, iPod and Android device, there are 2 options: Add File or Add Folder after you clicking the “Add” button. Choose the way you prefer to copy songs from Mac to your device.
Part 3. What if the music format is incompatible with iPhone?
For unsupported file formats, dr.fone also gives you the option of converting them before you copy them onto your device. This particular feature makes it a winner over all other such iTunes bypassing softwares. This utility gives dr.fone the bragging rights.
Video Tutorial: Transfer Music from Mac to iPhone with dr.fone


