The iPad is an excellent gadget that you can show off your friends and family members the extensive collection of photographs that you hold. Nevertheless, how do you get the photographs out from the iPad and store it on your computer? Well, that is what we are here to explain. Transferring the photos from your iPad to the computer will give you the benefit of backing up all the images. Proceed to read ahead as we present data about transferring photos from iPad to computer.
Part 1: Transfer Photos from iPad to Computer with dr.fone (Strongly Recommended)

dr.fone for Mac ( for Windows) is designed to transfer all the photos from your iPad to the computer. Note that, with the help of this program you can move all the photos in Camera Roll, Photo Library, and those downloaded from the Internet. dr.fone specializes as a media transfer program for all the iDevices. You can send photos, videos, music, and other documents from any Apple device to a computer or any other Apple device in a single stroke of the mouse.
Download the free trial version now!
Guide to transfer photos from iPad to computer
Step 1: Before beginning the process, ensure that you have installed the trial version of the dr.fone from the "Free Download" bottom. Now please establish a connection between your PC and iPad with the provided USB cable. Launch dr.fone program. As you have already connected your iPad to the computer, the program recognizes it instantly. Now you will get a dr.fone window like this screenshot.
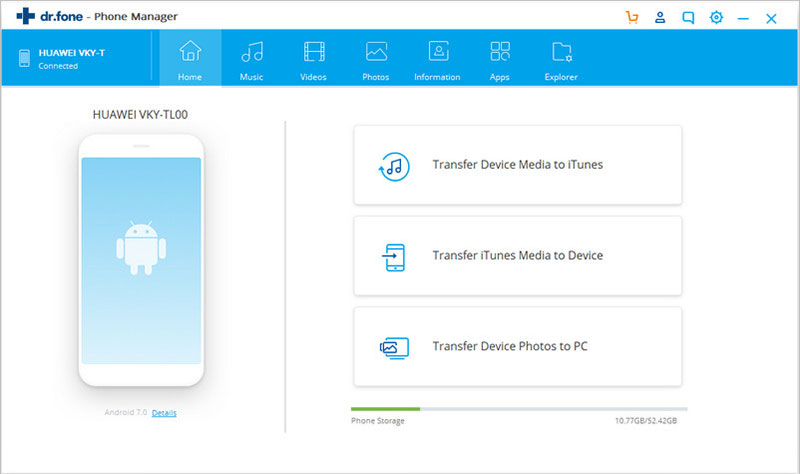
Step 2: Click “Photos” tap at the top of the main window, and you can see photo lists like Camera Roll, Photo Library, and other lists. Mark the photos that you want to copy to you computer. You can mark only those that you need or the entire collection from the sub-menu categories under the “Photos” tab. At the top of the displayed images, you will notice “Export to” option. Click it, and then choose your computer saving location. You can create a folder or direct towards an existing folder to save the images on your computer.

Step 3: Once done, dr.fonewill begin copying all the pictures marked or the entire collection to the selected folder on your computer. The time needed for the method to complete depends on the number of files selected and the size. Once completed, you can check the folder for the pictures.
Part 2: How to Transfer Photos from iPad to Computer with a USB Cable
Step 1: Plug your iPad into the computer using the USB cable that you use to charge. You have to unlock the device to allow the Windows to access the files on the iPad. Press “Trust this PC” when prompted.
Step 2: Open “My Computer” window. You can further start this by pressing the Windows button plus E. If you are using Windows 10, you can use the file explorer located in the task bar.
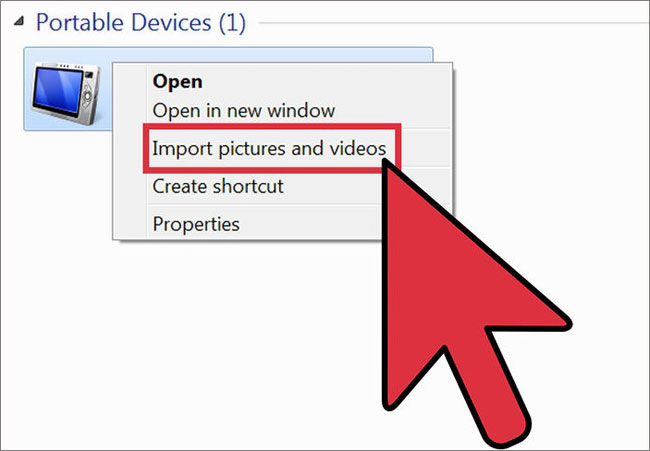
Step 3: Right click on the iPad and choose “Import pictures and videos”. The wizard will then begin the scan to collect the photos and videos on the device. The time taken by it depends on the number of photos stored on the device. If the wizard is unable to find anything, close the program, wait for a few minutes, and restart the process. Sometimes, Windows takes a while to recognize iPad storage.
Step 4: In the next screen, choose “Review, organize, and group items for import” and press “Next.” The action will enable you to select the pictures that you want to import and arrange them according to the requirement. You can use the slider to adjust the importing of the pictures and sorting them into folders. You can create folders based on the time taken or into a single folder.
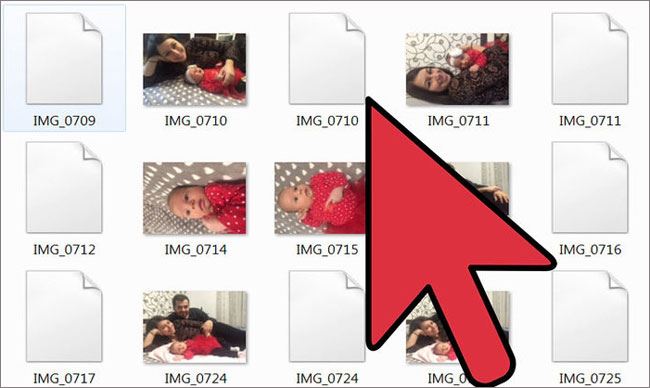
Step 5: You can name the folder with a particular name. Should you not choose to name the folder, the program will create the label with dates. If you need advanced options, you can click the “More options” link. Once everything is ready and set, click the “Import” button to begin the process. Browse the folder to view the imported pictures.
Note: The process will allow you to import only the images present in the Camera Roll. The major disadvantage is that you will be unable to import other photographs stored in any other location on your iPad.
Part 3: Export Photos from iPad to the Computer via Email
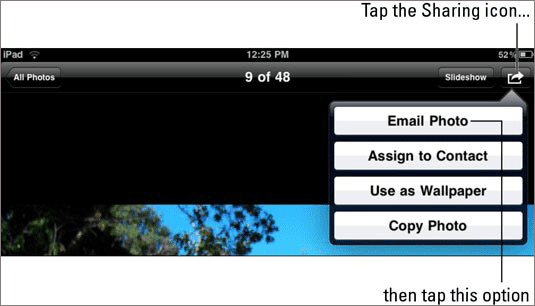
Step 1: Log into your email account on your iPad. In the “To” address field, type your email id.
Step 2: Go to the attachments icon, browse to the Photos folder and begin selecting the images. Note that you have a cap of 25mb for attachments for a single mail. Choose the images that you want to copy to the computer and send the mail.
Step 3. Open your mail on your computer. Download the attachments that you have sent from your iPad. Save them to your PC in a folder.
Note: The process is time taking and not the preferred option if you have many images stored on your iPad. You cannot waste your time attaching the pictures and sending emails to your id! Beware! It is only helpful if you have a couple of photographs that you want to copy to your PC.
Transferring photos from iPad to a computer is no longer a tedious procedure. You can use idr.fone to avoid complicated processes, where you have to do most of the things manually. They are time taking and create frustration. With the help of application, you can directly transfer all the pictures stored on your iPad in a few simple steps. Go ahead, use the program, and copy your iPad photos to your computer in a hassle-free manner.


