Live Photos are actually GIF images with the sound, yes, it is something in between the photos and videos on your iPhone. This feature was recently introduced in the latest model of iPhone 6S and no deny is an amazing yet useful feature. Ever thought of taking pictures while recording videos using the one camera or recording videos while taking photos from iPhone? Well, this is what Live Photos is called and it will save a 1.5 seconds video before the shot and 1.5 seconds video after taking the shot.
- Part 1. How to send iPhone Live Photos to Other iPhones/iPads/iPod touch
- Part 2. How to share iPhone Live Photos from iPhone 6S to iPhone 6S
Part 1. How to send iPhone Live Photos to Other iPhones/iPads/iPod touch
Using the same method as explained in the above method, you can forward the Live Photos to other iPhone, iPod Touch or iPad users, however, there are certain problems with the certain devices. Users with iPhone 4S or below will not be able to receive the photos via Airdrop, so, you will have to use the third party applications or iMessage to send the Live Photos to other devices.
However, one main problem associated with the all other iDevices except iPhone 6S is that the received Live photos will only be the still images. There is no way of watching the photos on the older devices. To resolve this issue, you can use a third party application such as dr.fone for Mac. Using this amazing application, you can’t only convert the Live Photos to GIF images but you can also transfer them back to your iPhone, so, you will be able to send them using iMessage.
dr.fone – best software to convert Live Photos into GIF images:
dr.fone for Mac is not only a simple live photo converting software, it is your all-in-one solution to manage all type of photos or videos on your iPhone. If you have both iPhones, you can use this software to transfer the GIF images from one iPhone to another iPhone without ruining the quality of the photos. Moreover, you can create new photo albums on your iPhone right from this software and transfer images from the computer to your iPhone using the simple steps. dr.fone is available for both the Windows and Mac. However, right now, only the Mac version is supporting the live photos conversion, developers are working hard to update the Windows version to support this feature. Here’s the step by step guide to convert live photos to GIF images using dr.fone for Mac.
Note:This software support windows and latest Mac OS system.
Step by Step to convert live photos to GIF images using dr.fone for Mac:
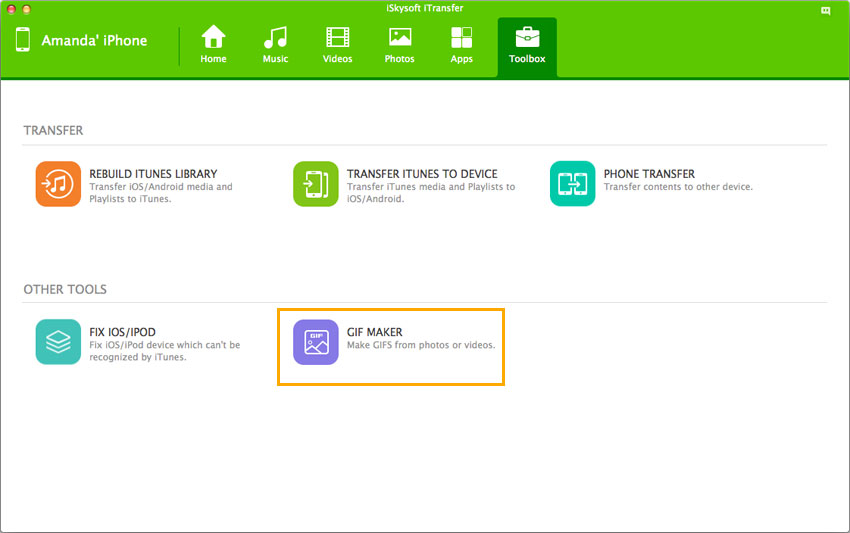
Step 1: Connect your iPhone with Mac and Launch the dr.fone for Mac. The software will detect your device automatically. After detecting the iPhone, it will show the main screen of the software. Find the "Toolbox" at the top menu so you can see a "GIF MAKER" button.

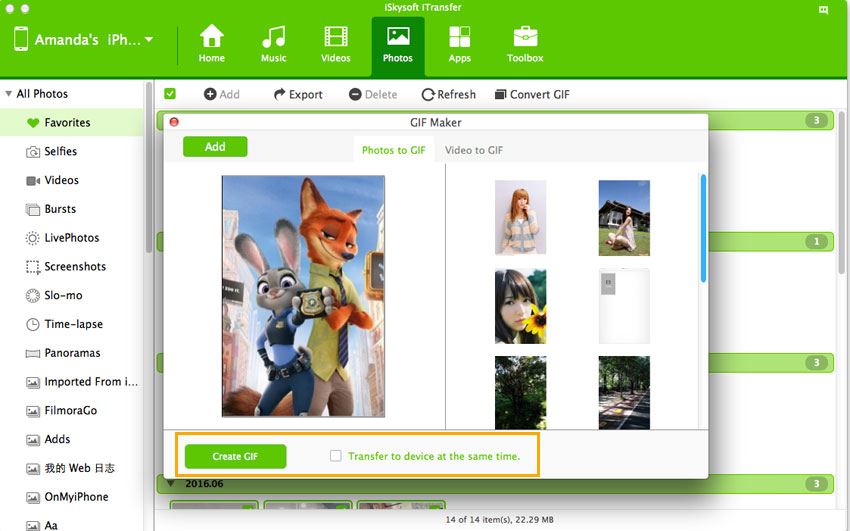
Step 2: There are 2 tabs in the window “Photos to GIF” and “Video to GIF”. You’re supposed to click the one that you need to convert to GIF images. Click the “Add” button to browse photos on your Mac. Press the Command button and click photos to select them (at least 2 photos) from your Mac. Click “Convert GIF”.
After conversion, the photos will be transferred to your Mac. You can use them to send them to a friend using iMessage, Facebook or any other third party messaging application.

Part 2. How to share iPhone Live Photos from iPhone 6S to iPhone 6S

Sending photos from one iPhone 6S to another iPhone 6S is pretty easy task, if the person is near you, you can send them via AirDrop. However, if the person is far away, you can always use the amazing iMessage to send these live photos. The best part about sending Live Photos from one iPhone 6S to another 6S is that they will behave the dame. Using the 3D touch technology of the iPhone 6S, recipients will be able to see the live photos in perfect way. Whenever, you will send someone a live photo, a small live photo icon will be shown in the top left corner of the image. Here’s how you can send the Live photos from one iPhone 6S to another.
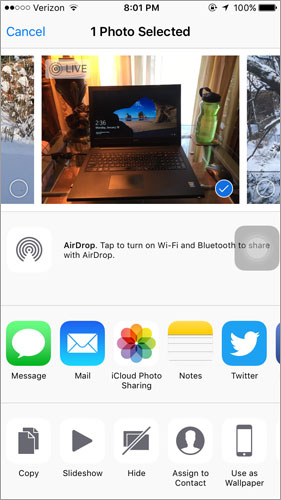
Step 1. Go to Photos and open the live photo that you want to send to another person.
Step 2. Now, Click on the little arrow sign at the bottom left corner of the screen.
Step 3. Now, select the message and write down the recipient’s contact information and hit the send button.


