The latest iPhone comes with 128GB space limit. But studies have shown that a lot of users still own the 16GB versions or 64GB versions. Many of them complain that the iPhone storage is full and want to know how to get more storage on iPhone. The fact is that, unlike some Android phones, iPhone doesn't have the option to insert extra SD card. It means if your iPhone storage is full, you’re supposed to clean iPhone storage or ditch it for a new bigger space iPhone. The following are the top 5 tips for how to get more storage on iPhone 7/6s/6/5s/5/4s/4.
There are several factors that lead to this situation. You are not buying an iPhone only to make calls, are you? It could be a music player, video player, and game console, camera take photos and shot videos, a mini computer to manage documents, a library to store eBooks, etc. right? To make it simple, it is a warehouse to store all kinds of staff. To free up the space, you need to do as the tips mentioned below.
Tips #1. Backup songs, videos, and photos you not use currently and will not use in the near future.
Open your iPhone, find the storage usage in General > Storage, you’ll find that photos, videos and photos might take 1/5 of your iPhone storage. To get more storage on iPhone, the first option is to export these media files to your computer and remove them from your iPhone.
If all the songs or videos are bought from iTunes Store, connect your iPhone with your computer, launch iTunes. From iTunes File menu > Devices > choose “Transfer Purchases” to import them to your iTunes Library. As for Photos, directly cut and paste them from your iPhone to your folder on your computer (ONLY WORK FOR PHOTOS YOU HAVE TAKEN)
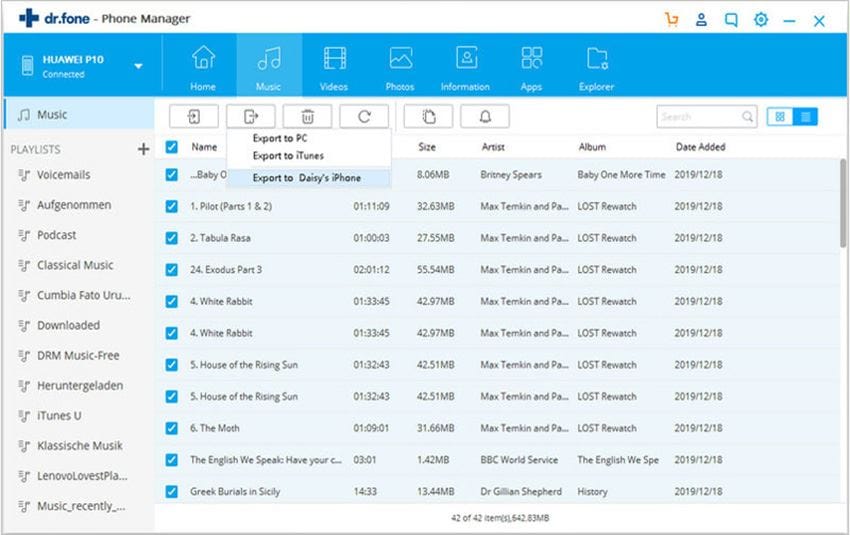
If some of the songs, videos, or photos you get are not purchased from iTunes Store or take by yourself, try dr.fone to backup them easily to your computer. All you need is connect your iPhone to your computer via a USB cable > install and launch dr.fone > select files displayed in dr.fone > click “Export” to save them to your computer.
Download dr.fone trial version now!
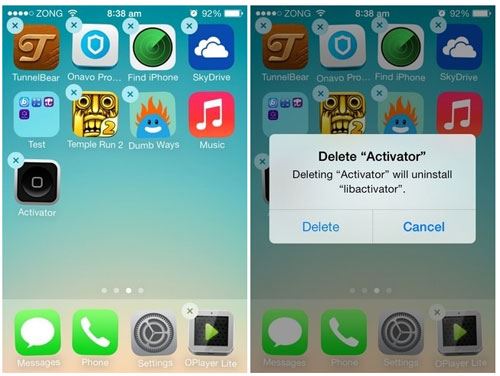
Tips #2. Delete The Apps That You Are Not Using
If there are some apps on your iPhone that you do not use them regularly or will not use them in the future, delete them. There is no reason in keeping all the useless games and applications installed. To delete useless apps, tap on one of the app for a few seconds unless you see the “X”. Then tap the “X” on the top right of the app to remove the app one-by-one.
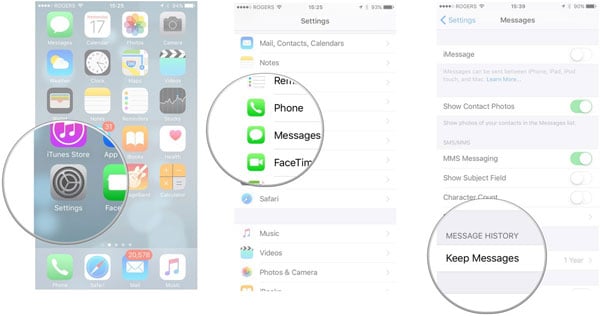
Tips #3. Set Messages to Auto-delete
Messages are among the things that consume a lot of unnecessary space on your iPhone. With each new message, that amount of space is increasing and begins to trouble you. Actually you don’t have to delete messages manually. You can enable the device to automatically delete messages by setting up the duration.
How to set your messages to auto-delete on your iPhone:
Step 1. You need to locate your Settings menu and then find the Messages section in it.
Step 2. You will notice the Keep Messages button, click it. It is located under the Message History.
Step 3. You have the option of setting the messages to delete after 30 days or after 1 year. The last option is to keep them forever.
Note: This is a handy option, but you still need to be careful not to lose an important message.
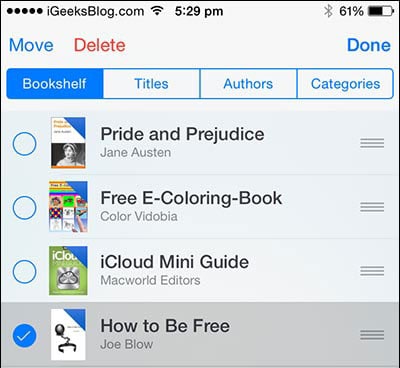
Tips #4. Delete e-books
We all love to read books, whether it’s during a long bus trip or in the evening before we go to sleep. There are books you are attached to and can read multiple times and there are those that you read once and completely forget about them. Over time, you can crowd your phone with many of books you basically don’t need because you will never again read them, which is why it’s recommended to erase any book that you think doesn’t deserve a place on your phone.
How to delete e-books on your iPhone:
Step 1. Open the iBooks app on your device.
Step 2. At the bottom left, you will notice My Books tab. This is where all the books you have downloaded to your iPhone are located.
Step 3. Simply mark the books you don’t need anymore and select the Delete button at the top of the screen to finish the process.
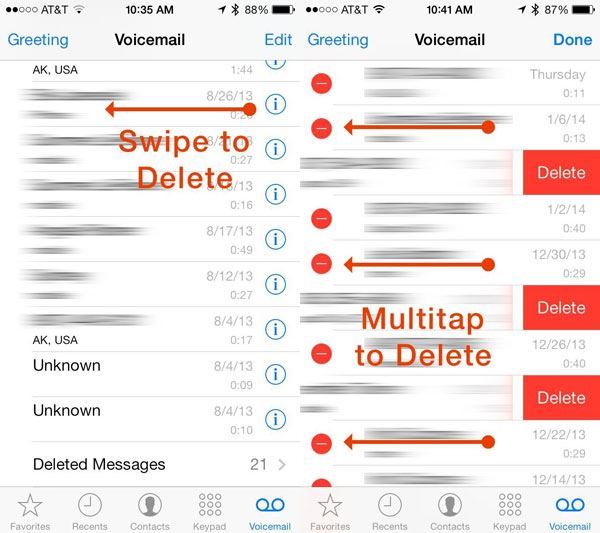
Tips # 5. Delete Voicemail Messages
Voicemail messages are something that you receive every day. When you get to listening to the message, it is actually downloaded to your device and takes up some space. This might not seem like a whole lot of space, but over time voice messages will pile up and start crowding your storage. This is why it is very important to occasionally delete all the voice messages you have stored on your iPhone.
How to delete voicemail messages on your iPhone
Step 1. Go to the Voicemail tab on your Phone app to look through your voicemail messages.
Step 2. You can swipe left on each message to delete it. Alternatively, click Edit and then select which messages you want to erase.
Step 3. In order to permanently delete the messages from your phone, go to the bottom of the list and select Deleted Messages. Finally, choose Clear All to permanently remove them from your iPhone and free up some space.
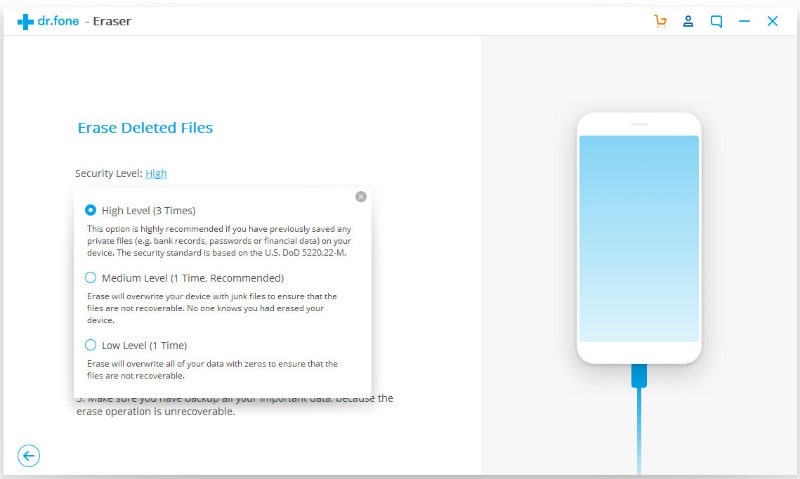
Tips # 6. Remove Junk Files, Caches etc.
One of the best things you can do to save a considerable amount of space on your iPhone is to delete junk files. These files are unnecessary on your system and are using up your memory for no obvious reason. Whether we are talking about downloads that didn’t complete and they’re unusable, application log files or other temporary files that various app created, deleting them will be a great move. The easiest way to do this is by using dr.fone - Data Eraser, a very handy tool for every iPhone user.
How to remove junk files on your iPhone by using dr.fone - Data Eraser
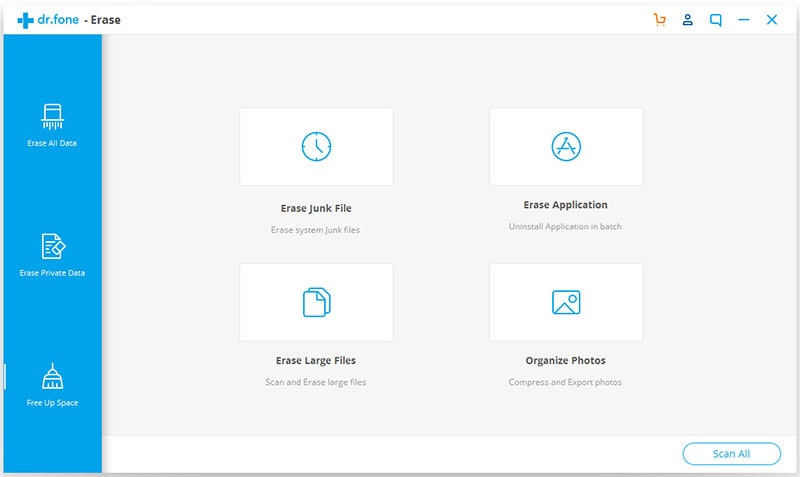
Step 1. First of all, you need to download the program. You can find dr.fone DataEraser. Once you download and install it, start the software. Connect your iPhone to your PC with a USB cable. You will notice that Data Eraser will automatically recognize your device and show the main interface screen.
Step 2. On the right part of the main interface screen, you have iOS optimizer option. Click on it. You will now see all the data on your phone categorized into System Data and User Data. Notice the Start Scan button in the bottom-right part of the screen. Click it and the software will start scanning the data on your device. Be patient until it finishes.
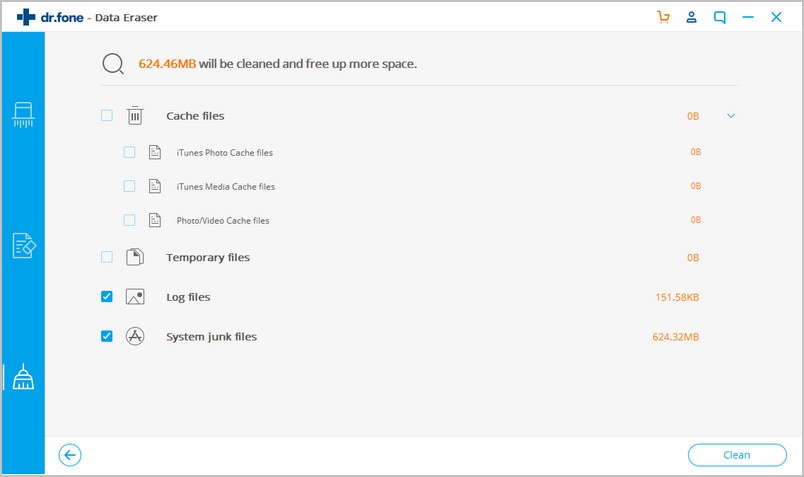
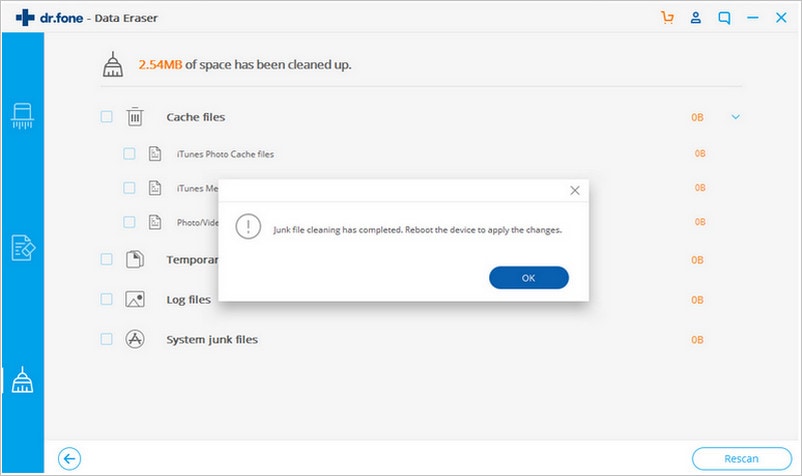
Step 3. You will now see the information on the amount of data that can be deleted to free up some space on your iPhone. There is a CleanUp button in the bottom right corner. Hit it and Data Eraser will start removing unnecessary junk files from your iPhone. This process can take a few minutes, so be patient.


