Recently, Apple introduced one of the latest iPhone SE with the technology of iPhone 6S in a small screen size 4.0”. If this is your first iPhone, you may be wondering how you can sync contents such as photos, music, movies and TV shows and iBooks and apps from your computer to the iPhone SE. iOS is a closed operating system and you will need to have iTunes on your computer to sync data from your iPhone to your computer.
- Part 1. How to sync iPhone SE with iTunes to import Apps, Music, Movies, Books, etc.
- Part 2. How to selectively sync iPhone SE with dr.fone (recommended)
Part 1. How to sync iPhone SE with iTunes to import Apps, Music, Movies, Books, etc.
If you are using Mac OS X, iTunes comes pre-installed on this device, however, windows users will have to go to this link to get the latest version of iTunes. After downloading the software, follow the simple on-screen steps to install it on your computer.
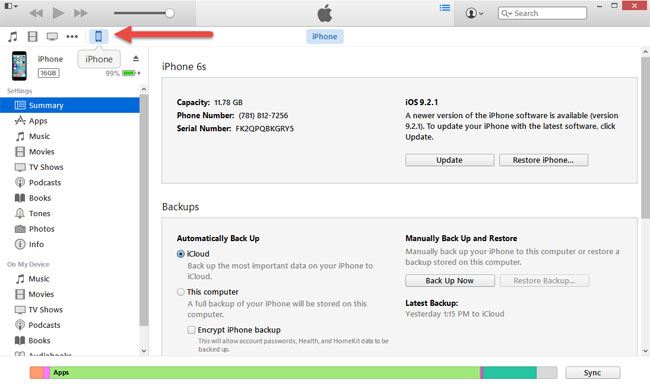
Step 1. Connect your iPhone SE with the computer using USB cable and launch recently installed iTunes on your computer. On the main screen of iTunes, Click on the iPhone button in the top bar as shown in the screenshot below.
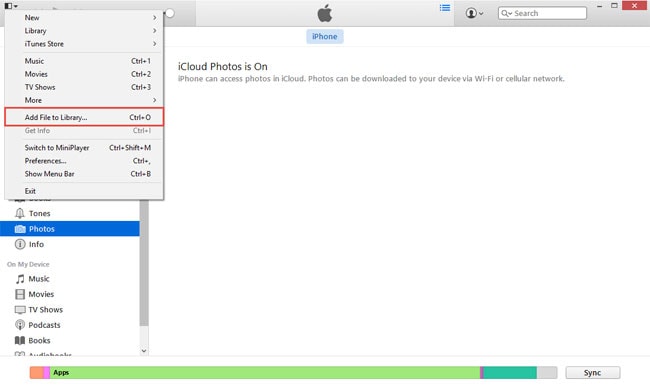
Step 2. The very first step is to move the files from your computer to the iTunes, Click on the little arrow in the top bar and select “Add Files to Library”. Select the files such as music, TV Shows, Movies and books to copy them to iTunes.
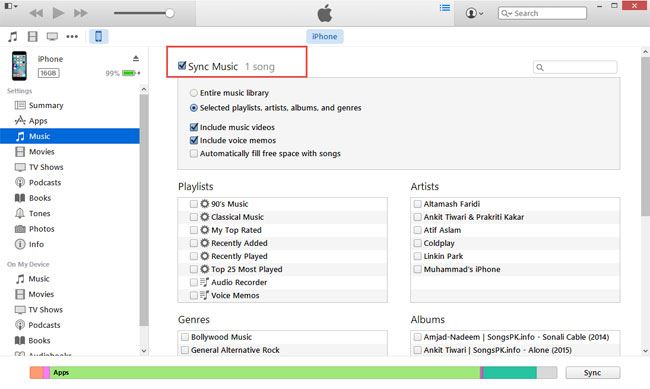
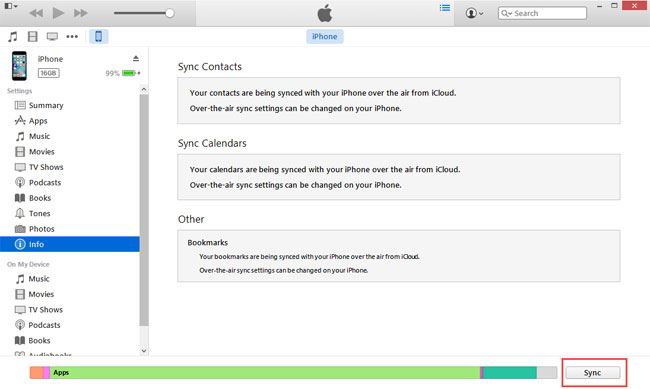
Step 3. On the left panel of main screen of iTunes, select each parameter and enable sync for each one of them such as click on music and enable the Sync Music, similarly, enable the Podcasts, Movies, TV Shows, Books, Tones and photos.
Step 4. Transfer of most of the data is pretty much easy, however, if you have enabled the iCloud Photos on your computer, you will not be able to transfer the photos. Go to settings on your iPhone to disable the iCloud Photos and sync your iPhone to finish this process.
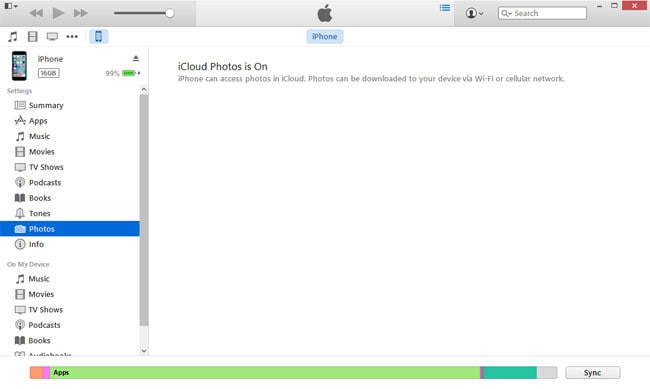
Step 5. Once you have enabled all the settings, click on the Sync button at the bottom of the screen to start the synchronization process. It may take some time depending upon the size of data that you are trying to copy from your computer to iPhone SE.
Advantages and Disadvantages of sync iPhone SE with iTunes:
The only advantage that we have found so far is that you will be able to sync the data from iTunes to new iPhone SE. Apart from that, there are several disadvantages of using the iTunes such as it will automatically delete data from your iPhone SE. Moreover, if you try to sync your iPhone with a new computer, the songs and media present on your iPhone SE will automatically deleted. If you are using the iCloud account to save your photos on the cloud, iTunes will not let you transfer the photos from your computer. Another worst thing about iTunes is that when you add files from your computer to the iTunes, it will also save them in another directly which takes a lot of space on your computer. Furthermore, Apple has introduced a new feature “Live Photos”, there is no way by which you can transfer these photos from your iPhone SE to computer, whenever you will try to do that, it will only copy the static JPEG images. Last but not the least disadvantage is that there is no way by which you can transfer any music or media from your iPhone to compute using iTunes, so, you will need to have a good alternative software to do all these tasks and avoid sync issues between your computer and iPhone SE.
Part 2. How to seletively sync iPhone SE with dr.fone without losing data (recommended)
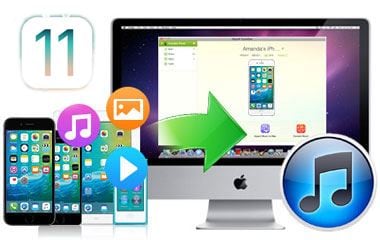
dr.fone - the best software to sync iPhone SE
Just like iTunes, dr.fone is a cross platform application available for both Microsoft Windows and Mac OS X. It is a complete media managing application for your iPhone, you can easily sync the music, videos and photos from your computer to iPhone SE without erasing the already present on your computer. If you are copying a song or video which is not compatible with the iPhone SE, dr.fone will automatically convert these videos and transfer them from your computer to the iPhone SE. It doesn’t require the complex sync process and works just like copy-paste interface to transfer data between your computer and iPhone SE.
The amazing features of the dr.fone does not end here, developers have also included a new feature which will let you convert the live photos from your iPhone SE to the GIF images. This feature will not only free a lot of space on your iPhone but will also let you create beautiful GIF images using the different photos and videos. Moreover, you don’t have to be bond to a specific computer to transfer contents from computer to iPhone SE, it works great with any computer that you use. Last but not the least, you can transfer the media from the iPhone SE to your computer with simple one click. You can either copy this media to a folder on your computer or transfer it to the iTunes Library. Here’s the step by step guide to use dr.fone to put music, videos and photos to iPhone without iTunes.
Step 1. The very first step involves downloading and installation of the dr.fone on your computer. Get the latest version and with one click you can install it on your computer. Connect your iPhone SE with computer, close iTunes and launch the recently installed dr.fone.
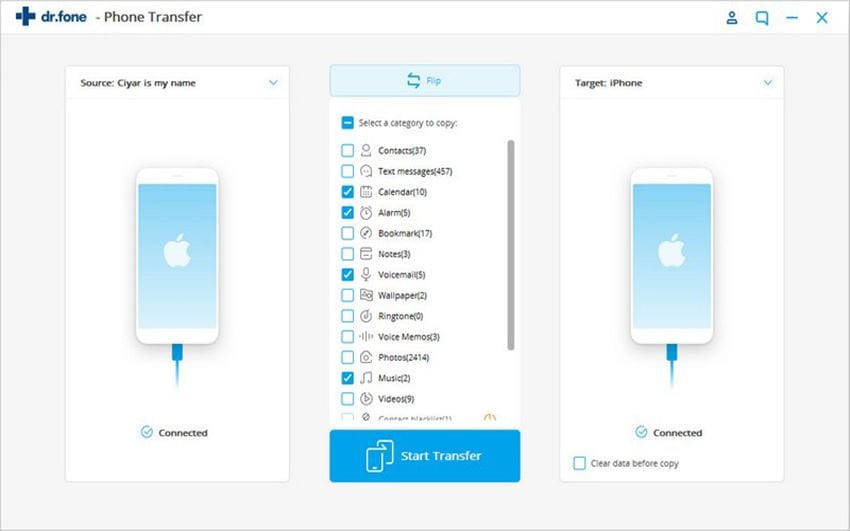
Step 2. If you want to transfer the music, music videos or movies, click on the "Music"/"Photos"/"Videos". In the new window,select the music, music videos, TV Shows, iTunes U, Podcasts or Audiobooks and click on "Expert" to transfer media files to your computer.
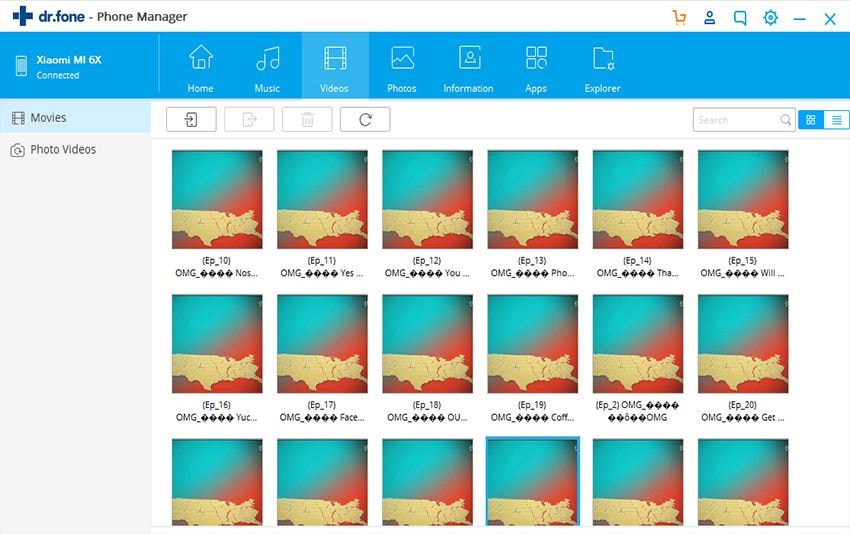
Step 3. In order to sync the photos from your computer to iPhone SE, select "Photos", open the appropriate album and click on add to add the photos to your iPhone SE. Wait for a few seconds as it may take some time to copy photos from your computer to iPhone SE.
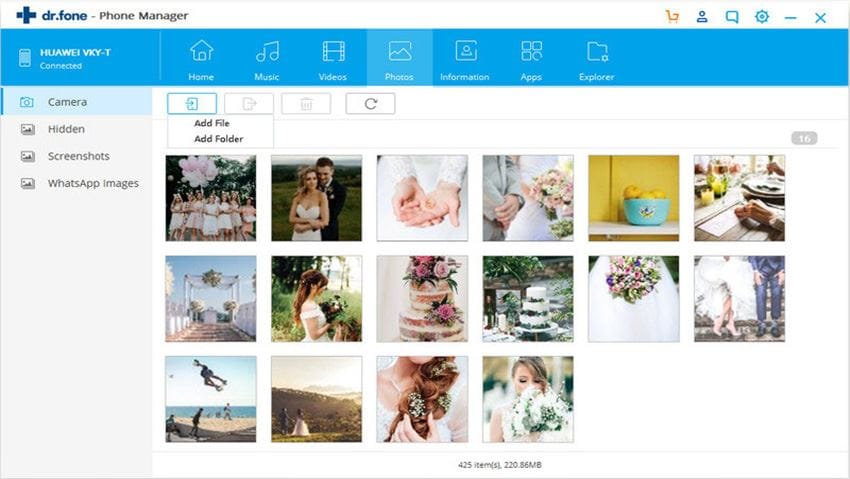
That’s it! You have successfully transferred any type of media from your computer to iPhone SE. Similarly, you can also copy media from iPhone SE to computer, just click on the photo, music or video and select Export.


