How do I transfer contacts from iphone to iphone?
This question pops up in the minds of every single user owning an iPhone. Using iCloud and iTunes the users certainly can transfer files but it is a long and time consuming process which, in turn, proves futile or even catastrophic if data loss happens due to some error popping or bad connection. Since contacts are very dear and important to us, here in this article we are going to discuss the methods on how to move contacts from iphone to iphone via “iCloud”, via “iTunes” and the lightning fast revolutionary way via “dr.fone”.
Part 1: How to Transfer Contacts from iPhone to iPhone via iCloud
Transferring contacts from iPhone to iPhone isn’t really a big deal. It’s just the fear to accidently loose contacts makes it much tougher. Just follow the steps mentioned below and you’ll certainly be able to send contacts from iPhone to iPhone easily.
To begin with syncing contacts from iPhone to iPhone via iCloud, first make sure that both of your iOS devices are connected to same WiFi. And yes don’t worry, if in the enthusiasm of using your new iPhone you already have done setting up your device. One can easily send contacts from iPhone to iPhone without factory-resetting it. Follow the steps below.
Step 1: Log into the same iCoud account on both the iPhones between which you are going to transfer contacts.
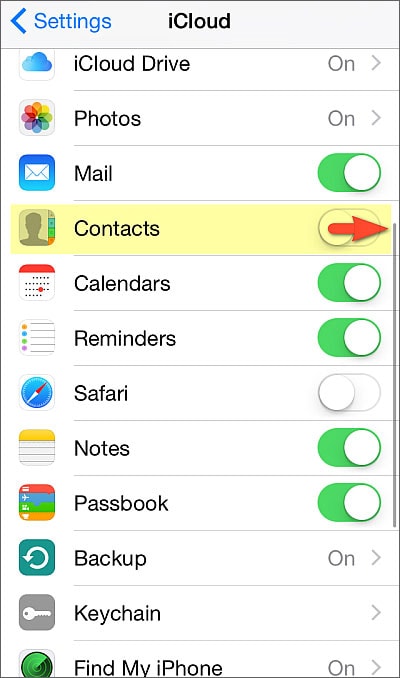
Step 2: Head to “Settings”, hit the name on top, then click on iCloud and check if the “Contacts” option is toggled on. Make sure to turn it on if it’s not already. Note: Users owning iOS 10.2 or older, head to Settings and then tap iCloud.
Step 3: Next you are required to scroll down to the Storage & Backup (or iCloud Backup) and hit “Backup Now”.
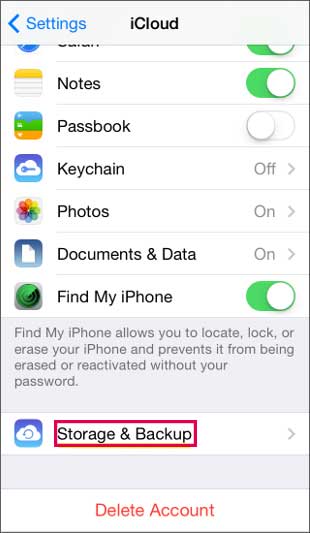
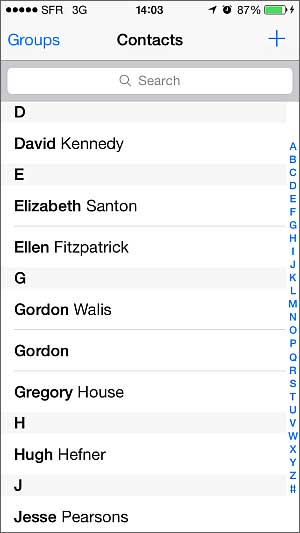
Step 4: Now pick up your new iPhone in which you wish to sync contacts, get into the “iCloud” section in the “Settings” and make sure to toggle the “Contacts” syncing as enabled if it’s not. Now, head to your Contacts and refresh it by scrolling down. And you’re done, within a fraction of minutes all your contacts from your old iPhone starts appearing on your new device.
Part 2: How to Transfer Contacts from iPhone to iPhone via iTunes
Sometimes you may not have access to the WiFi or also some users do not use the iCloud service, for those users, especially, we are discussing this how to transfer contacts from iPhone to iPhone via iTunes step guide. This guide will help you to sync contacts from old iphone to new iphone without much effort. All you need to have for this is your new iPhone, your previous iPhone from which you want to transfer the contacts and your PC/Mac. Let’s have a look at the step guide.
- Open the iTunes latest version installed on your computer and then plug in your old iPhone with a help of the lightening cord.
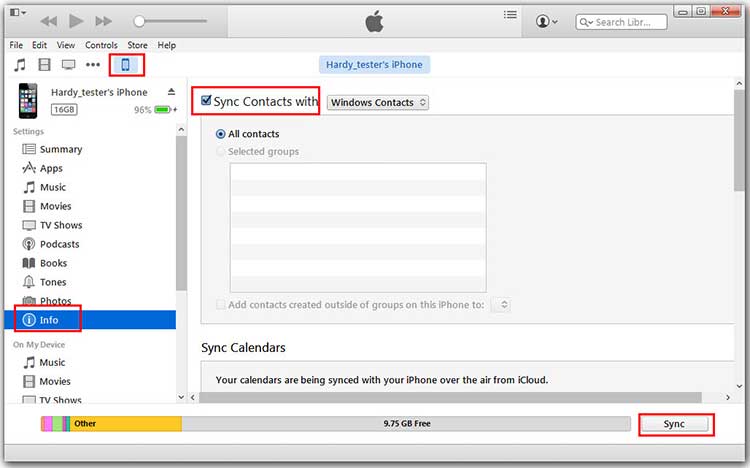
- Tap on iPhone from the iTunes menu bar, now tap on info and check if Sync Contacts is enabled, enable it if not.
- Now hit “Sync” to send all your contacts by syncing your iPhone with your PC/Mac and let the process complete.
- After the process completes, plug old iPhone out and plug in your new iPhone device.
- Tap on iPhone from the iTunes menu bar, now tap on info and check if Sync Contacts is enabled, enable it if not. (Repeating this step is important.)
- Now, look for the “Advanced” menu by scrolling down and select “Contacts” under the submenu “Replace Information on this iPhone”. Doing so, will wipe all contacts stored currently on your new iPhone and load up the contacts from the computer which we have just now backed up from your old iPhone.
- Hit “Sync” to get this rolling. On completion, you’re done.
Part 3: Transfer More than Contacts with dr.fone (Recommended)
Here is a great way for transferring contacts from iPhone to iPhone without any of the limitation and restrictions. dr.fone for Mac (dr.fone for Windows) comes with a blend of amazing features, amazing results and yes amazing speed of transfer. It’s a great phone manager tool and extremely simple to use that takes no specific technical knowledge or anything. This software is counted on top when it comes to syncing, transferring, backup, rooting processes and even more. Here are the detailed features of this software.
- You get the opportunity to do transfer between phones, iTunes library rebuilding, transferring iTunes media to phone or backup in just one click.
- You can manage phone music simply with this tool like if you want to create or edit the playlist, de-duplicate the music tracks, add multiple songs etc. you can do that without any trouble.
- You can transfer more than contacts with this software for example music, photos, videos, messages and more.
- You can send messages directly from your desktop to the Android device if you’re stuck with your device.
- Not just moving contacts from iPhone to iPhone, the transfer process can take place between Android to iPhone, iPhone to Android, Android to Android, iTunes to iPhone/Android and computer to iPhone/Android.
How to transfer contacts from iPhone to iPhone using dr.fone
Step 1. Open dr.fone
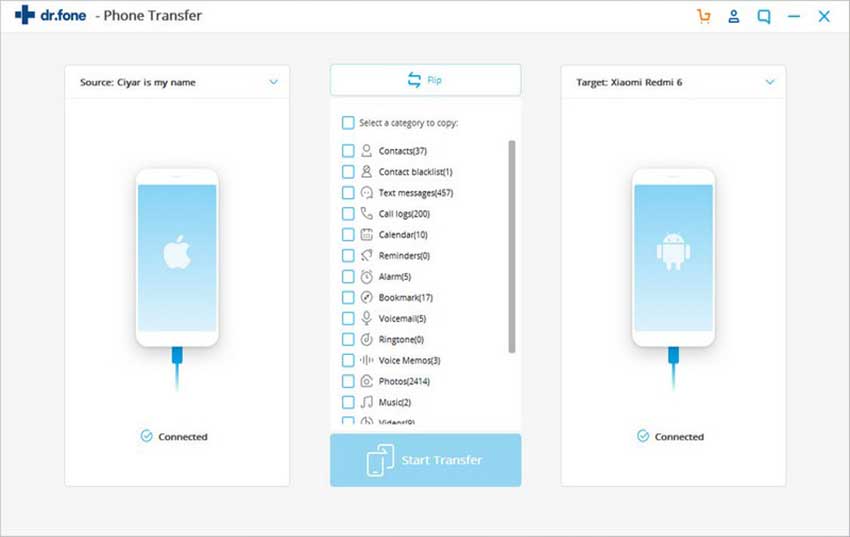
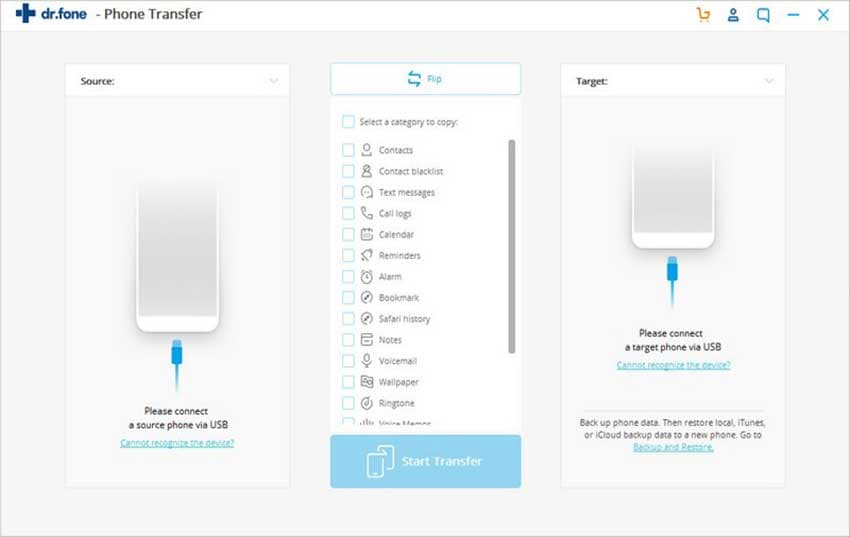
First, download and install the software and launch it. Connect both the iPhone devices to the computer. You need to choose the main device i.e. the device from which all the stored content is going to be transferred. Afterwards, click on “Phone to Phone Transfer” options available on the computer screen.
Step 2: Target Device Selection
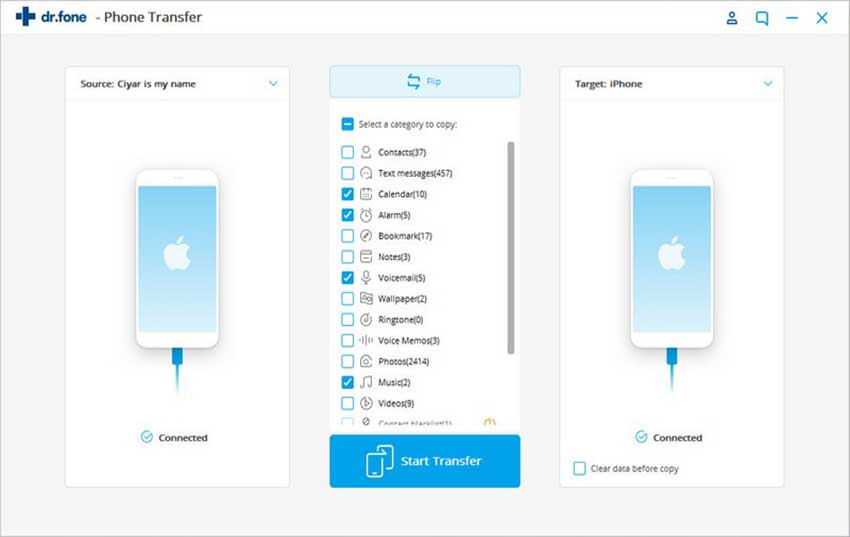
Now, you need to select the other iPhone device (where you want to transfer) which will be the target device. Selecting it will send the content from the source device to the target device. After that, click on “Next”.
Step 3: Move Content from iPhone to iPhone
Clicking on Next will bring all the files of your device on the computer screen. All the files will be shown selected by default. You just need to hit the “Transfer” button. Wait for a few seconds and click “OK” after finishing of the process.
