- Part 1. How Do I Transfer Music from iPhone to iTunes on Mac/Win
- Part 2. How to Transfer Purchased Music from iPhone to iTunes via iTunes
- Part 3. Why We Need to Transfer Music from iPhone to iTunes
- Part 4. Troubleshooting on Transferring iPone Music to iTunes
Have some songs stuck on your iPhone and want to copy them to your iTunes Library? Or got a new computer, and need to transfer music from iphone to new computer? Whatever the reason is, you must know that the right way to get the job done. If the songs on your iPhone are imported from CD, shared from friends or downloaded directly from the Internet, you should try the way mentioned in part 1, because it is the only way to make it. If all songs on your iPhone are purchased from iTunes Library, then follow the steps in part 2.
My suggestion: if you want to transfer music from iPhone to new Mac or Windows PC, I suggest you try the way mentioned in part 1. It is the most efficient way to help you achieve your goal currently.
Part 1. How Do I Transfer Music from iPhone to iTunes
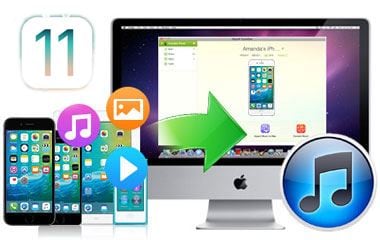
Transferring music from iPhone to iTunes isn't a difficult task if you are using the correct transfer tool like iSkysoft dr.fone for Mac (or iSkysoft dr.fone). It has an easy user-interface that can allow you to sync and transfer music to iTunes from iPhone without restrictions. This smart transfer tool lets you copy all music from iPhone (iPhone 6 plus and iPhone 6) to your iTunes library or Mac in only one click. Not only the purchased music but also non-purchased music can be transferred from iPhone to iTunes. You can also export the whole playlist to iTunes easily. See more wonderful features:
- One click to copy all music from iPhone to iTunes
- Export selected songs and playlists to iTunes.
- Copy playlists with rating and play counts to iTunes.
- Support new iPhone 6 Plus, iPhone 6, Yosemite, iOS 8.
- Authorize computer is not required when transferring music from iPhone to new computer.
Steps to Transfer Music from iPhone to iTunes
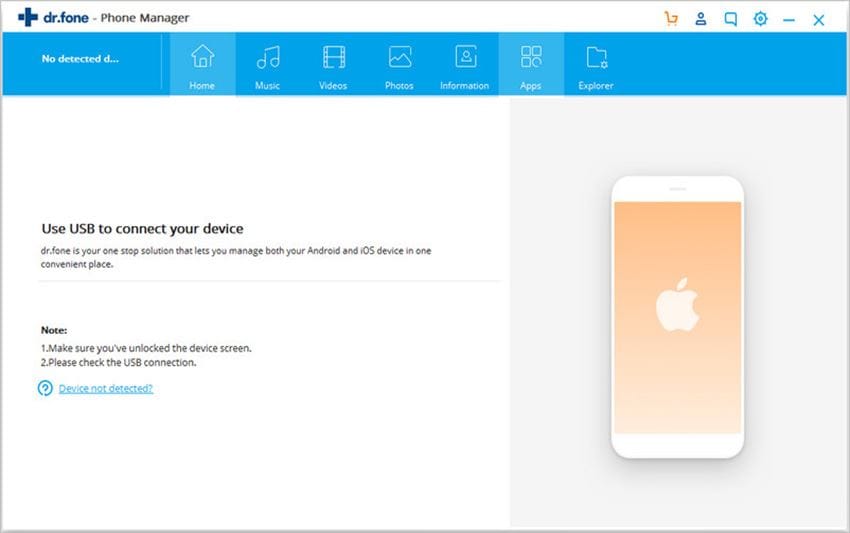
Step 1: Download and launch the software. And then connect your iPhone to your computer. The transfer tool will automatically detect your iPhone and scan your iPhone content.
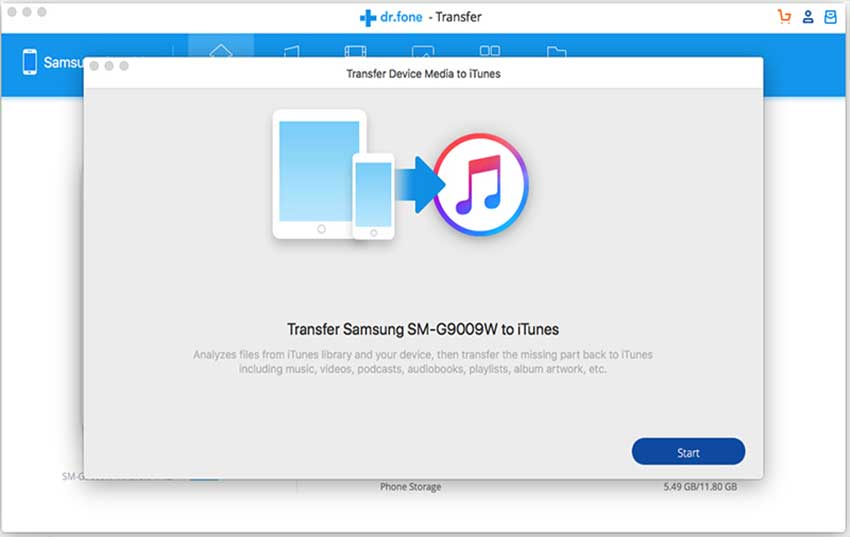
Step 2: You can directly tick the "Name" button at the top of the song list, and click “Export” > select “Export to iTunes”. This smart application will intelligently transfer all the songs to iTunes. Alternatively, you can click the "Music" menu and select the music you want, and then click the "Export to iTunes" button on top of the primary window to start transferring. Next, find a folder on your Mac to save these exported songs.
Part 2. Transfer Music from iPhone to iTunes via iTunes (only available for purchased music)
Using iTunes to sync music from iPhone to iTunes should be straightforward, but this method only allows you to import purchased music. Simply follow these steps.
Step 1. Plug the iPhone into your computer: iTunes should automatically open. You may need to enter the passcode on your iPhone in order for your iPhone to connect (if you have a passcode on your iPhone).
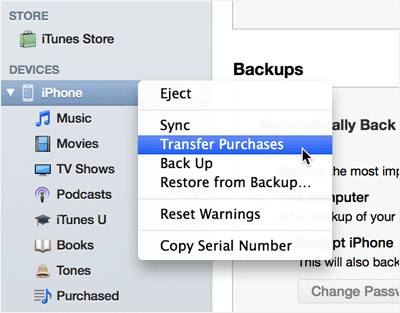
Step 2. From the iTunes home page, simply go to “Files” , and then “Devices”, please note that you may not see the menu bar if you are using iTunes for windows. You need to turn on the iTunes menu from Windows before you start this operation.
Step 3. Simply select “transfer purchases” from your iPhone. Once transfer is completed, you can close the iTunes library and your iPhone before disconnecting your iPhone from the computer.

This option will work only if your music were bought or downloaded freely from the iTunes store, and any music you copy from your audio CD or downloaded from other internet sources will not be copied into your iTunes library. To transfer pruchase music and non-purchase music from iPhone to iTunes, you need to move to Part 1.
Part 3. Why We Need to Transfer Music from iPhone to iTunes?
Why would you want to transfer music from your iPhone to iTunes? Put simply, your iPhone will eventually have too many files in its memory. While music files may not take up as much space as videos, they still take up room, so clearing space on your iPhone by transferring music to iTunes would definitely clear up some space.
You might also want to transfer music from your iPhone to iTunes because your computer can function as a high tech stereo. If you transfer your music from your iPhone to iTunes, you could have thousands of songs on your computer and never have to worry about the music running out. This is ideal in situations where you are entertaining regularly and do not want to have to keep changing up the music you are listening to manually.
One of the final reasons why you might want to transfer music from your iPhone to iTunes is that, put simply, your computer has far more capacity than your iPhone. If you are an audiophile, you would definitely want to store more music on the device with the most room on it. A computer fits this bill nicely. With all that said, here is the way you should transfer music from an iPhone to iTunes. This has the added bonus of you having something of a backup track in the event your music on your iPhone become lost. It should be noted, however, that this mode of transference can only be done if the music was purchased via iTunes in the first place:
Part 4. Troubleshooting on Transferring iPhone Music to iTunes
Q: You may be prompted too many times by iTunes to authorize your computer to play iTunes purchases?
Log unto your administrator account, make sure you have the newest iTunes version, choose “Store” and then select “Authorize computer”. Enter your iTunes account details (your name and password), and close your iTunes, log in again and transfer your iPhone music to iTunes.
Q: Get Error 3221?
Error 3221 is an error that come up when you access iTunes store. You will need to change the permission level for your iTunes and iTunes Helper to get full access to your iTunes.
Q: Error while downloading a purchased music from iTunes.?
This error normally appears when there is a connection timeout, while you are downloading a purchased content from iTunes. Some software may interfere the rate at which your computer receives and send information through the internet, these software include; Firewalls, filters and antivirus. In this situation, your first troubleshooting procedure is to re-configure your software and ensure that it does not create a barrier for your transfer of music from iPhone to iTunes. Make sure domains such as iTunes.apple.com, and ax.iTunes.apple.com, are allowed to transfer contents online.
Q: Error “-50”, may appear when transferring downloaded purchased songs from iPhone to iTunes?
This error is common only when transferring purchased songs from iTunes, it does not occur when other songs are being transferred. You can perform some troubleshooting steps by deleting the cached music files for downloads, and then you can re-download the songs again.
Q: Some of my songs are not transferring from iPhone to iTunes?
Restoring your iPhone may be the first troubleshooting step to take in this situation. However you need to create a backup for your iPhone before restoring. Simply plug-in your iPhone to the computer, and then choose “settings”, and “Backup”. Simply disconnect your iPhone after backup and then reset your iPhone by clicking on “ Settings” then click “General”, and scroll down on your iPhone to select the “Reset” option. Click on the “erase all content”, and then your iPhone will be reset to its default settings. Choose “restore from iTunes” and your backup contents will be transferred to your iPhone from your computer and then you can transfer them to your iTunes.


