Have many loved songs stuck on your iPhone? Or just want to transfer music from iPhone to iTunes Library to make up for iTunes Library lose. Anyway, there are 2 ways allowing to transfer purchased songs from iPhone to iTunes Library described in part 1 and part 2 respectively. And in the process, you might encounter some errors while trying to copy purchases from iPhone to iTunes Library. If so, check part 3 for the right solution.
Part 1. Transfer Purchased Music from iPhone to iTunes
Remember that this method only works for songs you have purchased from iTunes Store. If some of the songs on your iPhone are purchased from other websites, like amazon.com, or downloaded from any app on iPhone, you should turn to part 2 - transfer all or selected music from iPhone to iTunes intelligently.
For Windows computer users:
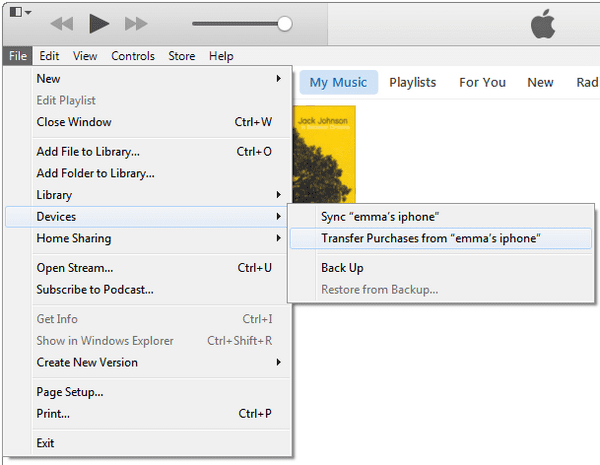
Step 1. Plug in your device in the usb slot on your computer and launch iTunes. When connected succesfully, your iPhone will appear on the ribbon of iTunes.
Step 2. on the left top, click the little window and choose "Show Menu Bar"or helo down the Control and B keys on the keyboard to open the iTunes menu bar.
Step 3. Click File menu > Device > Transfer Purchases from "[device name]".
For Mac users:
Step 1. Connect your iPhone with your Mac via a digital cable and launch iTunes.
Step 2. From the menu bar at the top of your computer screen, choose File > Devices > Transfer Purchases from "[device name]".
Step 3. on the left top, click the little window and choose "Show Menu Bar".
Step 4. Click File menu > Device > Transfer Purchases from iPhone.
Part 2. Transfer Music from iPhone to iTunes Intelligently (Recommended)
As i have told you can only transfer iTunes Store purchased songs from iPhone to iTunes Library on your computer. For songs you have gotten from other rouces will be stuck on your iPhone or be erased by your iPhone when you try to sync your iPhone with your computer again. To avoid the lose of these songs, you can try the intelligently method - using dr.fone to transfer music from iPhone to iTunes library, either 1 click to copy all or transfer selected ones. It depends on you.
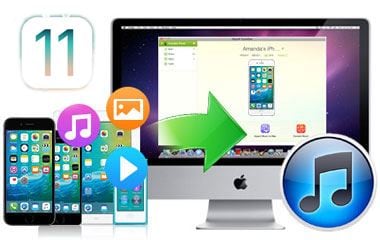
Why recommend dr.fone? It is designed as iTunes companion to help users do what iTunes can't: transfer all music, both iTunes Store purchased and none purchased, from iPhone, iPad and iPod to iTunes Library, computer and another Apple device. And it also enables you to select songs, videos, and playlists to copy to your iTunes Library. Check out its main features here:
- 1 Click to transfer music from iPhone, iPod, iPad iTunes,without generating duplicate in iTunes Library.
- Copy selected songs, videos, playlists and more to iTunes Library, computer and another Apple device.
- Export photos from iPhone/iPad/iPod touch to computer
- Copy playlists with rating and play counts to iTunes.
- Put music to iPhone without iTunes Library, without data erasing issues.
Below step-by-step tutorial will show you how to transfer purchased and none purchased music from iPhone to iTunes
What You Will Need:
A Computer;
dr.fone
Time Required:
Very Fast (Variable depending on how many large files you're transferring)
Difficulty:
Easy
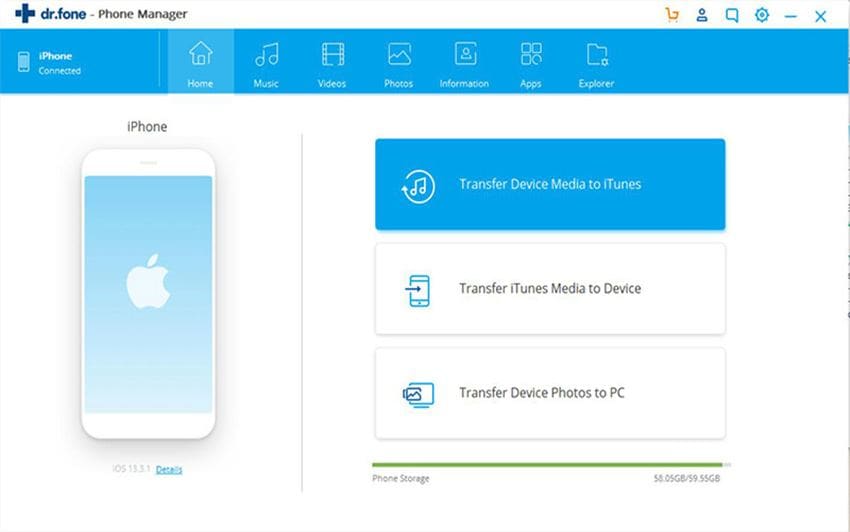
Step 1. Click the Download button to get the installation package of dr.fone according to your computer operating system (Mac or Windows). Use a USB cable to connect your iPhone with your computer. After successfully detect your device by this software, it displays your device in the main window. Click “Rebuild iTunes Library” in the main window.
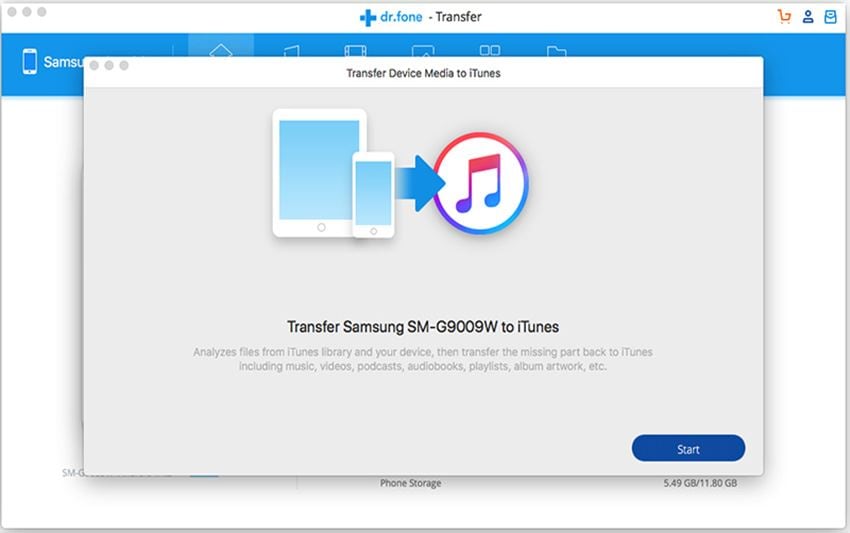
Step 2. In the pop-up window, please confirm the operation by clicking “Start”, letting the software scan media files on your device. It takes a few seconds to finish this process.
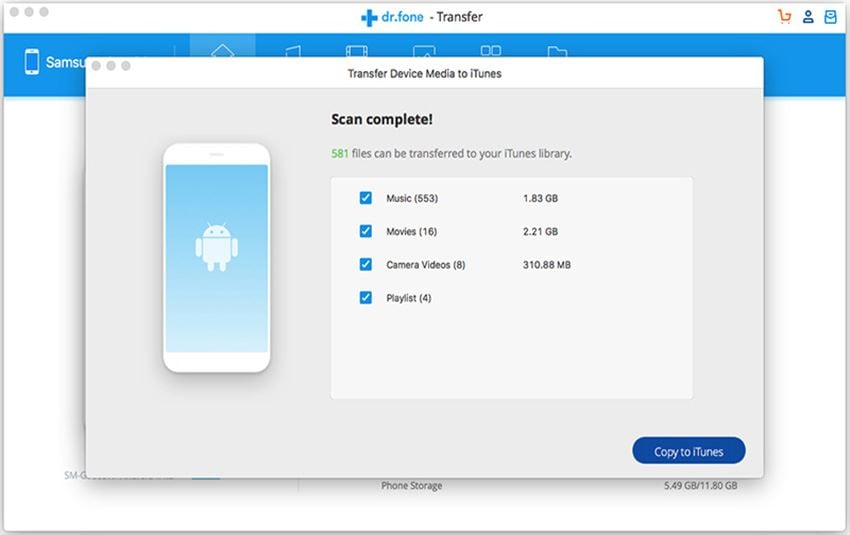
Step 3. Next, choose the file types you want to transfer from your device to your iTunes Library and click “Start”. Please note that media files, including music, movies, device captured videos, playlists, iTunes U, and more will be copied to your iTunes Library instantly. Never worry about any duplicate files generated. dr.fone for Mac will compare the files on your device with these in your iTunes library, transferring iTunes Library missing ones.
To resolve this issue, authorize purchases from an administrator account. Follow these steps to authorize your purchases from an administrator account:
- Log in to your administrator account. (You need to have access to the administrator password, contact the administrator of the computer, if you don't have access to the administrator password.)
- Make sure your iTunes version is latest.
- Choose Store > Authorize Computer.
- Enter your iTunes account details (name and password).
- Quit iTunes.
Once you've authorized your computer, log out and then login again to the user account from which you'd like to play your purchases. Once you're log in, open iTunes, select the iTunes Store purchases in the library, and click Play. The purchases will begin to play without any further delay.
If this case, to allow full access, you need to change the permission level for iTunes and iTunesHelper. It will allow iTunes and iTunesHelper to send and receive data from the iTunes Store.
This normally happens in a situation of connection timeout while purchased content from the iTunes Store is downloading. Some software affects the way computer receives and sends the information from the Internet, like Ad Filters, Firewalls, Virus Protection Software and Web Accelerators.
If you use any of above listed software and you are not able to access iTunes store or download from iTunes Store, configure the software to allow iTunes connect with Internet and allow following domains to receive and send data from the Internet:
- itunes.apple.com
- deimos3.apple.com
- gs.apple.com
- phobos.apple.com
- albert.apple.com
- ax.itunes.apple.com
You may get the issue fixed by deleting the cached video files for downloads and then resuming your download.
You need to restore your phone. Firstly backup the phone before proceeding to restore. Plug in your phone and choose Backup from settings. On backup completion, disconnect your phone from the computer.
Now you need to reset your phone. Go to Settings > click General > Scroll down to select the Reset option> click on the daunting Erase All Content. This will reset your iPhone to its default settings.
Once your phone loads backup, you’ll be at main screen to again setup iOS. You can either setup your iPhone again or restore the data from iCloud or iTunes.
Choose Restore from iTunes, the most recent backup that you just made. You’ll get everything back and this time all your songs will be synced instead of just half of them!


