Most people turn to using iTunes for all their music needs on their devices whether Apple/Mac or Windows. It is user-friendly software that organizes your music, movies and TV shows. Aside from that, you can listen to free streaming radio stations if that suits your style. Here in this article, we would like to share tips on how to transfer iTunes music from one computer to another.
- Part 1: How to Transfer iTunes Music from One Computer to Another
- Part 2: How to Rebuild Your iTunes Library
- Part 3: The Easy Way to Rebuild iTunes Library
Part 1: How to Transfer iTunes Music from One Computer to Another
Trying to find the easiest way to transfer iTunes music to new computer? Don’t be alarmed by the steps that it takes to do so. You can easily become an expert by following these few simple steps on how to transfer iTunes music from your old computer to your brand new computer.
Step 1: Make sure that both computers have installed the latest iTunes software, have excellent connection to the Internet through using WLAN or Wi-Fi, and a valid Apple ID.
Step 2: Using the same ID, open your iTunes account on both computers. Click Turn On Home Sharing. Do this for both.
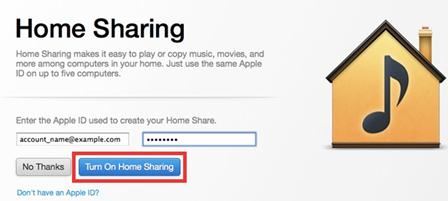
If it doesn’t appear, it is probably because the Home Sharing has not been turned on for both computers. Please check if the Home Sharing is turned on for both computers.
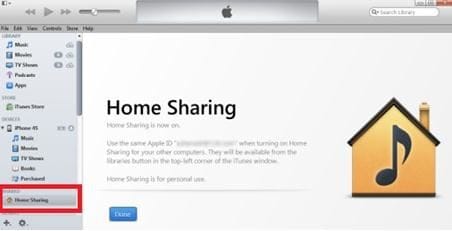
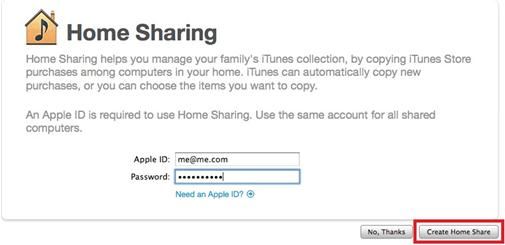
Step 4: Sign into your account by entering your Apple ID and password. Once it has been done, click the Create Home Share button.
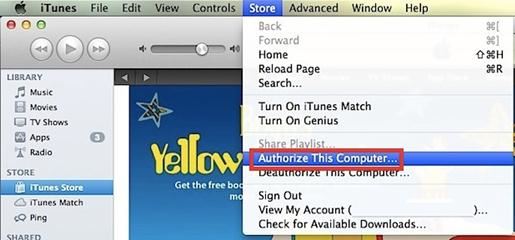
Step 5: On your new computer, click the Store menu and select Authorize This Computer. It will ask for your Apple ID and password. Enter your details.
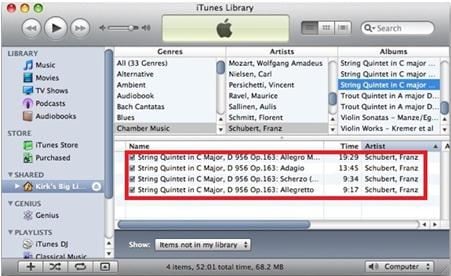
Step 6: Select the Home Sharing icon in the left menu. Right below, you will find the libraries on your old computer. Select the files of your choice or click Edit and choose Select All to copy the entire list.
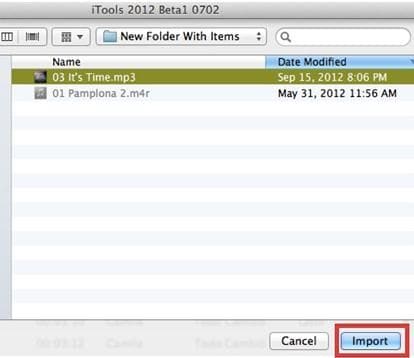
Step 7: Once you are done selecting the music files, click the Import button. The selected files will be copied to your new computer.
Part 2: How to Rebuild Your iTunes Library
If something unpredictable happens like a hard disk crash has taken effect on your computer, you might find several files missing or practically all of your files in a worst case scenario. If you happen to be one of those people who take their music files seriously and happen to lose them, you will probably have to rebuild your iTunes Library. Below is the guide to rebuild or backup iTunes music.
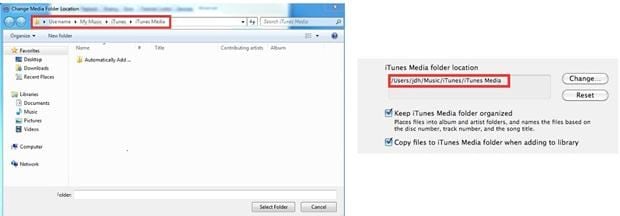
Step 1: Close your iTunes. And find your iTunes folder.
For Mac users, the default location of iTunes folder looks like: /Users/[your username]/Music For Windows, it would be: \Users\[your username]\My Music\
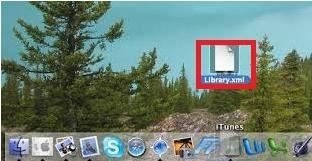
Step 2: Select and open the iTunes folder. Drag the iTunes file to the Desktop. It should be in the form of “iTunes Library.xml” or iTunes Music Library.xml.
Step 3: For Mac users, drag “iTunes Library or “iTunes Library.itl” to the Trash. As for Windows users, the file name is “iTunes Library.itl”

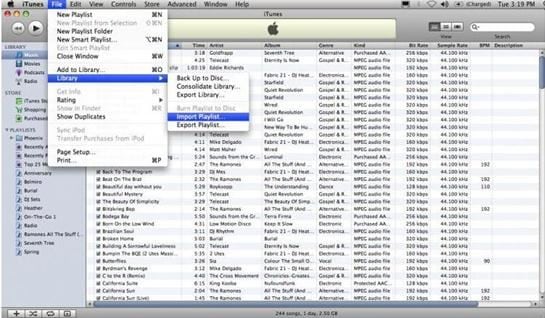
Step 4: Open iTunes. Click on Choose File, then Library, and finally Import Playlist.
Step 5: Go to the “iTunes Library.xml” found on the Desktop. For Mac users: Click Choose. For Windows users: Click Open. You should be able to find your music files in your iTunes library.
Part 3: The Easy Way to Rebuild iTunes Library
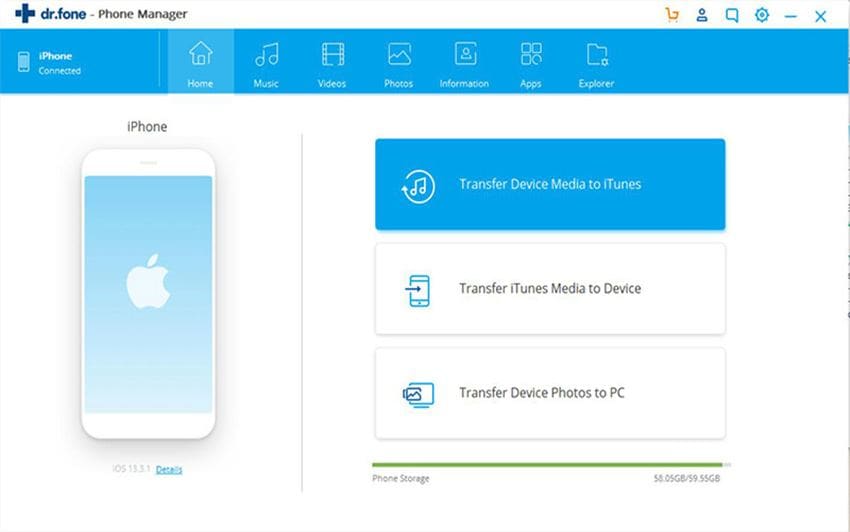
The worse thing that can happen to you is if you lose all your music in iTunes but have them saved on your iPhone, iPod or iPad. If so, you can use this easy-to-use dr.fone for Mac (or dr.fone) to rebuild iTunes library by transferring all music from iDevice to iTunes. It makes it quick and easy to export music to iTunes from iDevices. And it also can sync music, movies, photos and more to iDevices.
Step 1: Click and open dr.fone. Connect your device to the computer. Once the program has detected your device, it will show its information in the main menu. Click on the Rebuild iTunes Library button in the dr.fone window.
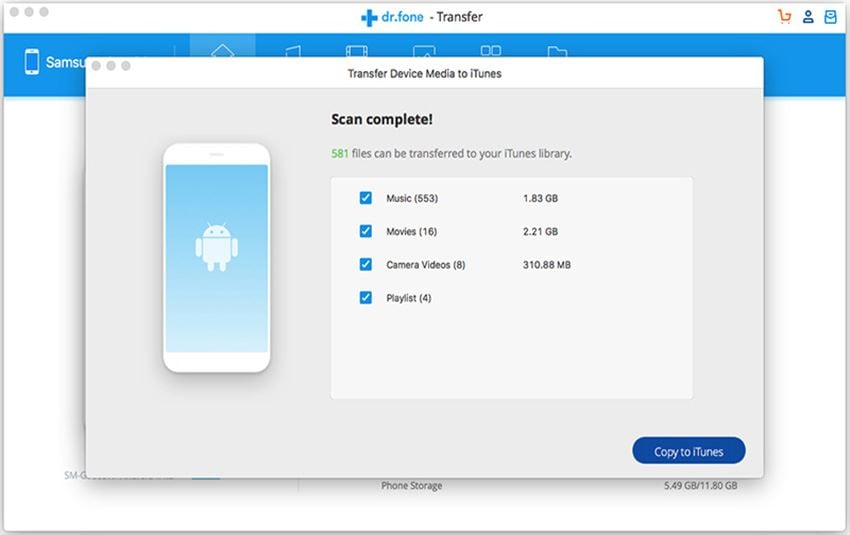
Step 2: In the new window, you are supposed to click on Start so that the software can scan the files on your device. It will take a few seconds to do this process.
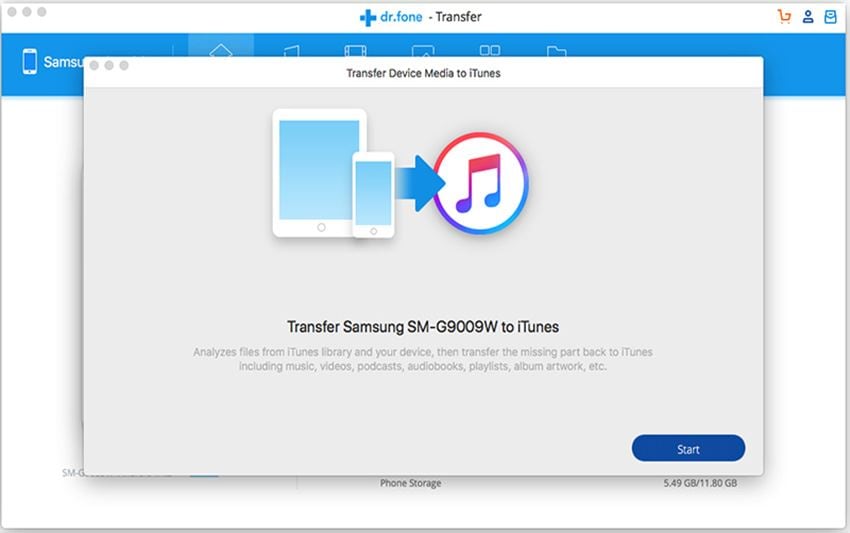
Step 3: After scanning the files, now you can choose the files that you want to transfer to iTunes Library and click "Start". Never worry about any duplicate files generated, for it will only transfer the missing files.
