There are certain ideas that are too important for the Android users. "Android backup settings" is one such idea as it completely comprises of the ideas that are good for the data stored onto the device. It is advent that the users want to implement these ideas to make sure that the data is saved and secured and also that the overall integrity is also preserved. There are important parts of the data and the life long memories that are to be saved. The idea under discussion is therefore the one that makes it happen for the user with ease and satisfaction.
- Part 1: How to Backup Android App Settings
- Part 2: How to Backup Android WiFi Password and Settings
- Part 3: How to Backup Android Email Account Settings
Part 1: How to Backup Android App Settings
There are tens of thousands of apps that can be used to ensure that the work is done in line with the demands of the user in this regard. However for this tutorial the free app known as the Helium will be used to get the work done. The most important thing that is to be noted is that this app does not require a rooted phone at all. It is for the same reason that it can be used with relative ease and satisfaction when it comes to the settings backup.
Step-by-Step Guide to Backup Android App Settings
Step 1. Download and install the app Helium and start the process.

Step 2. A Google account login is required to make sure that the backup is made directly to the Google related services such as Drive.
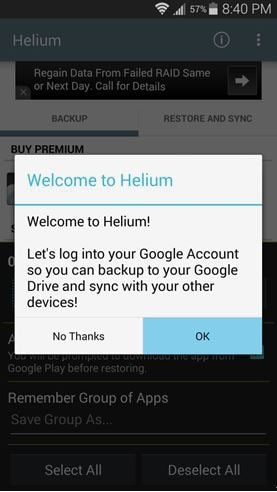
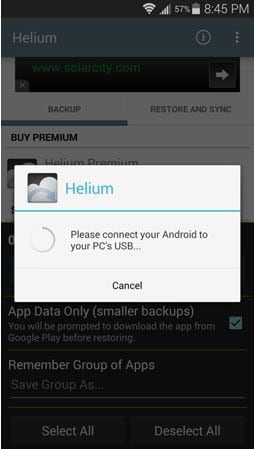
Step 3. Connect your phone to your computer and this app will detect it and sync both the machines.
Step 4. The helium app is also available for chrome. It is also free there. Install this app Helium Backup to the chrome as well.
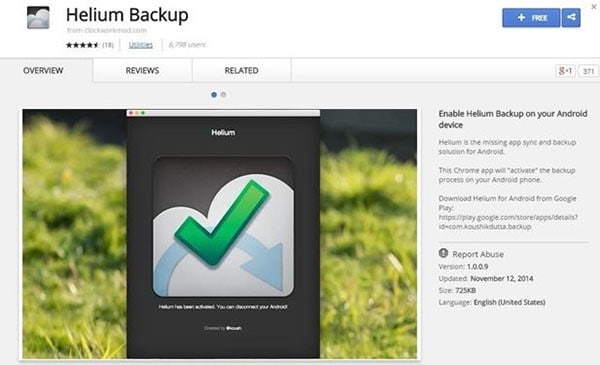
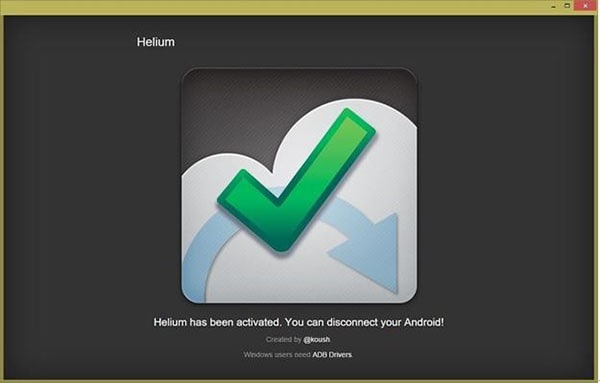
Step 5. The app will synch the phone to the computer with ease. The following screen will appear once the sync has been completed.
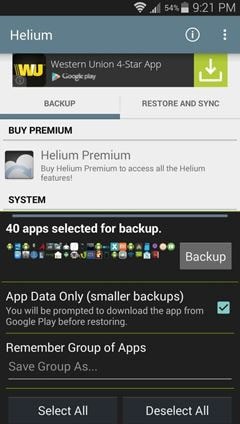
Step 6. From the Helium app the other apps to be back up are selected as shown in the figure below. The user can also leave some apps if there is no backup required in this regard
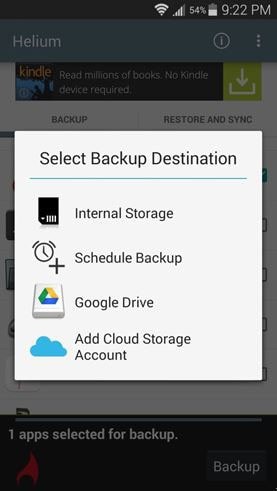
Step 7. The backup destination is then to be selected. This will make sure that all the apps are back up and thus the process completes here in full. The app settings as well as data will be backup with ease and satisfaction
Part 2: How to Backup Android WiFi Password and Settings
WiFi and the related settings can also be backup if the best and the most advanced programs are used. This idea is important for those who are not at all tech savvy. It means that the users that want to apply the same settings to all phones are advised to follow this idea. The process that is to be followed in this regard has been mentioned as below. The process that one has to follow in this regard is not only easy but also gets the work done with relative ease. The main thing that is to be considered in this regard is the fact that only the built in ideas are used to get the work done. There is no need of any third party app as it is not required at all. On the other hand the process is also not at all complex to follow.
Step-by-Step Guide to Backup Android WiFi Password and Settings
Step 1. First of all the settings icon is to be pressed onto the home screen of the device to start the process.

Step 2. Within the Settings the "Backup and reset" tab is to be pressed moving forward.
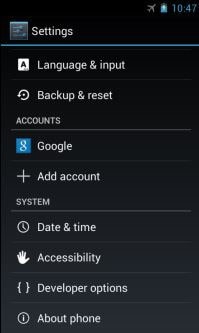
Step 3. The "Back up my data" option is then to be ticked.
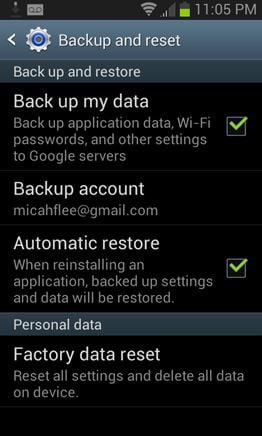
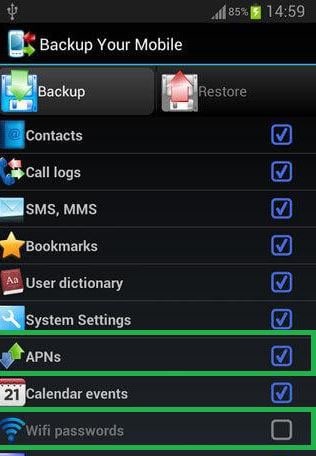
Step 4. On the next screen only the Wi-Fi and the APNs is to be selected to ensure that the process is completed. It is yet the easiest process that can be followed to get the work done with ease.
Part 3: How to Backup Android Email Account Settings
Google email or the Gmail service is the one that is to be considered in this regard. It is also a process that is one of those which require no third party installation. It is only the built in tool that would allow to get the work done with relative ease and satisfaction. The user also does not require to be a tech geek to perform the task.
Step-by-Step Guide to Backup Android Email Account Settings
Step 1. The Settings app within the app drawer is to be accessed to begin the process.

Step 2. The "Backup and reset" menu is then to be accessed to proceed with the process.
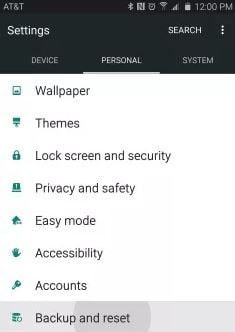
Step 3. Access "Backup my data" option to proceed with the process.
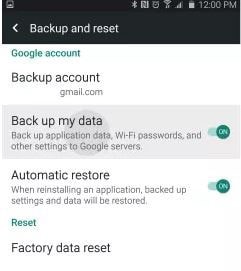
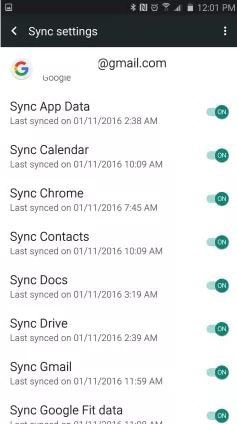
Step 4. Within the sync settings toggle the bars on against each and every option that can be seen. This also completes the process in full. The Gmail settings will be saved to the Google servers. Any changes that will be made afterwards will be synced automatically.
