Did you know that you can lose essential and irreplaceable data on your iPhone (iPhone SE included), if you do not backup your files regularly? Additionally, recreating and setting up your iPhone may take a long time. You will have to re-download all your favorite apps, enter your user information and then organize them on your home screen. To backup iPhone SE data to Windows PC helps you to restore all your data when your iPhone SE is lost, stolen or if you decide to upgrade or switch to a new phone. Below is a simple guide on how to backup iPhone SE to Windows (Windows 10 included).
The Easiest Way to Backup Data from iPhone SE to Windows PC
MobileTrans for Windows is a great software that you can use to backup iPhone SE data to Windows PC. It allows users to transfer photos, music, videos, contacts, messages, call history and more between Android, Symbian OS, BlackBerry and iOS devices. Once you install MobileTrans on your PC, you will be able to transfer 100% of your iPhone SE data without quality loss, backup, restore and retrieve the data at any time. (For Mac users, MobileTrans for Mac is also available.)

Key Features of iSkysoft Phone Transfer:
- It is a full-scale phone transfer tool. For example, contacts are transferred with names, numbers, email addresses, job titles, company names and more.
- It is not just a phone to phone transfer tool, but also offers safe and secure phone backup to a computer.
- It supports data restoration from multiple backup modes. This includes iCloud backup, BlackBerry backup, iTunes backup, Samsung Kies backup and Phone Transfer backup. You will be able to restore your backups to the new phone in just one click.
- It has an excellent interface that is easy to use. Even if you are computer illiterate, you will be able to transfer files between phones, backup data to your PC, restore or retrieve your backed up data with ease.
Steps to Backup iPhone SE to PC
Step 1: Launch iSkysoft Phone Transfer
After downloading and installing iSkysoft Phone Transfer on your Windows PC, launch the program. And connect your iPhone SE to your PC.

Step 2: Enter the backup mode
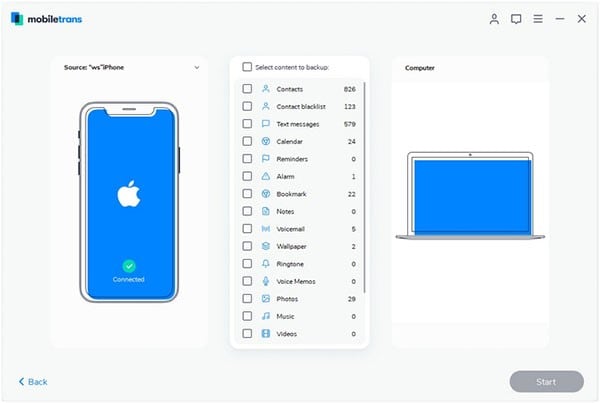
Click "Back UP Your Phone" option, which is located on the main interface of the program. This will lead you to the backup window.

Step 3: Start to backing up iPhone SE data to Windows PC
Select all the data you would like backup and then click "Start Copy". All the checked data will be backed up to your Windows PC. The time taken will depend on the condition of your iPhone SE as well as the size of data you would like to back up. Click the OK button once the process is successful.


