Regardless of your model, you'll agree that it's fun to capture, edit or share photos with Samsung Galaxy smartphones. This is because all Samsung phones come with cameras that take rich, vivid photos without limits even in challenging light conditions. They also feature ultrasharp screens that display images and picture with true colors, especially when surfing the web. In this article we outline how to download photos from Samsung Galaxy, the simplest and fastest way to transfer your HD Samsung Galaxy (Note7 included) photos to PC as well as well as how to import photos from Samsung Galaxy manually.
Part 1: How to Download Photos from Samsung Galaxy When Surfing the Internet
You may come across a picture of you and your loved ones or any other attractive photo, while surfing the web, especially when you are logged into social media networks such as Facebook, Instagram, Twitter and more. The photo can capture your attention since your Samsung Galaxy screen makes everyone, and everything in a picture to look amazing, with richer colors and darker shadows. Without a doubt, you are likely to download such photos to your Samsung Galaxy.
Step-by-Step Guide on How to Download Photos from Samsung Galaxy When Surfing the Internet
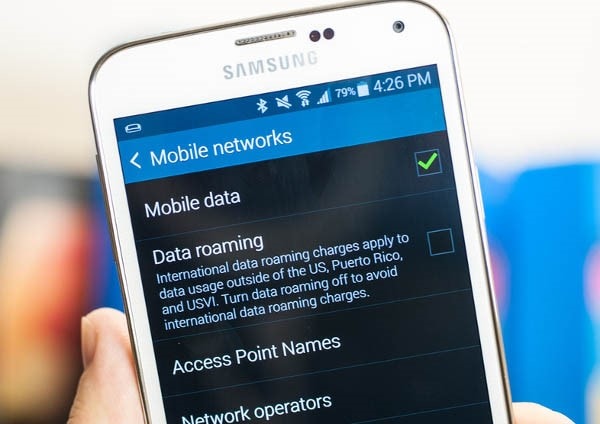
Step 1 Enable Mobile Data Connection
Tap Apps> Settings> More Networks> Mobile data> and tap "OK" if prompted. If you would like to access the web via Wi-Fi, drag the Notifications bar from the home screen, then tap Settings> Quick Settings> Wi-Fi and tap the "Wi-Fi" switch to "ON".
Step 2 Launch Your Web Browser
Tap the Samsung Galaxy built-in browser, Chrome, Opera Mini, Firefox or any other browser in order to launch access the web. In this guide, we are using the built-in browser.
Step 3 Search for the Photo You Would Like to Download
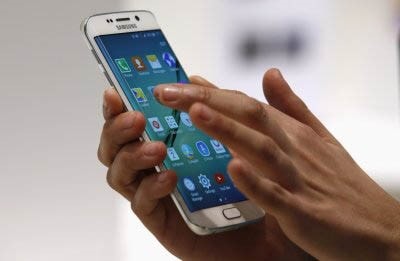
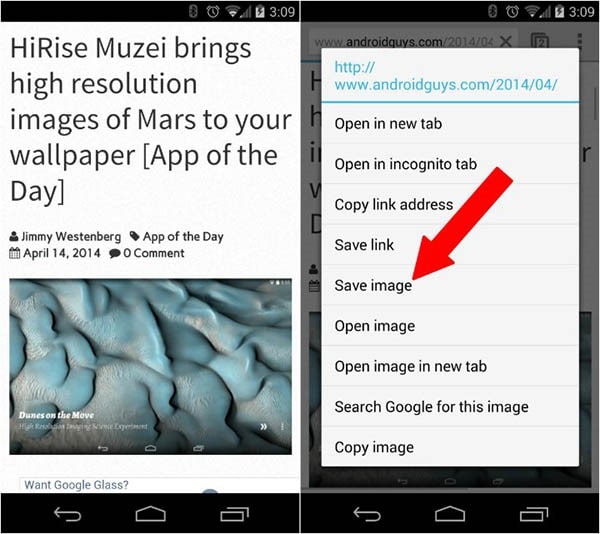
The photos can be located anywhere- on a website, Google+, Facebook, Twitter, Google Search and more. Once you find the photo, just press and hold on it. A menu will then appear with various options.
Step 4 Download the Photo
Tap the "Save Image" tab and the browser will automatically start downloading your photo. The download speed depends on the quality and size of the image as well as the speed of your internet connection. Large images may take a few more seconds to be successfully downloaded to your Samsung Galaxy. Pull the notification shade and tap the "Download notification" to view the photo. You can also access it directly from the "Gallery" app.

Part 2: How to Transfer Photos from Samsung Galaxy to PC
All Samsung Galaxy cameras are brilliant and capture sharp, clear and high-quality photos. If you have been taking a ton of HD photos with the stellar camera of your Samsung Galaxy, and you would like to work with them elsewhere, you need MobileTrans for Windows (or MobileTrans for Mac). This software can help you transfer all your photos from Samsung Galaxy to PC with just a click. You will be able to put your photos on PC for more extensive editing, get them tucked away for long-term storage or share them with the world. This is the best phone to phone, phone to PC and PC to phone transfer tool on the entire web. It allows you to move not only photos from Samsung (including Galaxy Note 7) to PC but also supports the transfer of videos, music, call logs, contacts, messages, apps and other contents between various devices. In addition to data transfer, the simple yet powerful tool also helps you backup, restore data from your phone.
Key Features of MobileTrans:
- It supports over 3500 phones and networks, including iPhone, BlackBerry, Android and Nokia phones.

- The software allows you to backup your phone data on another smartphone, tablet or PC in a safe and secure way.
- It takes 1-click to restore the backed up data from multiple backup modes such as iTunes, iCloud, Blackberry, Phone transfer, and Blackberry backup.
Step-by-Step Guide on How to Transfer Photos from Samsung Galaxy to PC
Step 1 Download and Install the Software
MobileTrans for Windows is easy to download through any web browser. Just go to the official website and select your preferred version. Once the phone to phone transfer file is successfully saved in the "Downloads" folder, double click it to install the software on your PC. Double click on the software's icon located on the desktop background in order to launch it. You will then see a simple and attractive display with several choices that represent the primary functions of MobileTrans.

Step 2 Connect Your Smartphone to PC
Use the original USB cables to connect your Samsung phone to your Windows PC. Click the "Back Up Your Phone" tab to access the backup window.
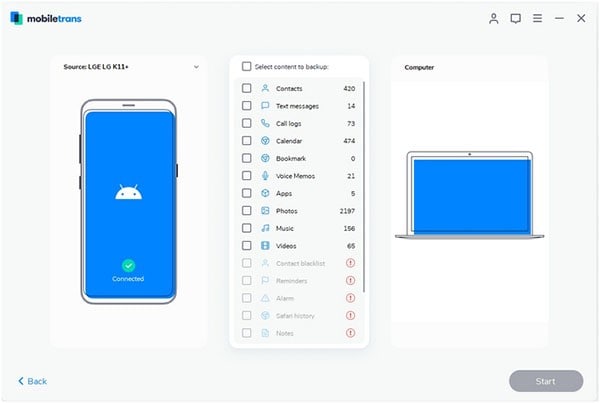
Step 3 Open the Backup Window and then Transfer Photos from Samsung Galaxy to PC
MobileTrans will automatically scan your phone and display its data on the interface. Check the files that you want to transfer from Samsung Galaxy to PC, in this case, check "Photos". Now click the "Start Transfer" button and the software will start backing up your Samsung Galaxy photos to your PC.
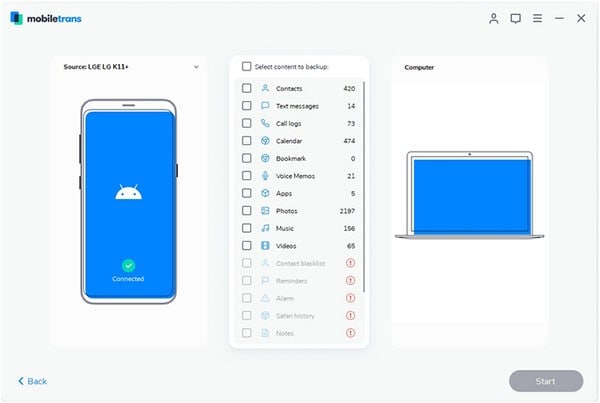
You shouldn't disconnect your phone until all photos are successfully transferred to your PC. The time taken mainly depends on the size of your Samsung Galaxy photos as well as the condition of your phone and Windows PC. However, MobileTrans is powerful and will move all your photos at an excellent speed.
Part 3: How to Import Photos from Samsung Galaxy Manually
The manual method for transferring photos is easy and straightforward since it just involves plugging your Samsung Galaxy directly into your Windows PC. Most users claim that this method is slow especially when you are transferring a large file of photos, but it can be helpful when you want to copy your photos to a thumb drive to give others or if you want to backup your favorite photos.
Step-by-Step Guide on How to Import Photos from Samsung Galaxy Manually
Step 1 Connect Your Phone to PC
Samsung Galaxy comes with microUSB cables. Insert the narrow end on the bottom of your smartphone and then plug the wide section into any of your PC's USB port.
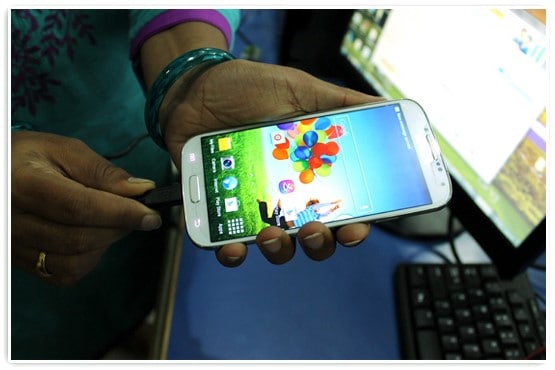
Step 2 Select "MTP" Connection Mode
On your phone's screen, a message will appear informing you that your smartphone is connected to PC. Pull down the notification shade and tap "USB connection". Select the "Media device (MTP)" option which allows you to transfer photos manually using Windows Explorer.
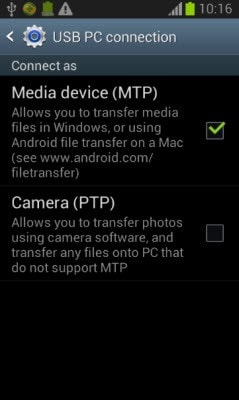
Step 3 Transfer Samsung Galaxy Photos to Windows PC
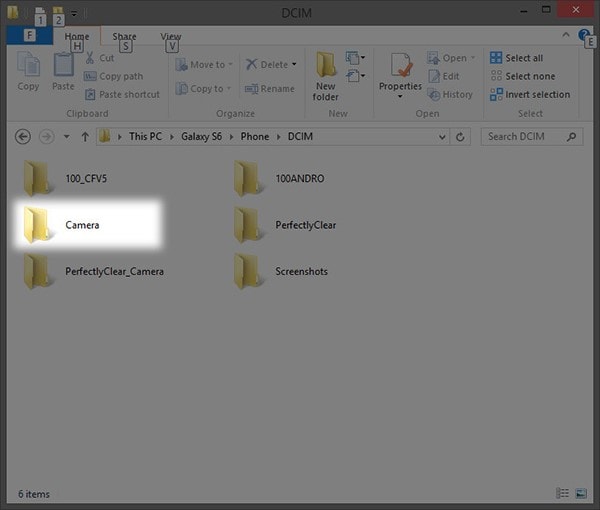
Once your phone is successfully connected to your computer, your Galaxy phone will automatically pop up in the "Finder" or "My Computer" section as a drive. Browse the "DCIM" folder and then open the "Camera" folder. This is where all the photos you captured with your Samsung Galaxy camera are located. To transfer downloaded photos, you will have to open the "Download" folder. Drag and drop your photos to a specific folder or on the desktop background. You can move the whole "Camera" folder at once, or transfer your photos selectively.
