If you ever wanted to create some more storage space on your iPhone, one of the most logical things to do would be to get rid of some of the larger files such as photos, videos and music. But if all the photos you have are important to you and you don't want to get rid of them, you may decide to transfer them to another device such as your iPad. If this seems like a viable option for you, this article will offer a complete guide as to how you can get photos from iPhone to iPad.
- Part 1: The Best Way to Get Photos from iPhone to iPad
- Part 2: Get Photos from iPhone to iPad via Photo Stream
- Part 3: Get Photos from iPhone to iPad via iCloud Photo Library
- Part 4: Get Photos from iPhone to iPad via AirDrop
- Part 5: Get Photos from iPhone to iPad via iTunes
- Part 6: Get Photos from iPhone to iPad via Message
- Part 7: Top 4 Apps to Get Photos from iPhone to iPad
Part 1: The Best Way to Get Photos from iPhone to iPad
Of all the methods available, using MobileTrans for Mac (or MobileTrans for Windows) is by far the easiest, most reliable and the best way to get your pictures from iPhone to iPad. This software is specifically designed to help you transfer photos from iPhone to iPad as well as other files. It makes it very easy to sync photos from iPhone to iPad as we shall see very shortly.
Key Features of Phone Transfer:
- Data transfer from your iPhone to your iPad is quick and easy. The entire process takes no more than 10 minutes from start to finish.
- You can transfer not just photos but also contacts, messages, music, videos, call logs and even apps.
- It is completely compatible with all iOS devices including iPhone 8 and 7.
- You can also use it to create a backup of your device from which you can restore the device later.

Step-By-Step Guide to Get Photos from iPhone to iPad
Step 1. Download and install the program on to your PC or Mac. When you launch the program, you should see the following window.

Step 2. Connect the iPhone and the iPad to your computer. If authorization is required, allow on the device to continue.
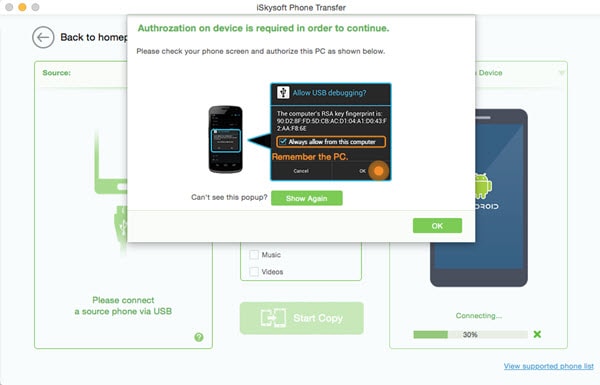
Step 3. Choose "Phone to Phone transfer" tab to open the transfer window. You will see both the devices as well as the source data in the middle panel.
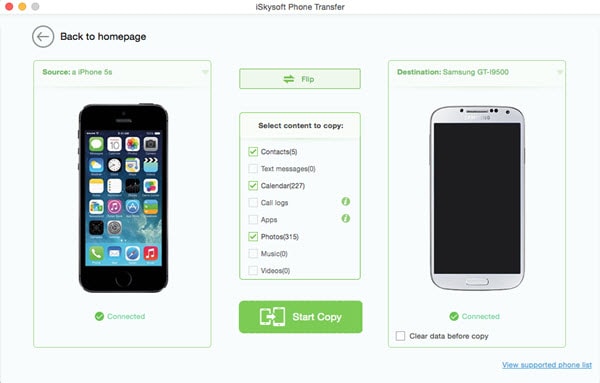
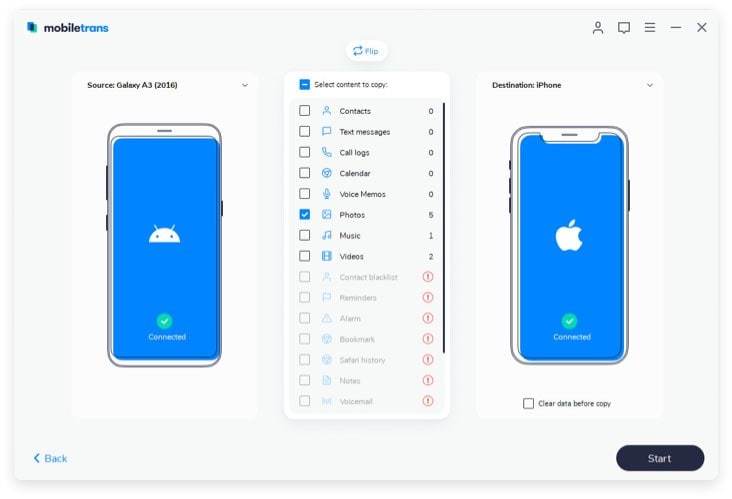
Step 4. Select Photos to copy the Photos to your iPad and then click "Start Copy". The program will begin copying the photos to your iPad.
Part 2: Get Photos from iPhone to iPad via Photo Stream
You can also use Photo stream to get photos from your iPhone to your iPad. To do this however, your devices need to be using the same iCloud account and also need to be connected to Wi-Fi.
Step-By-Step Guide to Get Photos from iPhone to iPad
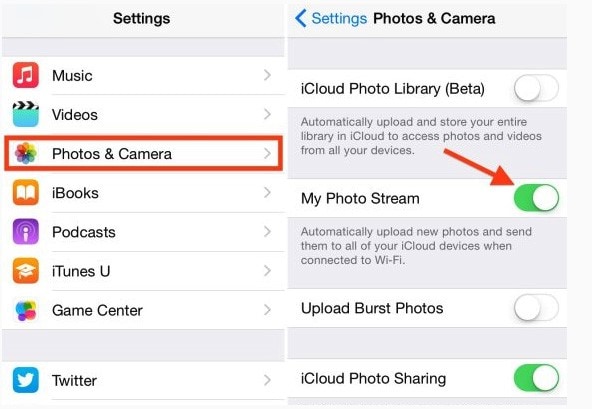
Step 1. Open settings> iCloud and login with your Apple ID and password. Then select Photos and then toggle the "My Photo Stream" option to "ON".
Part 3: Get Photos from iPhone to iPad via iCloud Photo Library
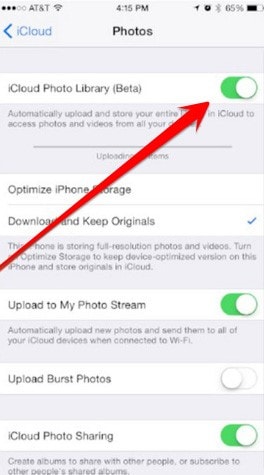
Again both devices need to be connected to Wi-Fi and also share an iCloud account for this method to work. To do this, all you have to do is set up iCloud Photo Library on either device.
Step 1. Launch the settings app on your device and then tap iCloud. Next, tap photos and turn iCloud Phone Library "ON".
Part 4: Get Photos from iPhone to iPad via AirDrop
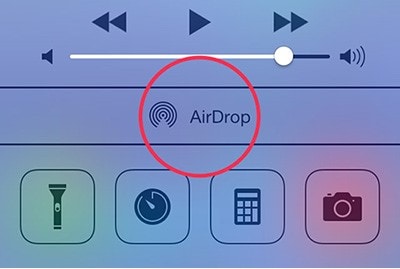
If your iPhone runs iOS 7 or later you can use AirDrop to send the photos to an iPad. To do this open the control centre by swiping up on your device. Tap in AirDrop > choose "Everyone" and then open the "Photos" app on your iPhone to choose the photos you want to send. Tap on the Share button.
The name of the iPad should appear in the "Tap to Share with AirDrop" section. All you have to do now is accept the transfer on the iPad and you're done.
Part 5: Get Photos from iPhone to iPad via iTunes
To be able to transfer photos from your iPhone to your iPad via iTunes, you need to have saved the photos in your iPhone to out PC or Mac. You can do this by simply connecting the iPhone to the computer and then creating a folder with the photos on the computer.
Once this is done, here’s how you can transfer those images to your iPad using iTunes. Connect the iPad to your computer and then launch iTunes. Select the iPad from the device list and then click on the "Photos" tab. Check the box next to "Sync Photos from" and select "Choose folder".
Locate the folder with the images from your iPhone and click "Choose". Click "Apply" and iTunes will sync the photos to your iPad.

Part 6: Get Photos from iPhone to iPad via Message
You can also transfer your photos from the iPhone to the iPad using email messages. This is not the most ideal method but it does work. You can also just send up to five photos this way. Here’s how to do it.
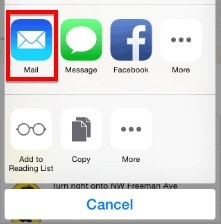
Step 1. Find and open the image you would like to send and tap the share button. Select the additional photos if you have more photos to send and select four more. If you select more than five the "mail" option will disappear. Tap the mail option and a new window will appear allowing you to compose the message. Enter your own email address in the address field. You can skip the subject and body. Send the message.
Part 7: Top 4 Apps to Get Photos from iPhone to iPad
If you would rather use Apps to transfer photos from your iPhone to your iPad, here are four of the most popular to choose from. Most work very well but as we shall see, they all also have a few drawbacks.
1# AnyTrans
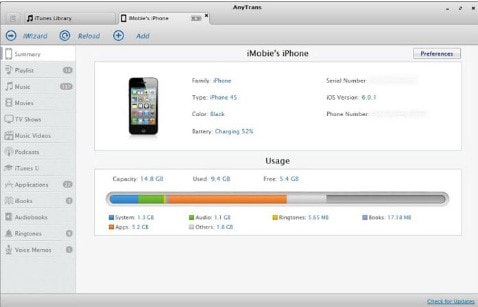
AnyTrans is software that is available for both MAC and PC and ideal for the transfer of not just photos but a whole host of other data from one iOS device to another. You can out movies, apps and even music from one device to another. Like most software of its kind, all you have to do is connect both the devices to the computer, select the files you want to transfer and then click "Copy" and the program does the rest.
It is also compatible with most iOS devices including the new iPhone 6s and 6s plus. It also has a feature that allows you to create a backup for your device.
Pros:
- It is very easy to use and comes with an easy to use interface.
- It is compatible with all iOS devices and can transfer a lot of files.
Cons:
- The AnyTrans Wizard can be a little hard to use.
- The free version has limited features.
2# Simple Transfer
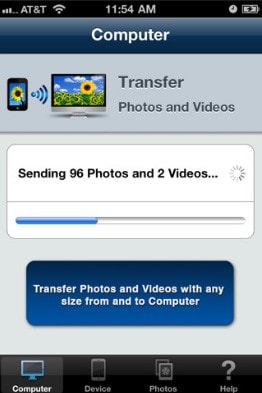
This is a very popular free app that has been downloaded more than 1 million times. It can be very useful when you want to copy photos from your iPhone to your iPad or even to your computer. It also preserves the Meta data of the photos being transferred. All the photos and photo albums as well as the videos on your device can be transferred to your iPad via Wi-Fi and the app can also provide extra security by allowing you to set up a passcode to access the photos.
There is no limit to the number of photos that you can send using this app and it is completely free to use for the first 50 files. If you want to send more than 50 photos at one time, you have to upgrade to the paid version. It also works on all operating systems including Windows and Linux.
Pros:
- It is very easy to use and quite reliable.
- It can be used to transfer multiple photos at once.
Cons:
- The free version can only transfer up to 50 photos.
- You have to be connected to Wi-Fi to use this service.
3# Wireless Transfer App
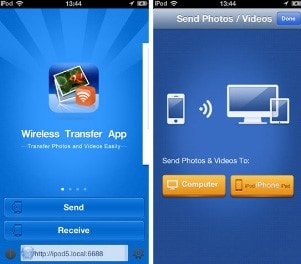
This is yet another very reliable photo transfer app that works very well to transfer apps from one device to another. It can be used to transfer apps between devices such as from an iPhone to an iPad but it also has an additional capability that makes it better than the other similar apps. It can also be used to back-up all the photos on your device. It is not free to download as you will have to part with $2.99 to gain access to it.
Pros:
- It is very easy to use and works very well to transfer photos from one device to another.
- It can also be used to create a backup of your photos which is a great feature.
Cons:
- It is not free to download so it is impossible to test its features before purchase.
4# PrimoPhoto
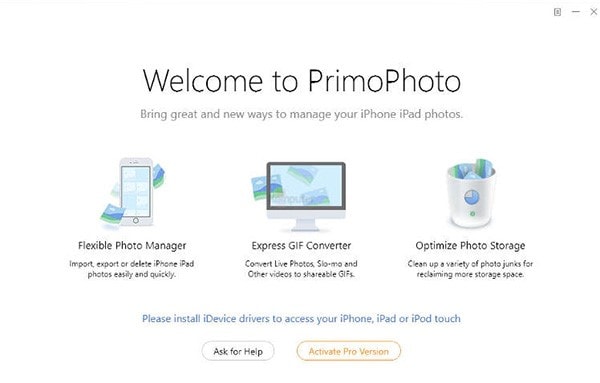
This is not just a photo transfer app but also one of the best photo management tools in the market. PrimoPhoto allows users to easily manage the photos and videos on their device. The interface on this app is user friendly and clean looking. All you need to do is connect your device to your MAC or PC and the program will do the rest.
It will proceed to immediately establish a connection with the device and provide you with the options to manage the photos and videos on the device. With this program you can easily transfer files from one device to your computer in a single click by making use of the Export button. You can also easily import photos and videos from your computer to a new device. You can also choose to delete some or all of the photos from your device although you would have to upgrade to the premium version to use this feature.
It also has an additional feature that is really cool. It can be used to turn your pictures into great live photos of GIFs that you can then share.
Pros:
- It is very easy to use and highly reliable.
- It makes exporting and importing photos to and from your iOS device very easy.
- You can make live photos or GIFs.
Cons:
- You cannot transfer files from one iOS device to another. You would have to export the files to your computer first before importing them to the iOS device.
All of the above options are great when you are looking to transfer photos from your iPhone to your iPad but perhaps the most reliable of the bunch is Phone Transfer.as we have seen in Part 1 above, not only is the software so easy to use but it also allows you to easily transfer Photos from one iOS device to another. Most of the other programs do not allow this kind of direct correlation between the devices.
You can also use Phone Transfer to transfer a whole host of other files from one device to another. This is what makes it the most reliable and effective solution for those looking to transfer files and save time while they’re at it.


