Sometimes you may need to send files and other data from your iPhone to your iPad. This is a great way to create more storage on your iPhone or even just continue an action that you started on the iPhone on the iPad. For example, you may want to finish watching a series of videos on your iPad and hence may need to move some of the videos to that device. Whatever the reason, being able to transfer or send info from your iPhone to iPad is a vital skill. In this article we look at the various ways you can do this easily.
Part 1: How to Send Info from iPhone to iPad
The easiest way to accomplish any kind of Phone to Phone transfer is to use MobileTrans for Mac (or MobileTrans for Windows). This software is specifically designed to allow you to easily transfer or send data from one iOS device to another. It is also very easy to use and very fast, accomplishing the task in a few short minutes.
Key Features of Phone Transfer:
- It is very easy to use. You can transfer data between devices in a single click.
- Transfer is rick free. Your transferred files will arrive on the destination device in the same quality and state.
- It also allows you to backup and restore the device.
- You can also use it to permanently erase the device if that’s what you want.
Step-By-Step Guide to Send Info from iPhone to iPad
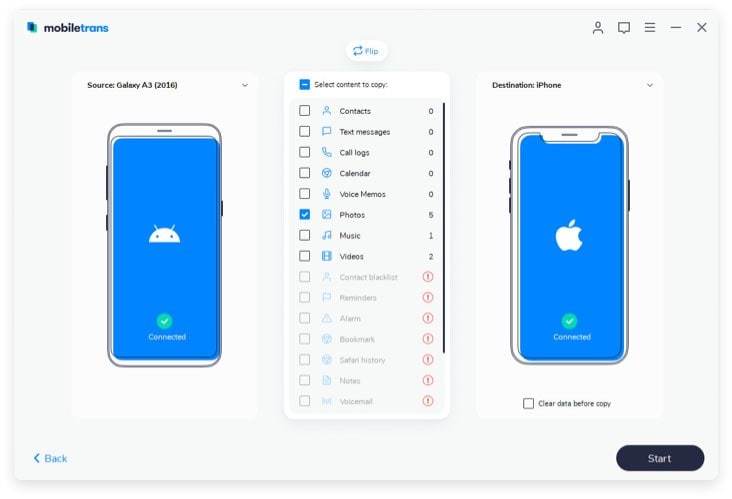
Step 1. Begin by downloading and installing Phone Transfer to your Mac. Launch the program and you should see the following window.

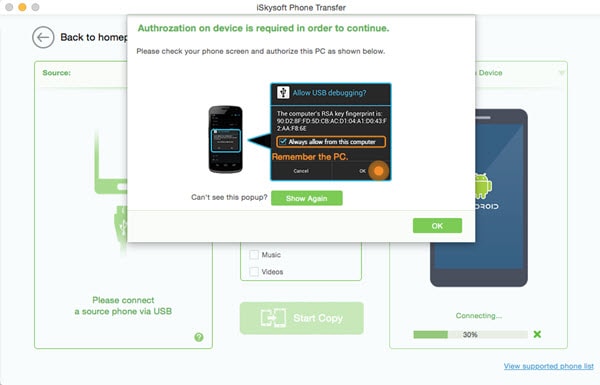
Step 2. Connect both the iPhone and the iPad to your Mac using USB cables. You may need to authorize the device to continue.
Step 3. Click the "Phone to Phone transfer" tab to open the transfer window and begin the process.
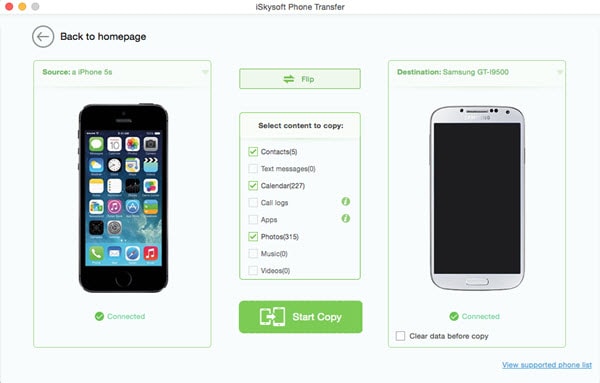
Step 4. Select the info you want to send to the iPad in the middle panel such as Contacts, Music, Photos, apps and many more. Click "Start Copy" to begin transferring the files.
Part 2: How to Send Photos from iPhone to iPad via AirDrop
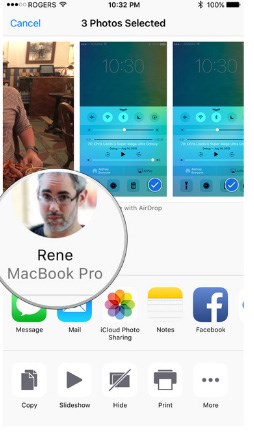
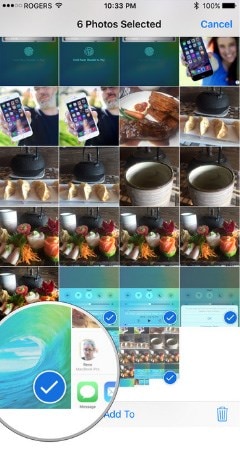
AirDrop allows you to easily share files such as photos from one device to another. To share your photos from an iPhone to an iPad, follow these simple steps.
Step-By-Step Guide to Send Photos from iPhone to iPad
Step 1. Go to the photo you would like to send via AirDrop on your iPhone and then tap the Share Button.
Part 3: How to Send Videos from iPhone to iPad via iTunes
To begin with, you need to ensure that the videos on your iPhone are synced to iTunes or added to your Computer. Once the videos are on your computer follow these very simple steps to add them to your iPad.
Step-By-Step Guide to Send Videos from iPhone to iPad
Step 1. Connect the iPad to your computer and ensure that iTunes recognizes the device.

Step 2. Select "movies" in iTunes and the video content in this folder will be synced to the iPad. Now, locate the file with your iPhone's videos and drag it into the iTunes Movies folder. Then click the Sync button and the videos will be on your iPad.
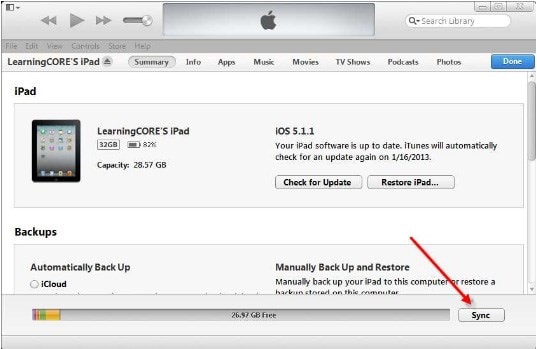
This method will only work if the videos in your iPhone are first of all transferred to your computer before being dragged to iTunes. It is therefore not an ideal way to get transfer videos from one device to another.
Part 4: How to Send Apps from iPhone to iPad
Apps that you buy from the App Store can be transferred from one device to another as long as both the devices are associated with the same iTunes or iCloud account. The easiest way to do it is through the iCloud service as it enables iOS device users to synchronize almost anything. When App sync is enabled, all apps you install on your iPhone are automatically installed on the iPad.
Step-By-Step Guide to Send Apps from iPhone to iPad
Transfer Using iCloud
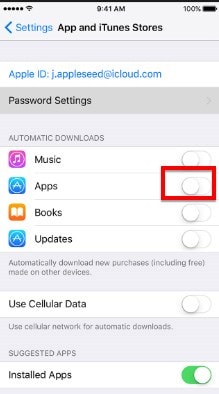
Open the setting app on your iPhone and the tap on the Store option. Slide the "Apps" to "On" in the "Automatic Downloads" section. Your Apps will now be available on the iPad as well.
Transfer Using iTunes
You can also transfer the Apps using iTunes but this method can only work if both the iPhone and the iPad utilize the same iTunes account. If they do, follow these very simple steps to transfer the apps via iTunes.
Step 1. Connect the iPhone your computer and iTunes will be launched immediately. If it doesn't, open iTunes and then right click the iPhone icon in the devices section and choose "Transfer Purchases" from iPhone.” This action will sync the apps to the computer.
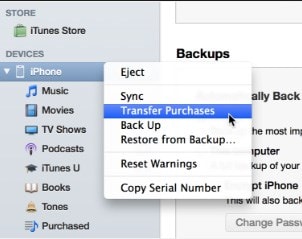
Step 2. When the sync is complete, click the eject button and then disconnect the iPhone from the USB and the computer. Now connect the iPad to the computer and right click in the iPad icon and then select "transfer purchase" from iPad.
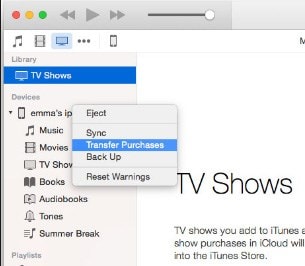
Step 3. Once the transfer is complete, click the iPad icon in the devices again to enable syncing of all the apps from both the iPhone ad the iPad. Next, select the "Apps" tab and then check the box "Sync Apps". This action will sync all apps transferred from both the iPhone and the iPad. Now click "Sync" to send all the apps to your iPad.
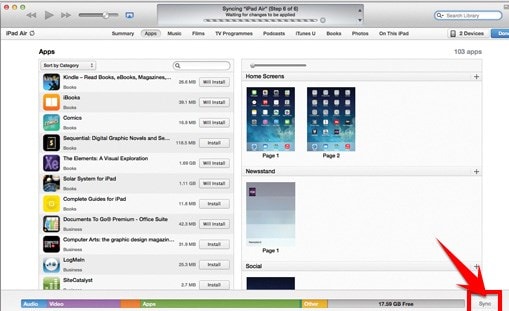
This process is a lot simpler and more effective and works very well although both devices need to be utilising the same iTunes account.
The above are some of the best ways to transfer information from an iPhone to an iPad. We hope they work for you and that you are able to either create more space on your device or you are able to continue to watch that movie on your iPad.


